How to Make an Instagram Reel (Start to Post)
A good Reel isn’t luck — it’s a formula: hook fast, cut to the beat, caption everything, and post the right size. Here’s the whole thing, start to post, on your phone.
Quick answer
To make an Instagram Reel in ExpoCut: New Project ▸ 9:16 (1080×1920), add your clips (Gallery or Stock) and trim them, add music and Split on the beat, apply one look from Edit ▸ Filters (the Instagram tab has Clarendon, Gingham, Moon…) at ~75 % intensity on every clip, add captions and a hook title, then ••• ▸ Export Video at 1080p · 9:16 · High · MP4 · 30 fps and post natively.
- Pick 9:16 in the Format sheet — the tile is labelled TikTok · Reels · Shorts — so nothing gets cropped later.
- The hook lives in the first 3 seconds: strongest visual or a question, never an intro.
- Beat-matched cuts (Beats button + Split) are the biggest “this looks pro” upgrade.
- One filter on every clip: Edit ▸ Filters ▸ Instagram tab, drag the compare line, drop Intensity to 60–80 %.
- Export 1080p · 9:16 · High · MP4 · 30 fps; Bitrate Auto. The Free plan adds a 3-second outro, never a watermark.
Reels reward a formula: hook in three seconds, cut to the beat, one consistent look, captions for the muted majority, right size for the feed. Nail those and the algorithm has something to push. Here’s the whole flow.
Step 1 — Start 9:16 and gather clips
Create a 9:16 project (1080×1920) so everything is composed vertically from the start — see the first-video walkthrough for the basics. Pull in your clips, or grab stock b-roll to fill gaps.
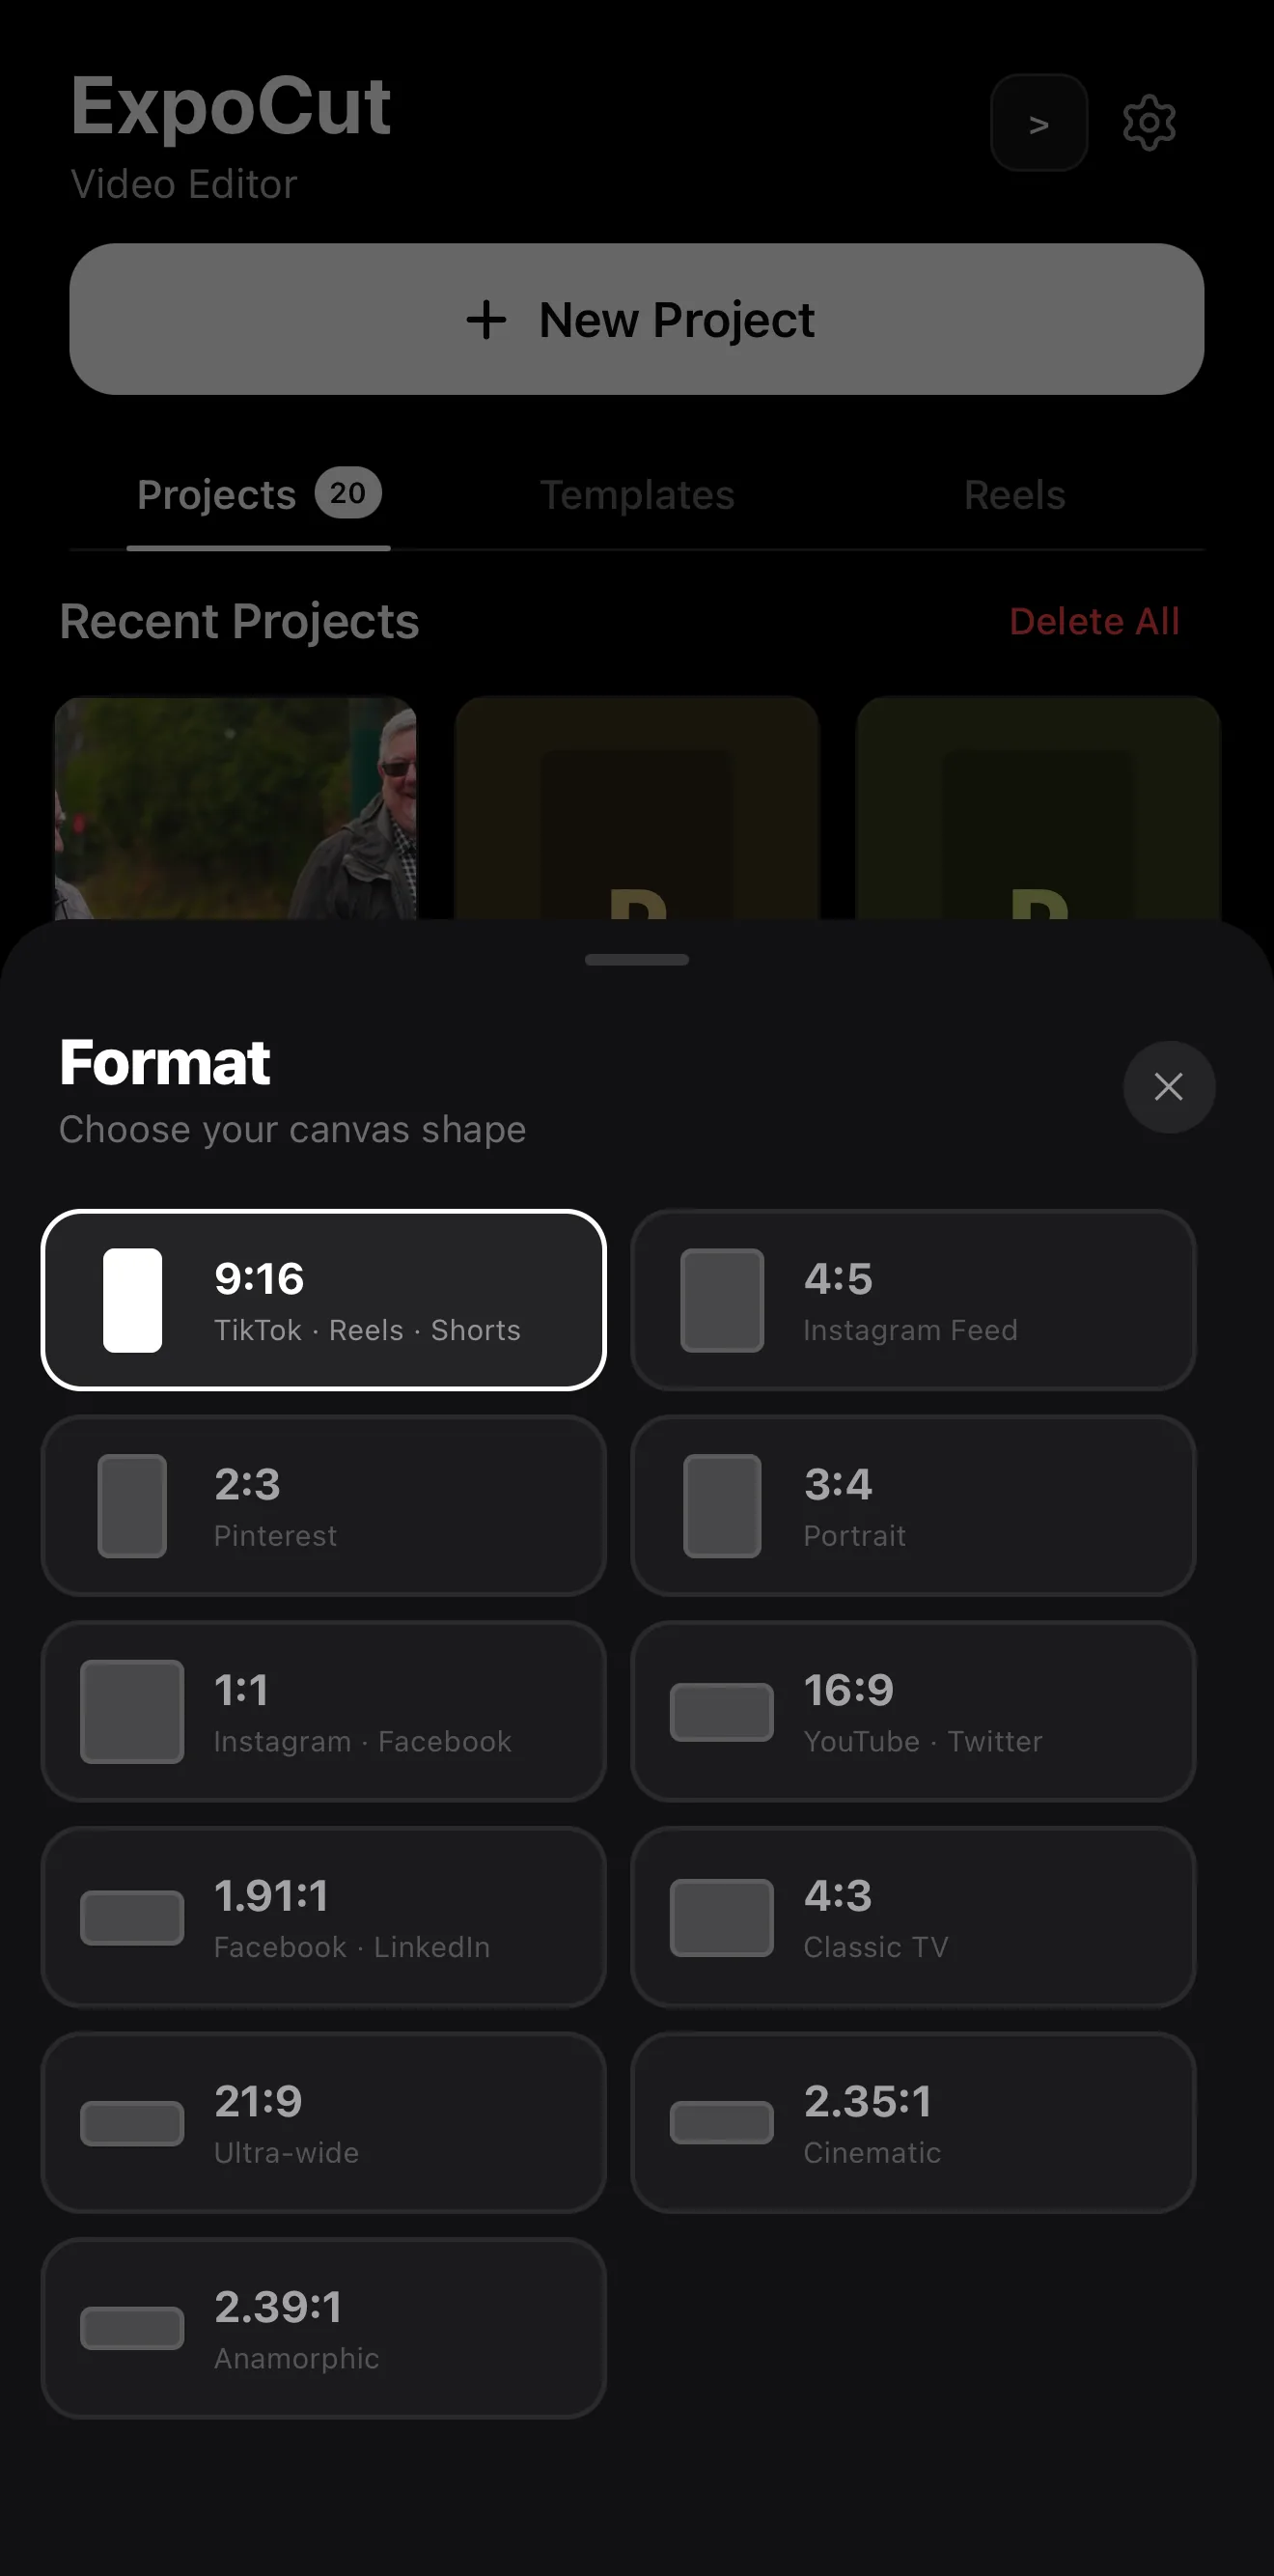 9:16 — the Reels size
New Project ▸ 9:16
Then Video ▸ Gallery or Stock. Trim each clip in the Trim Clip sheet as it lands.
Hook in 3 seconds
Put the strongest shot first; add a Text hook if the footage needs a promise.
Cut to the beat
Audio ▸ Explore for music, then Beats on the audio clip and Split the video on the ticks.
One look on every clip
Select a clip ▸ pencil (Edit) ▸ Filters ▸ Instagram tab ▸ pick one ▸ Intensity ~75 % ▸ Done. Repeat (or Copy Style / Paste Style) on the other clips.
Captions, then export
Add captions, then ••• ▸ Export Video ▸ 1080p · 9:16 · High · MP4 · 30 fps.
Step 2 — Earn the first 3 seconds
The hook is everything. Open on your strongest visual or a question that demands an answer — never a slow intro. If the best moment is later in your footage, move it to the front.
Step 3 — Cut to the beat
Add your music, then cut to the beat: cut every couple of beats through the build, on the beat in the chorus. Beat-matched cuts are the single biggest “this looks pro” upgrade. Keep transitions short and on the beat.
Step 4 — One look, captions, done
- One filter/grade across every clip for cohesion — pick a look and apply it to all.
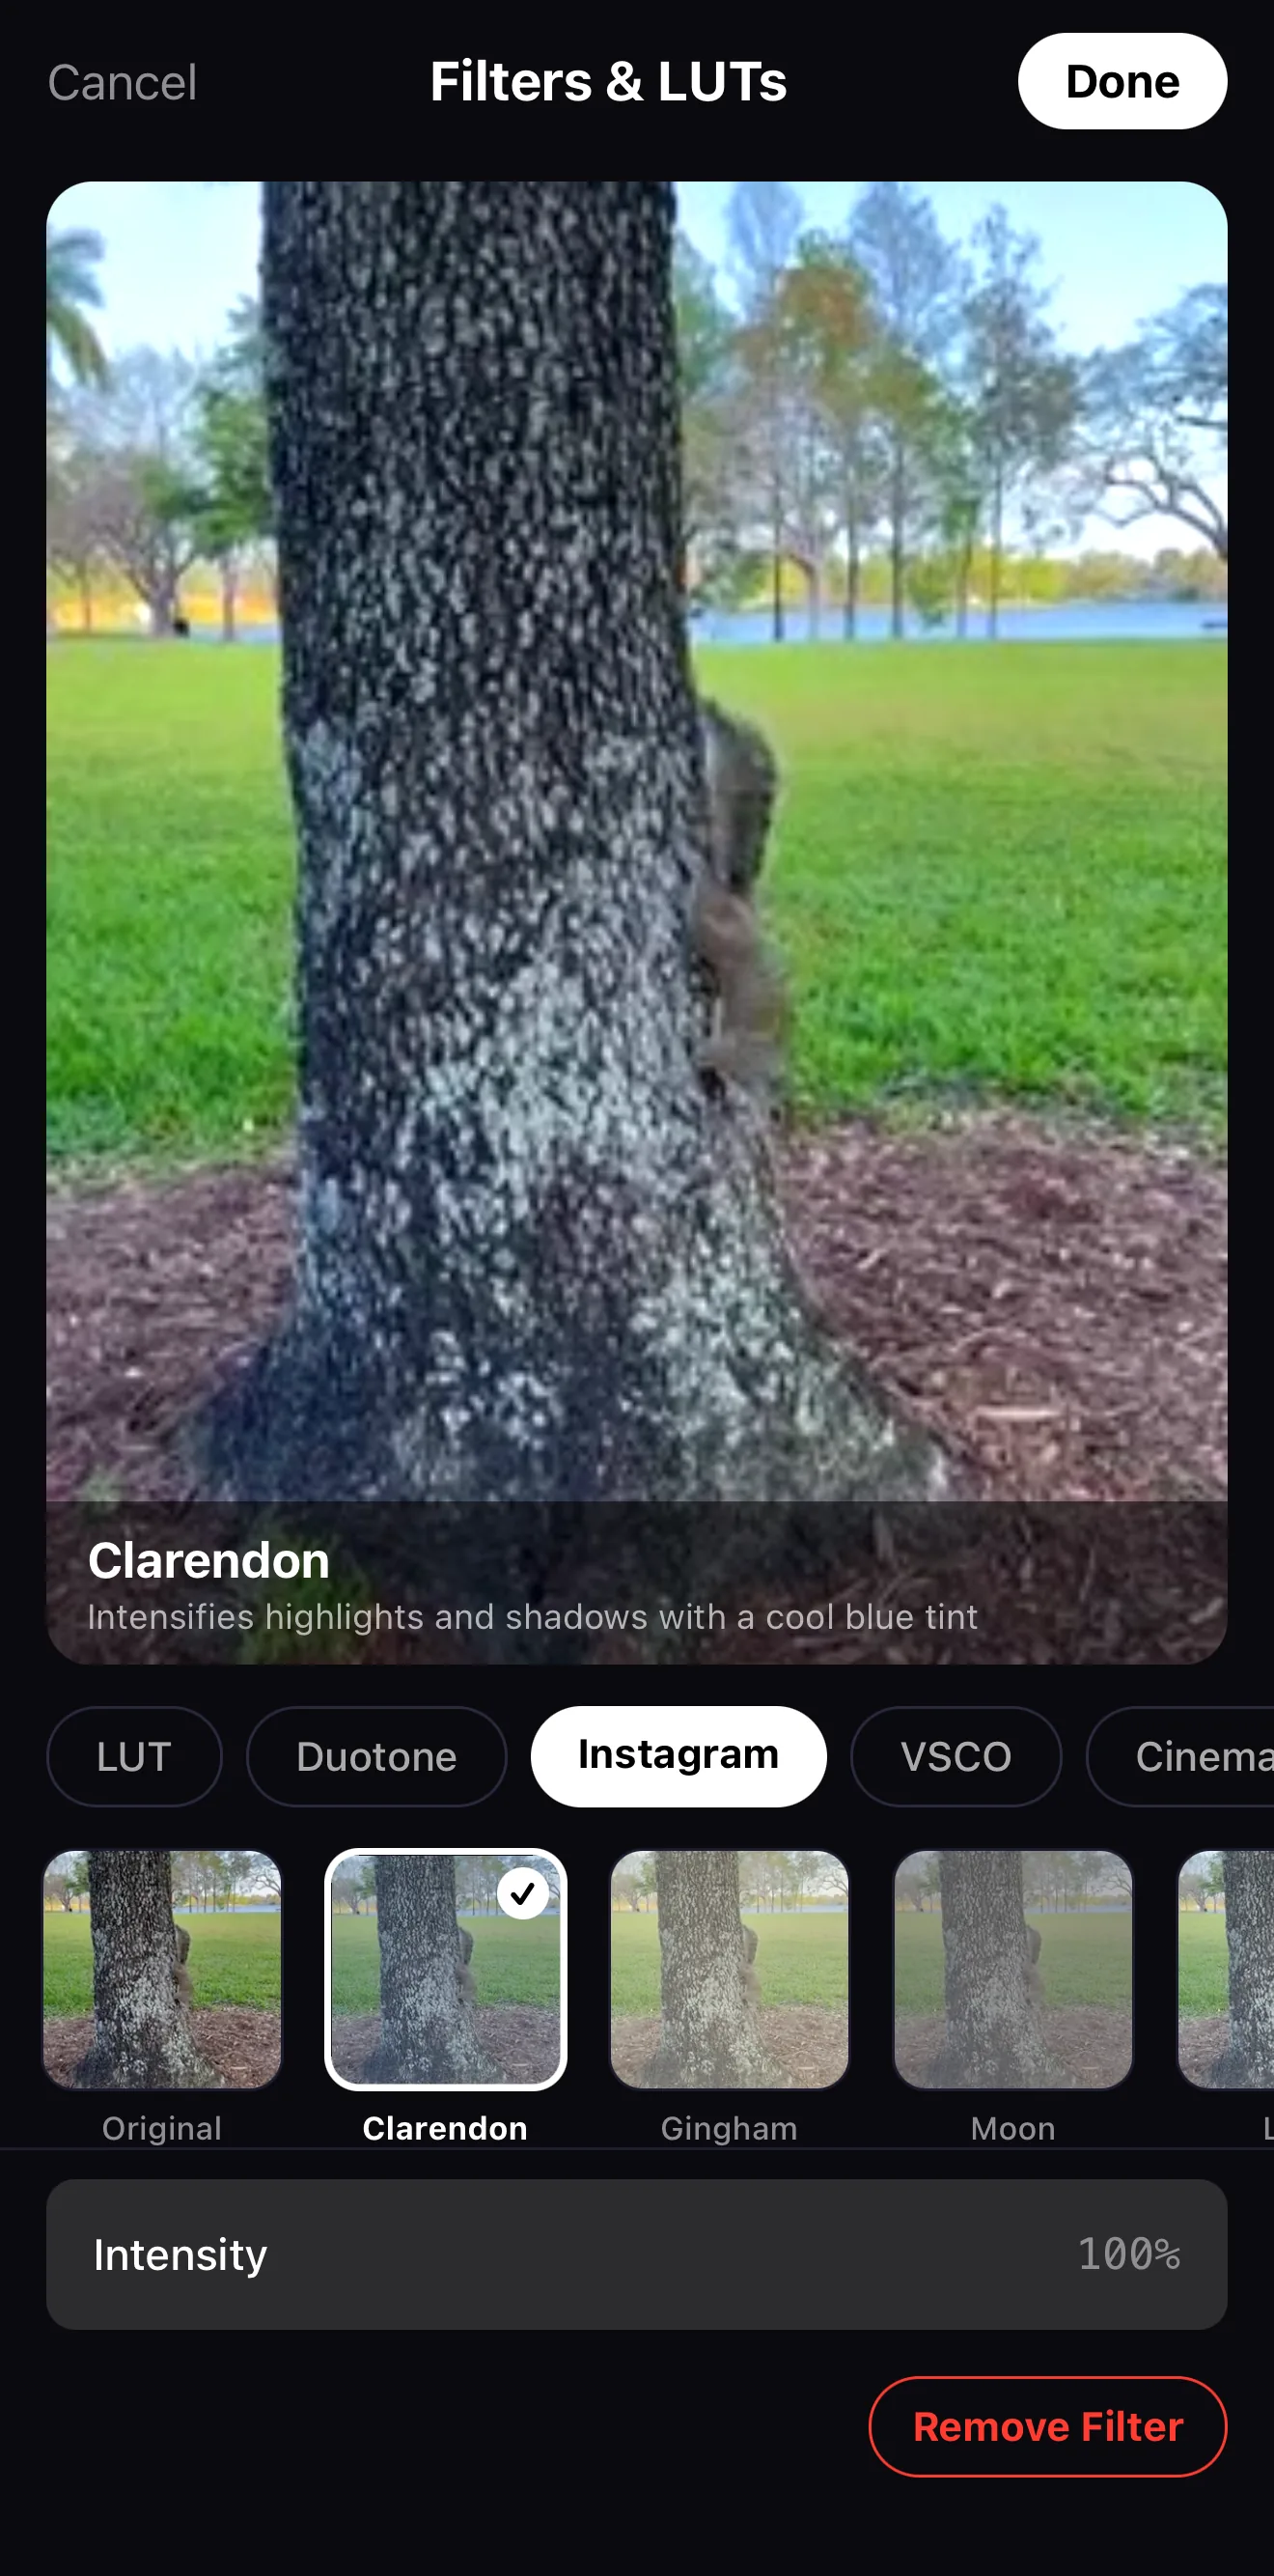 Look packs — Film · Duotone · Instagram · VSCO · Cinematic
Clarendon
Intensity ~75 %
Look packs — Film · Duotone · Instagram · VSCO · Cinematic
Clarendon
Intensity ~75 %
Keep the bottom clear. Instagram’s UI covers the lower ~15% of the frame. Keep captions and key action above it.
Step 5 — Export and post
Tap ••• ▸ Export Video. The sheet opens at 480p / Low / 24 fps, so set 1080p, keep 9:16, choose High, leave Bitrate on Auto, and pick MP4 and 30 fps — details in the export guide. Post natively, write a first-line caption that echoes your hook, and add a few relevant tags.
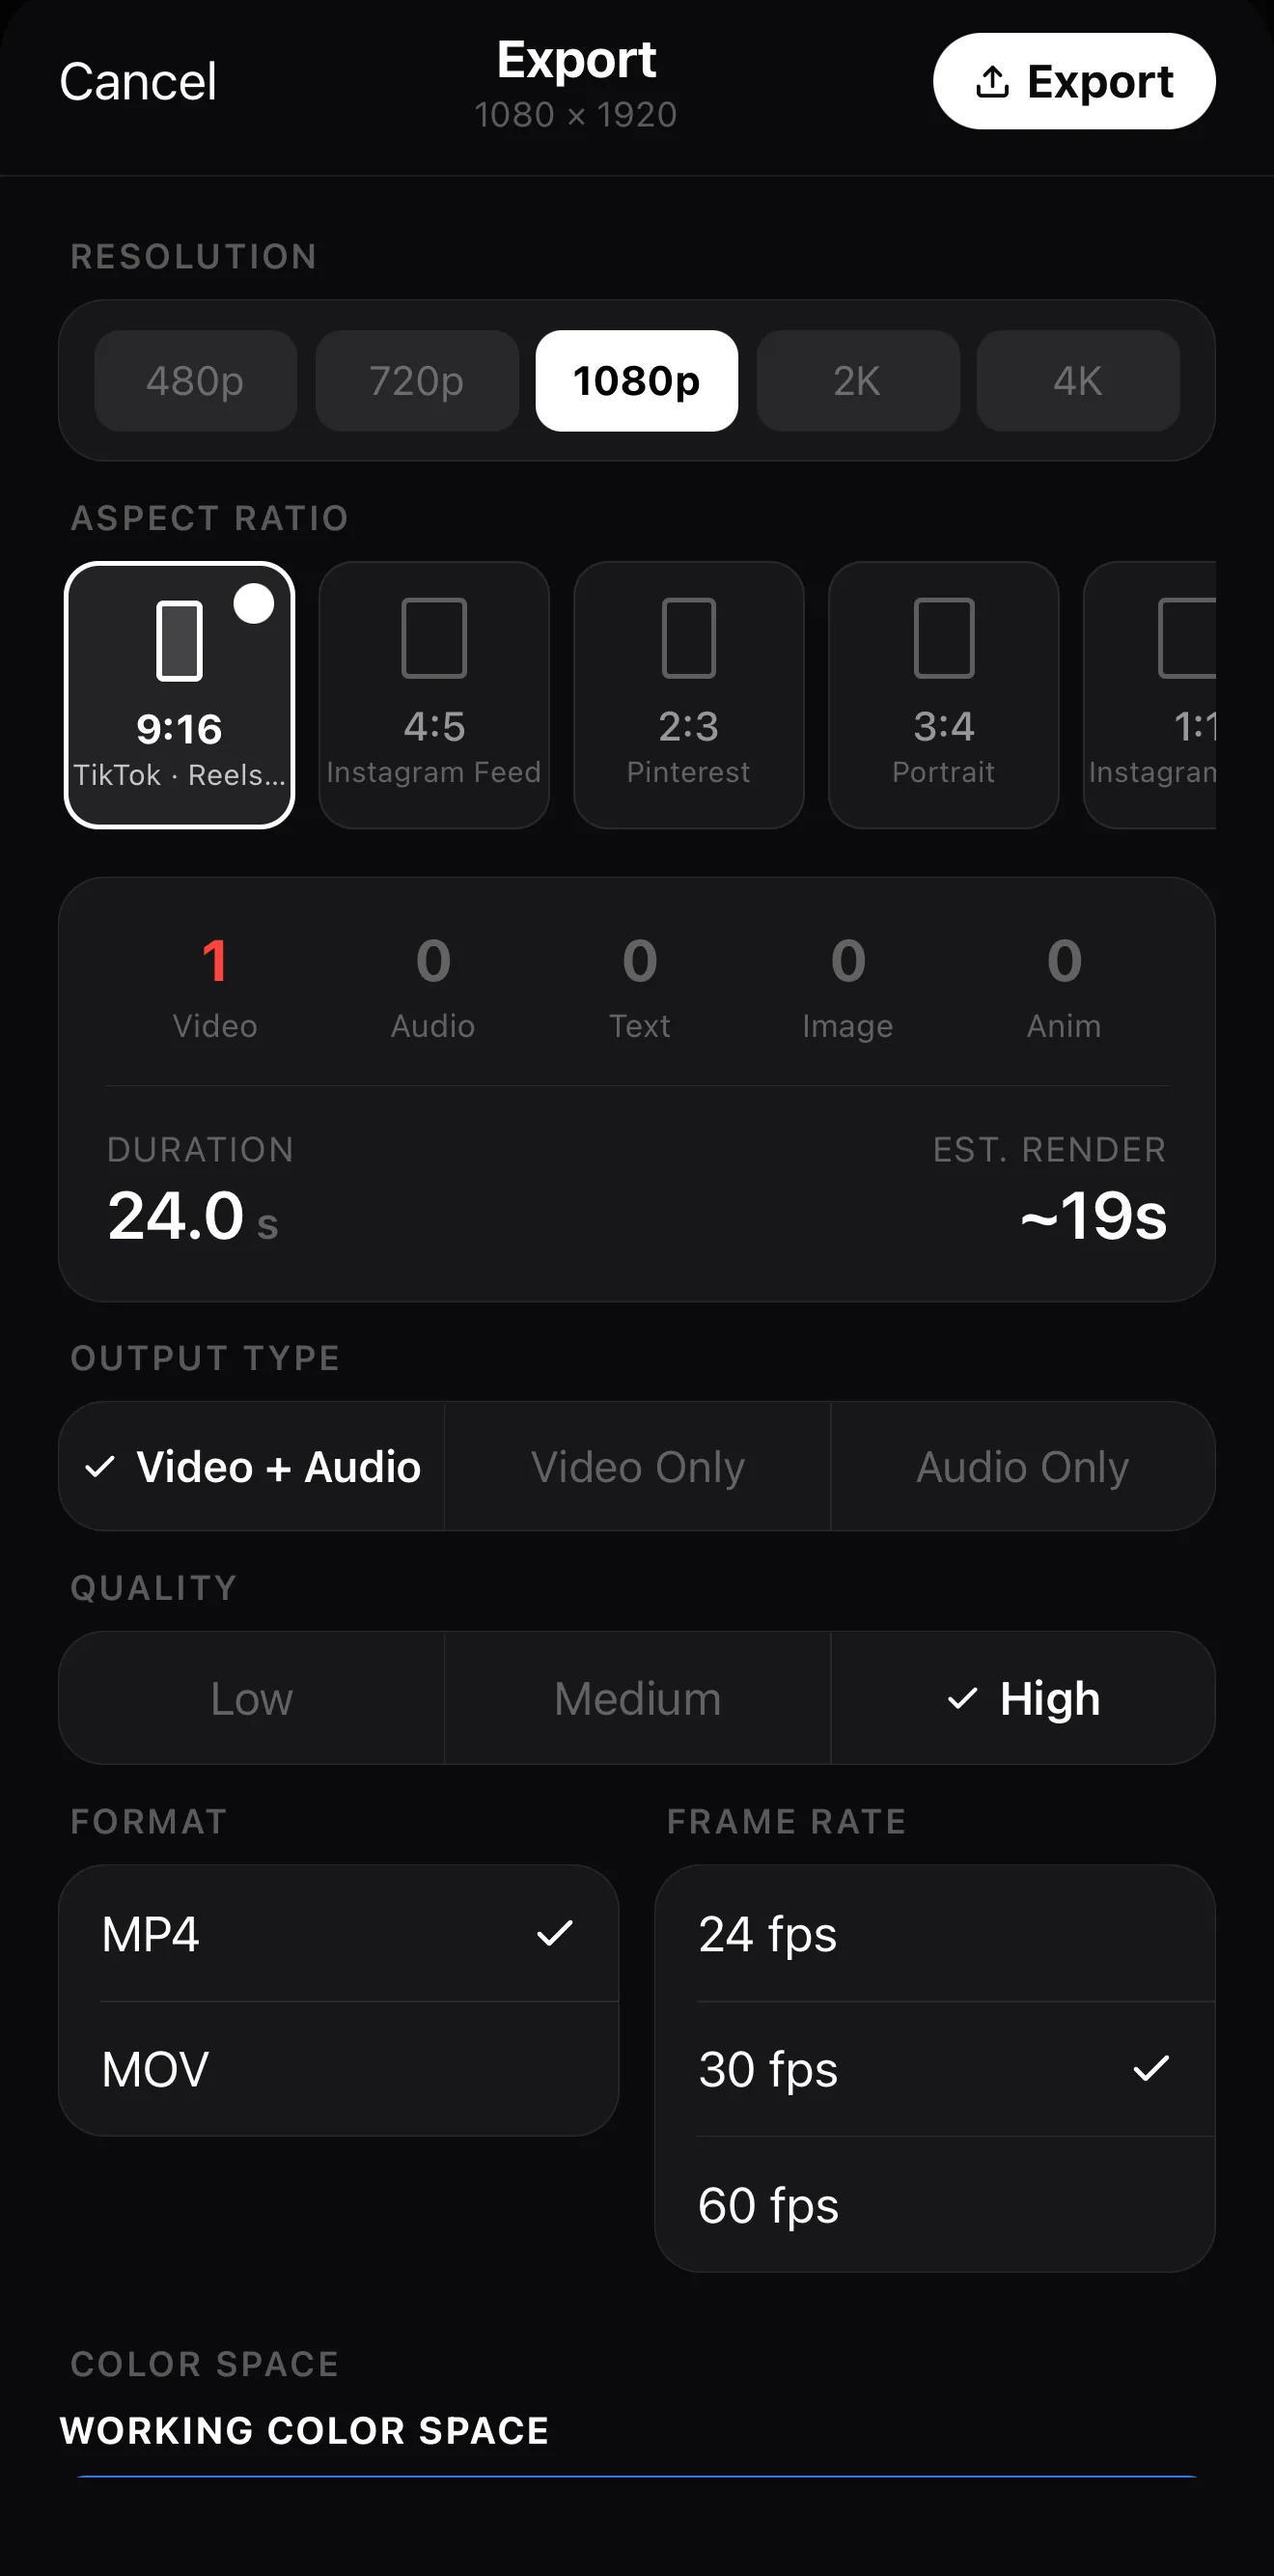 1080 × 1920
9:16
High
MP4
30 fps
1080 × 1920
9:16
High
MP4
30 fps
Where to go next
- The fundamentals: make your first video.
- Nail the rhythm: edit to the beat / add music.
- Caption it: add captions & subtitles.
Hook, beat, look, captions, right size — run the formula and your Reels stop being a gamble.
Frequently asked questions
What size is an Instagram Reel?
9:16 vertical, 1080×1920. Start a 9:16 project so your whole edit is composed for that frame, and keep important content out of the very bottom where Instagram's buttons sit.
How long should a Reel be?
Short usually wins — 7 to 30 seconds for most content. Lead with a 3-second hook, deliver one clear idea, and end with a reason to rewatch or follow. Longer is fine only when every second earns its place.
How do I make my Reel look professional?
Four things: a strong hook in the first 3 seconds, cuts that land on the beat, one consistent filter or grade across all clips, and captions so it works on mute. Those four cover 90% of what makes a Reel feel pro.
Which ExpoCut filter looks most like Instagram's?
The Filters browser has an Instagram tab with Clarendon, Gingham, Moon and the rest of the classic set, plus VSCO and Cinematic tabs. Apply one at 60–80 % intensity so it reads as a grade rather than a preset.
Related guides
Make your next Reel pop
Hook, beat-matched cuts, one clean look, captions — the Reel formula, on your phone. Edit, caption, export, post.
Get ExpoCut Browse all guides