How to Make a Photo Slideshow Video (with Music)
A folder of photos is a memory; a slideshow with motion and music is a moment people rewatch. The trick is to never let a still sit still — here’s how to make photos move.
Quick answer
To make a photo slideshow in ExpoCut: start a project, tap Image ▸ Photo Library and pick a photo (it lands as a 5-second clip); tap the row label (O1) and add the next photo so it appends after the last one — repeat for every photo. Then, per photo: tap the pencil (Edit), set W/H so it fills the frame, tap Motion ◇+ and pick a gentle path (Line Right, Arc Up…) at ~25 % Size — that’s the Ken Burns drift. Tap the + joiner between photos for a Dissolve, add music from Audio ▸ Explore, and export.
- Each photo becomes its own 5-second clip; tap the row label before adding so the next one appends instead of starting a new row.
- Photos land fit-to-width — type a bigger W/H (or pinch) in Edit mode to fill a 9:16 frame.
- The Ken Burns move is Motion ◇+ ▸ a line or arc preset at 20–30 % Size; the path endpoints are draggable on the canvas.
- Alternate directions (Line Right, then Arc Up, then Diagonal Down) so the drift never repeats.
- The + joiner between photos holds the Dissolve/Wipe; one Filter on every photo unifies mixed lighting.
The difference between a boring slideshow and one people watch twice is motion. A still that slowly zooms, changes on the beat, and dissolves into the next feels alive. Here’s how to turn a camera roll into that.
Step 1 — Lay out the photos
Add the first photo
Bottom bar Image ▸ Photo Library and pick one. It lands as a 5-second clip on its own row (O1). Lead with your strongest image.
Append the rest
Tap the O1 row label so it highlights, then Image ▸ Photo Library again — the next photo appends after the last one instead of starting a new row. Repeat.
Set each duration
About 2–3 seconds each is a good default — long enough to register, short enough to keep moving. Pinch a clip with two fingers, or open Trim.
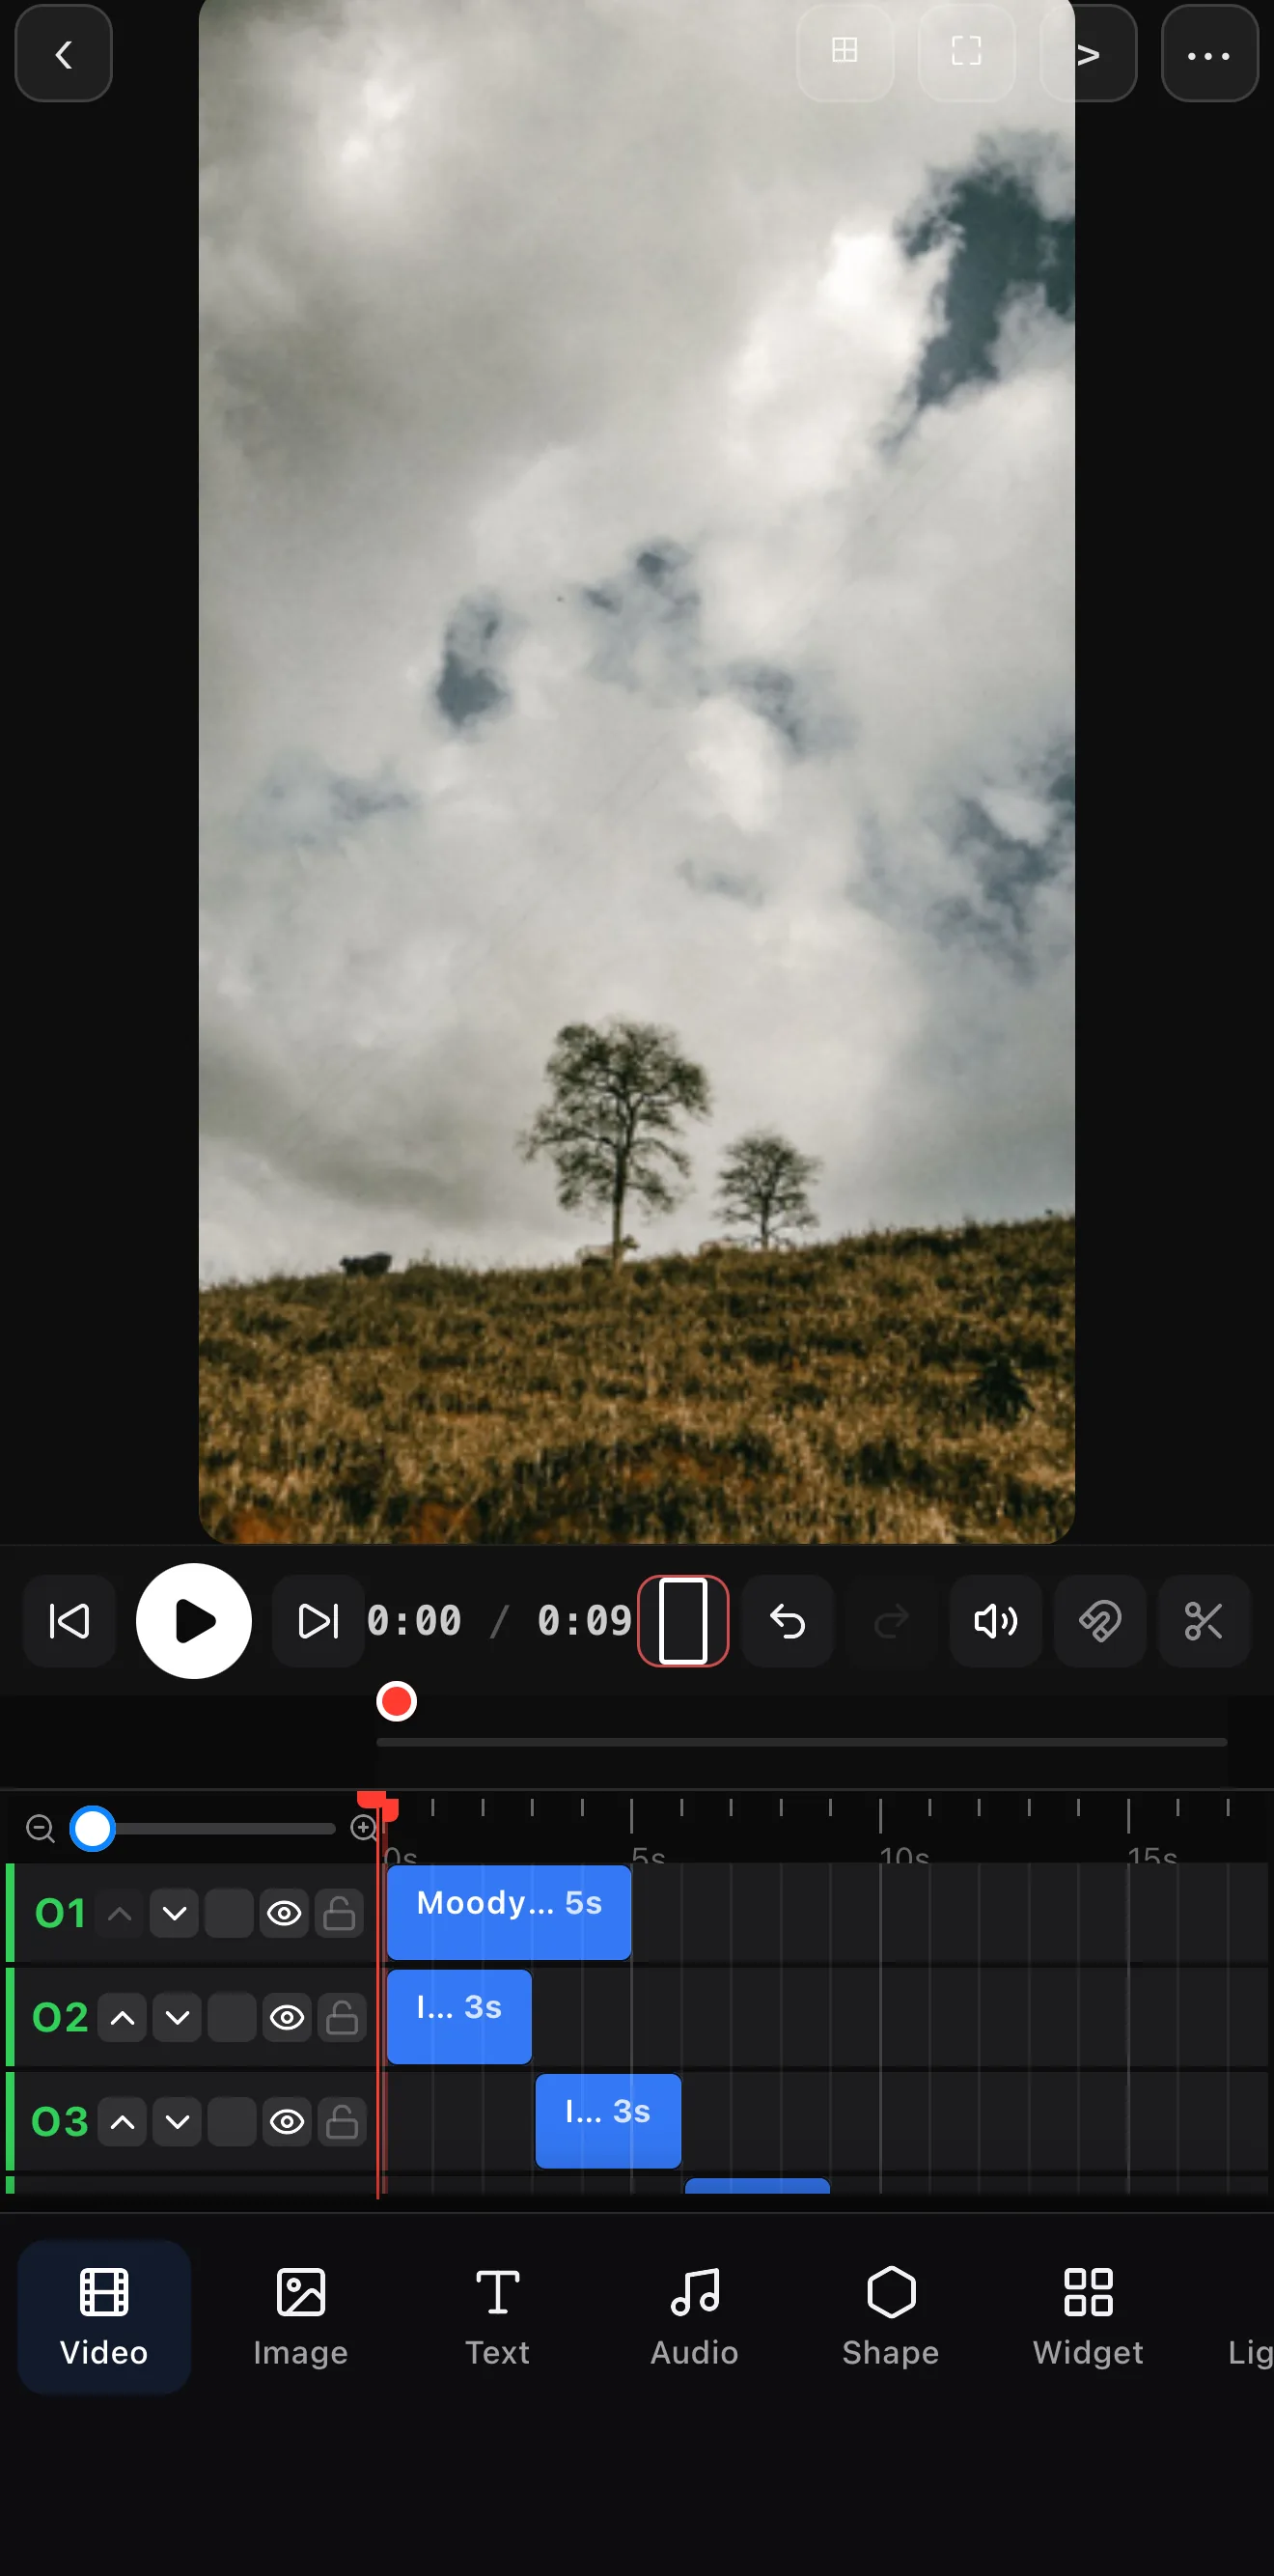 Tap the row label first
Three photos on one row, joiners between
Tap the row label first
Three photos on one row, joiners between
Photos land fit to the canvas width, so a landscape shot in a 9:16 frame shows bars. Tap the pencil (Edit) and type a bigger W and H (or pinch) so it fills the frame — you’ll crop the sides, but the drift you add next makes that a feature.
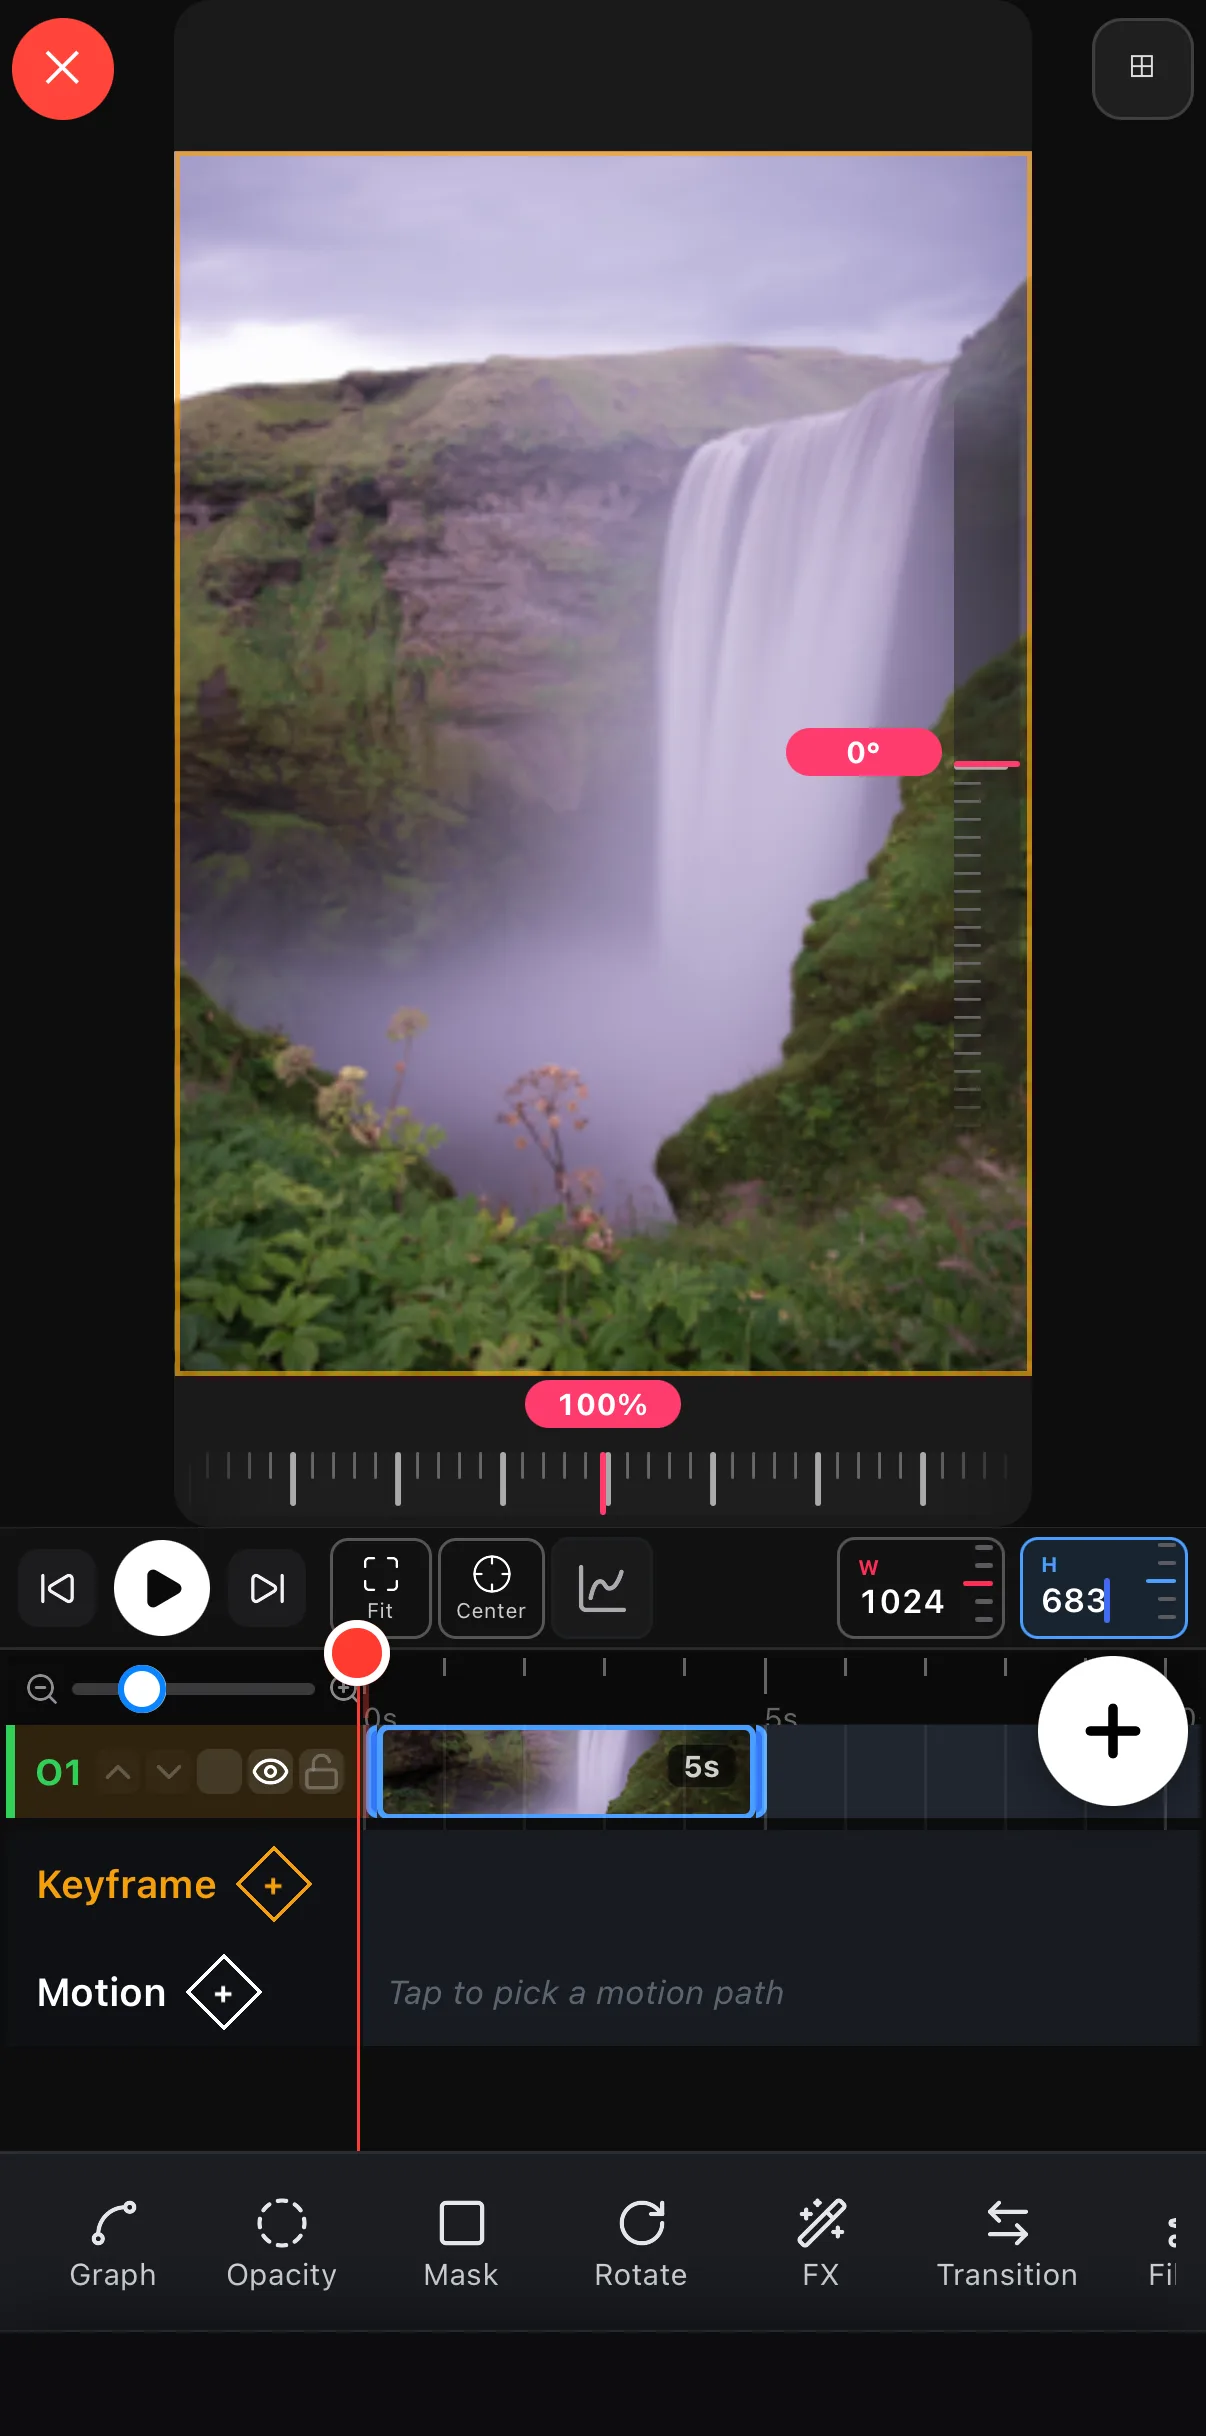 Fit
W 1024 × H 683 fills 9:16
Fit
W 1024 × H 683 fills 9:16
Step 2 — Never let a still sit still (Ken Burns)
This is the whole secret. Give every photo a slow zoom or pan so it drifts gently the entire time it’s on screen. The easiest way: with the photo in Edit mode, tap Motion ◇+ and drop a motion path on it — pick a line, arc, or curve (or draw your own) and keep Size low for a barely-there drift. Alternate the direction (one drifts up, the next pans across) so it doesn’t feel repetitive.
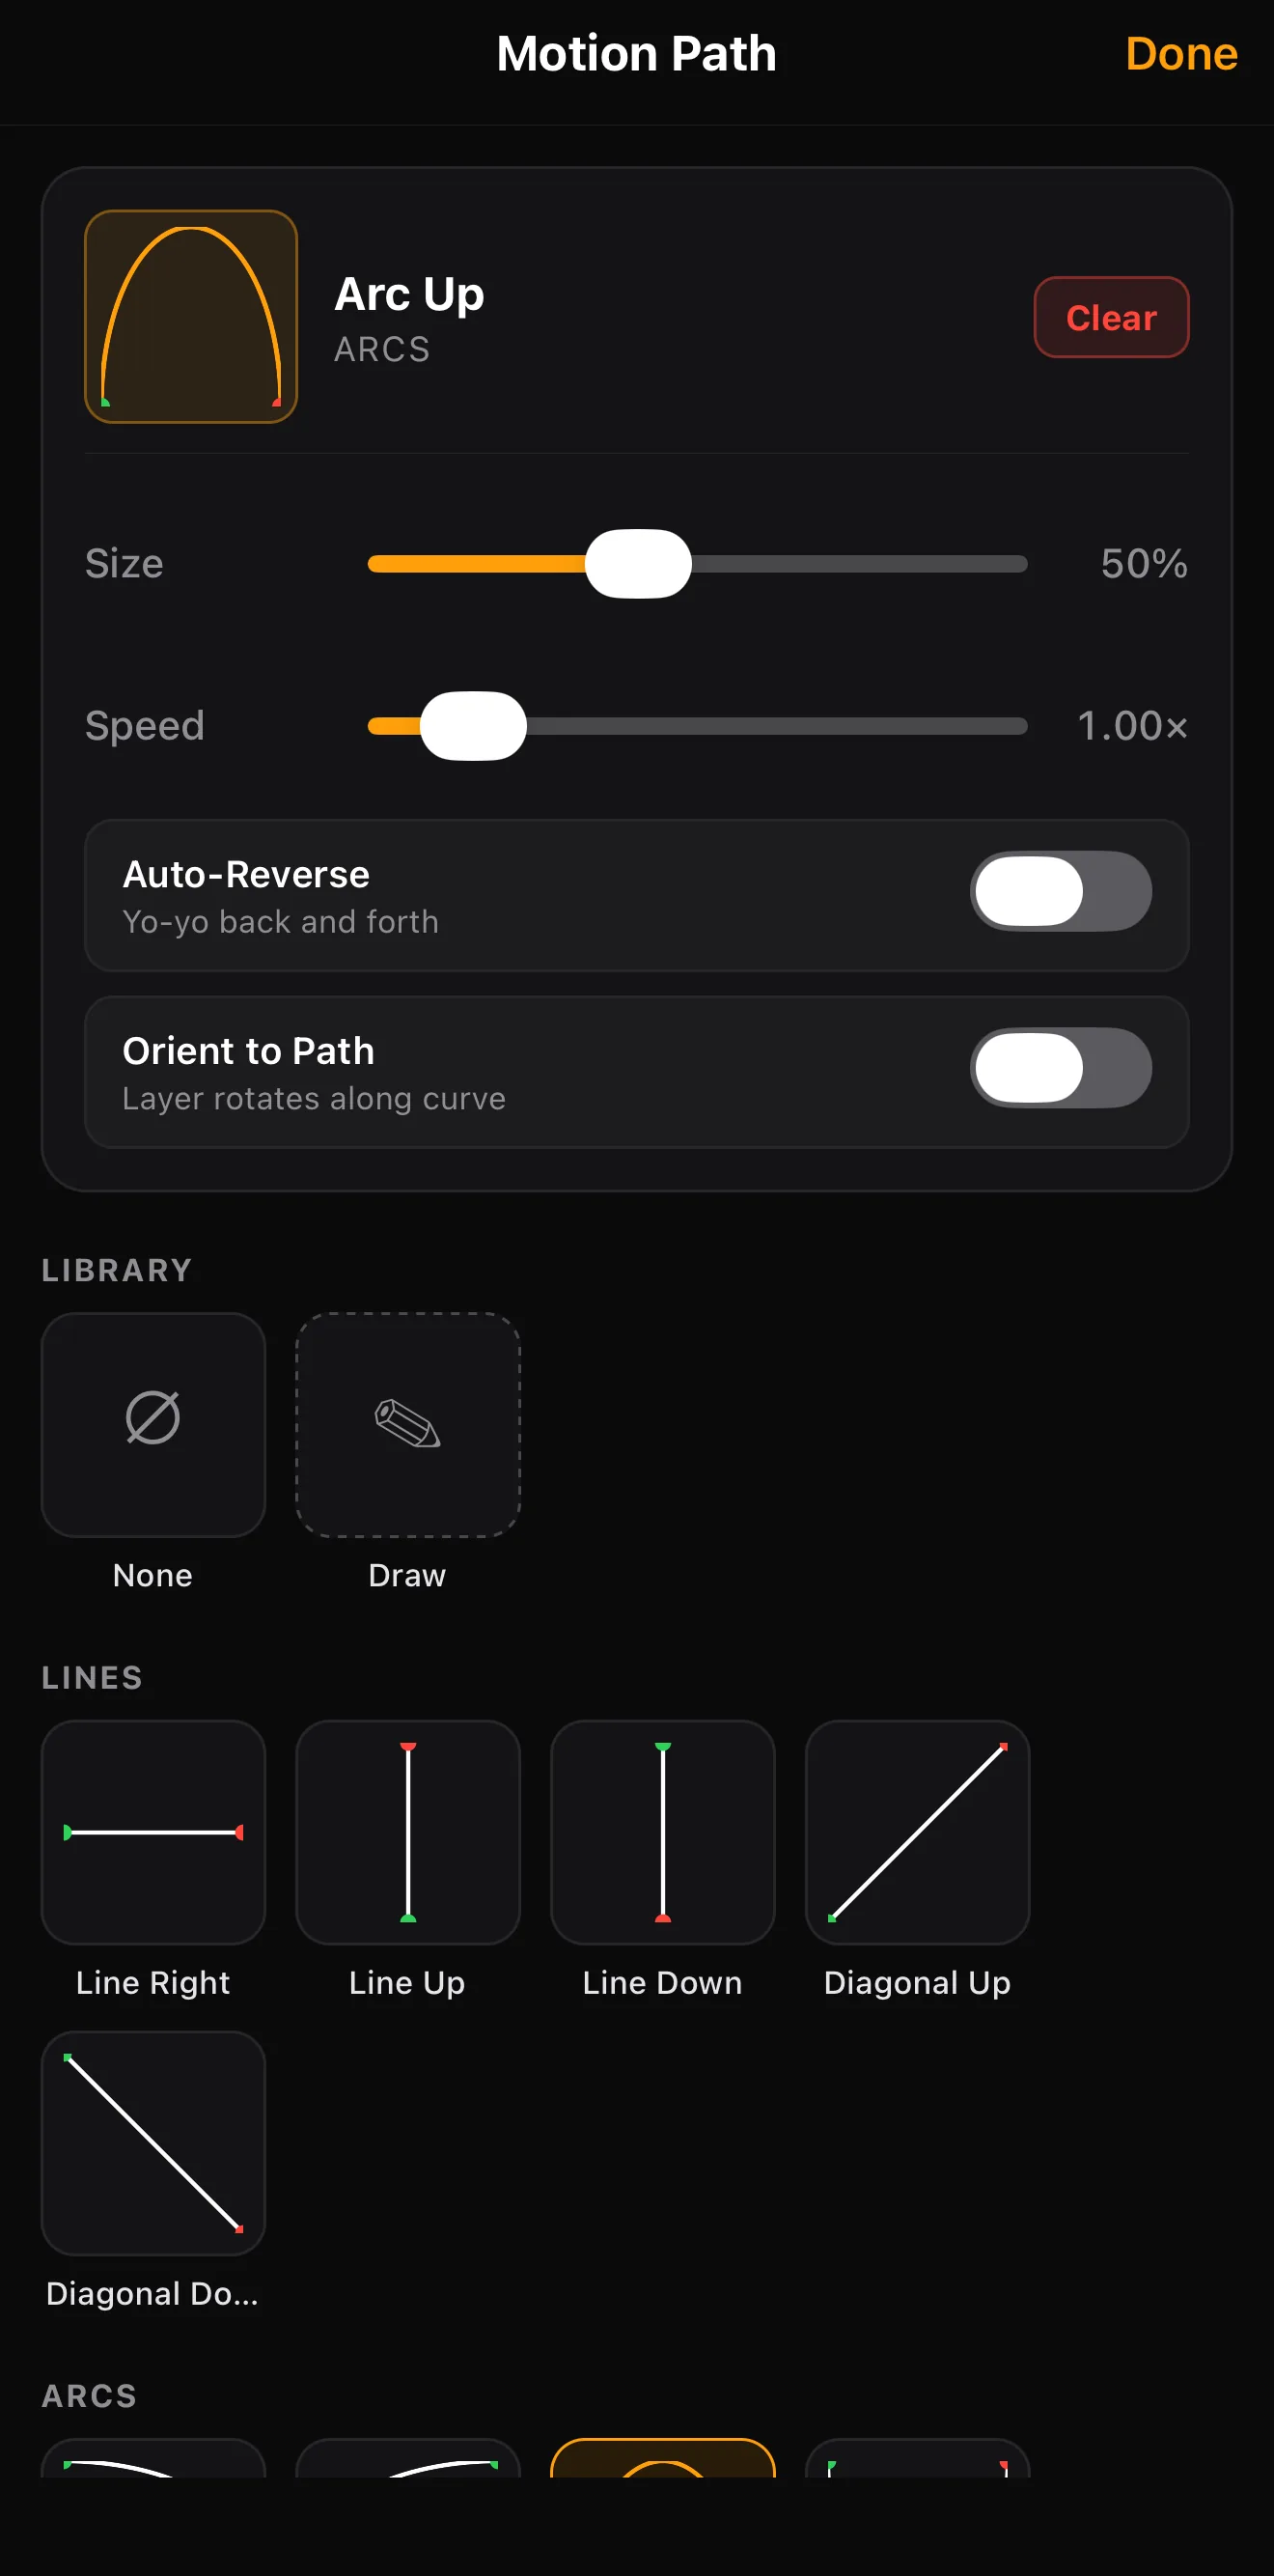 Path endpoints — drag them on the canvas
Size ~25 % = gentle
Speed 1×
25 presets + Draw
Path endpoints — drag them on the canvas
Size ~25 % = gentle
Speed 1×
25 presets + Draw
Slow and subtle. A barely-perceptible drift looks classy; a fast zoom looks cheap. Keep the movement gentle.
Step 3 — Transition and frame
Tap the + joiner between two photos and pick a Dissolve or slide for flow — keep them short and consistent. For a scrapbook feel, add a Polaroid border to each. One filter across all photos unifies mixed lighting from different shots.
Step 4 — Add music and sync
Lay a music track underneath and time photo changes to the beat — quicker for an upbeat song, slower and longer for a sentimental one. The sync is what sells it.
Step 5 — Export
Export at your target ratio — 9:16 for Stories/Reels, 1:1 or 16:9 for a shared memory video.
Where to go next
- Add the motion: keyframes & motion paths.
- Unify the look: filters & looks.
- Score it: add music & audio.
Set the timing, add a slow drift to every photo, transition gently, sync to music — and a camera roll becomes a video worth sending to the whole family.
Frequently asked questions
How do I make a slideshow from photos?
Add your photos to the timeline, set each one's duration (around 2–3 seconds is a good default), add a slow zoom or pan to each so they're never static, transition between them, and lay a music track underneath. Then export.
What is the Ken Burns effect?
It's a slow zoom or pan across a still photo so it feels alive instead of frozen. Add a scale or position keyframe (or a motion path) to each photo — starting slightly zoomed and easing in or out — and a static image gains gentle motion.
How do I sync a slideshow to music?
Add the track first, then set each photo to change on a beat — shorter holds for an upbeat song, longer for a sentimental one. Matching the photo changes to the music is what makes a slideshow feel produced.
Related guides
Make your photos move
Durations, slow zooms, transitions and music — turn a camera roll into a slideshow people rewatch. Build it on your phone.
Get ExpoCut Browse all guides