Liquify, Warp & Distort Effects on Your Phone
Two kinds of distortion live in ExpoCut. Liquify is a brush: you drag on the picture and it moves. Warp & Distort is an engine: fifteen mathematical warps with live previews and sliders. One is for fixing and caricature, the other for transitions and trippy loops — here’s both.
Quick answer
In ExpoCut, Liquify is on the image/video clip toolbar (next to Remove BG and Subject Blur): the sheet shows the frame, you pick Push, Bloat or Pucker, drag strokes on the preview, Undo/Reset, and Apply Liquify bakes the warp into the layer. Warp & Distort is a tab of the FX Filters engine: tap the pencil (Edit) ▸ FX ▸ Filters ▸ + Add ▸ Warp & Distort and pick from Swirl, Vortex Spin, Bulge, Pinch, Fisheye, Ripple Rings, Heat Wave, Kaleido Six/Twelve, Mirror Split, Tiny Planet, Slant Shear, Shockwave, Frosted Glass or Displacement Map; each opens a card with Mode, Amount, Speed and Intensity (plus Advanced) and animates over the clip.
- Liquify = hand strokes on the frame (Push, Bloat, Pucker), baked into the layer with Apply; Remove Warp undoes it later.
- Warp & Distort = 15 procedural warps in the FX Filters engine, each with live tiles rendered on your own frame.
- Amount is the strength, Speed the animation rate (0× freezes it), Intensity the blend with the original.
- Use Liquify for fixes and caricature (one or two strokes), Warp & Distort for loops, transitions and hooks.
- Both render on-device and export exactly as previewed; stack a warp under a Look for a stylised frame.
Distortion is the effect people notice first and understand least. There are really two tools: a brush that moves pixels where you drag, and an engine that bends the whole frame by formula. ExpoCut has both — and they live in different places, so here’s the map.
Where they live
| Tool | Where | What it is |
|---|---|---|
| Liquify | Clip toolbar (image or video) — after Subject Blur | Hand strokes: Push, Bloat, Pucker; baked into the layer |
| Warp & Distort | Pencil (Edit) ▸ FX ▸ Filters ▸ + Add ▸ Warp & Distort tab | 15 procedural warps with Mode / Amount / Speed / Intensity |
Liquify — push, bloat, pucker
Select the clip and tap Liquify
Swipe the clip toolbar past Chroma Key, Remove BG and Subject Blur. The Liquify sheet opens with the frame in the middle.
Pick a brush and drag
Push moves pixels along the drag; Bloat swells the area under the finger; Pucker shrinks it. Each drag is a stroke — the counter shows how many.
Undo, Reset, Apply
Undo removes the last stroke, Reset all of them. Apply Liquify bakes the result into the layer.
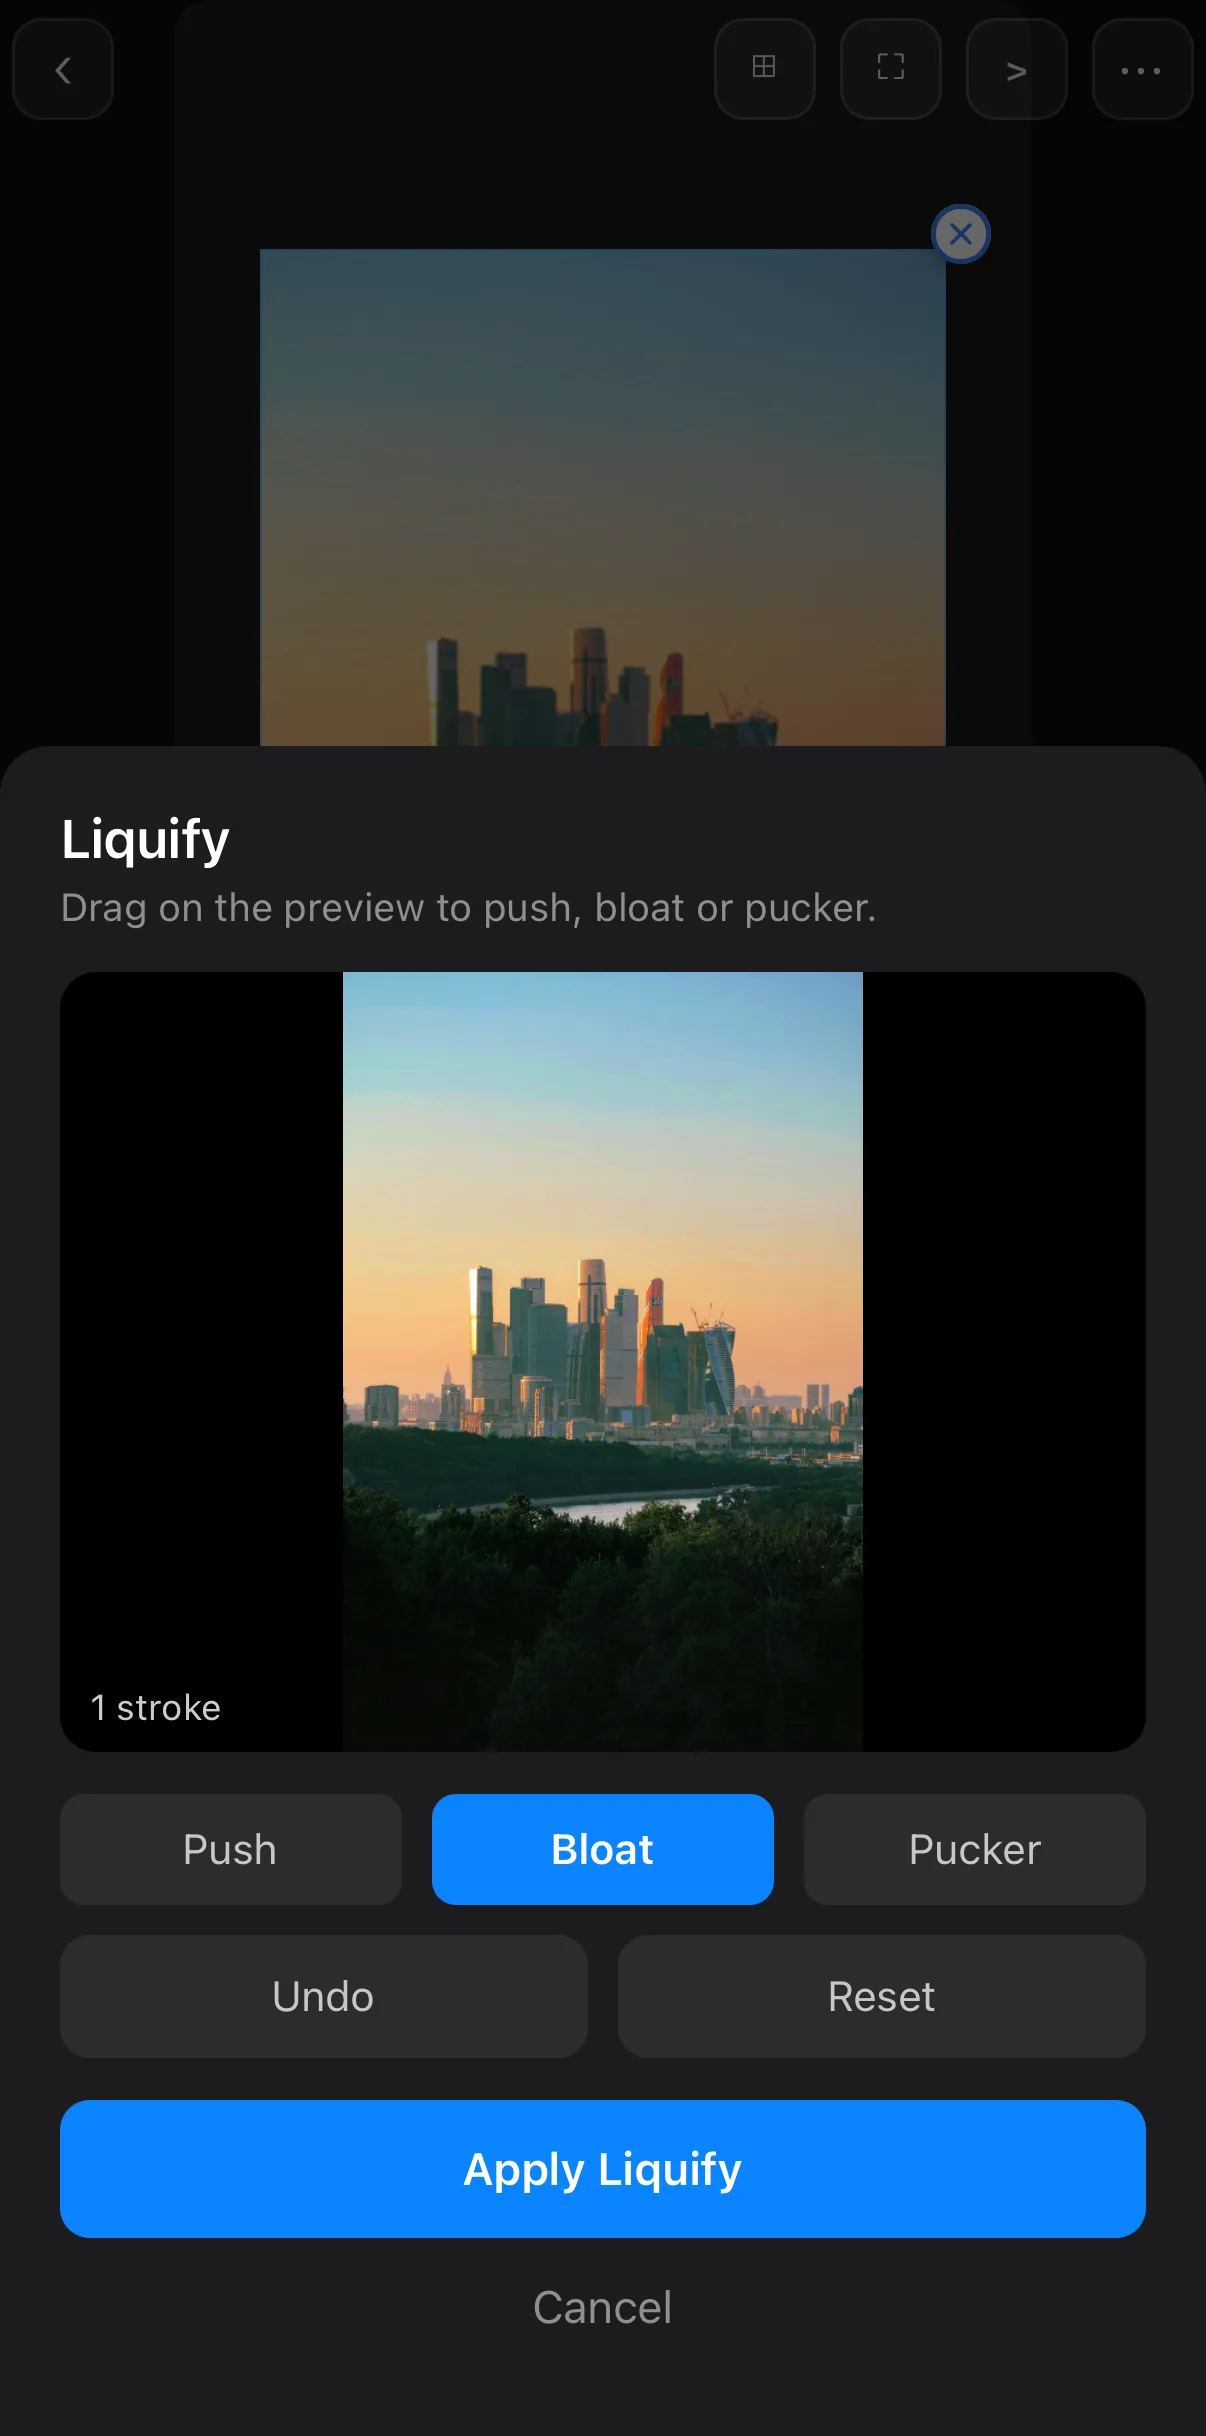 Drag on the preview to warp
Push · Bloat · Pucker
Undo · Reset
Apply Liquify
Drag on the preview to warp
Push · Bloat · Pucker
Undo · Reset
Apply Liquify
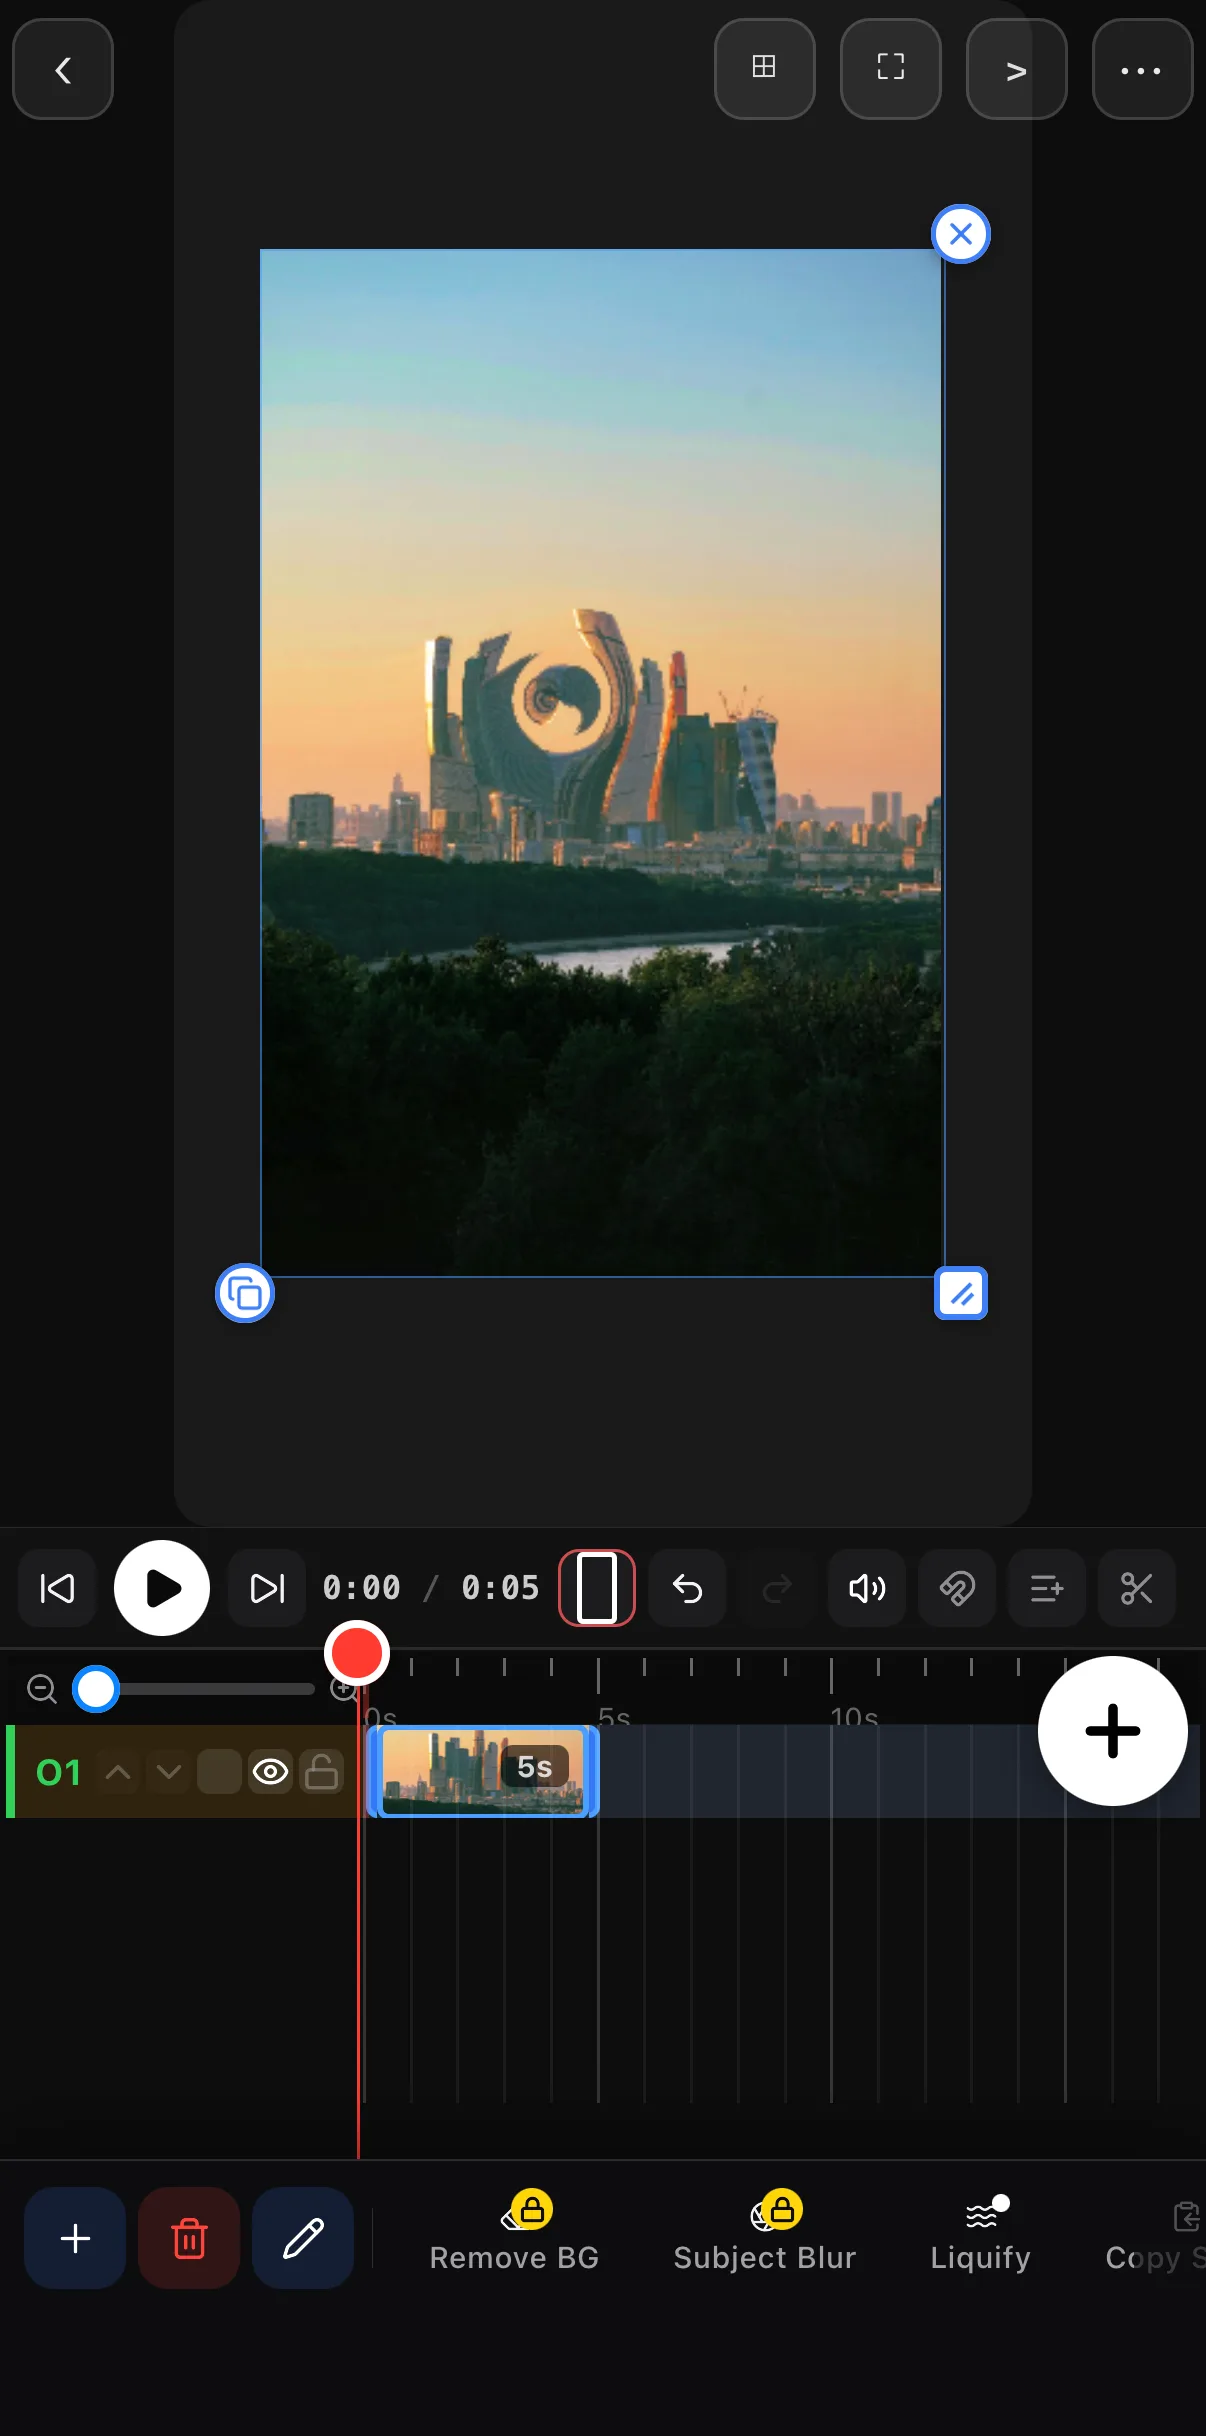 One Bloat stroke, applied to the layer
Liquify is for one or two strokes: straighten a horizon that Push can nudge, widen a smile, shrink a distraction, or go the other way and caricature a face for a meme.
Warp & Distort — the engine
Tap Edit ▸ FX ▸ Filters
The FX sheet has four tabs; Filters is the shader-filter engine.
+ Add ▸ Warp & Distort
The engine tabs run Looks · Warp & Distort · Retro · Sketch · Light · Cartoon · Flicker · Custom. Every tile previews on your own frame.
Tap a warp and tune it
A card opens with Mode, Amount, Speed and Intensity (plus Advanced). Tap Done.
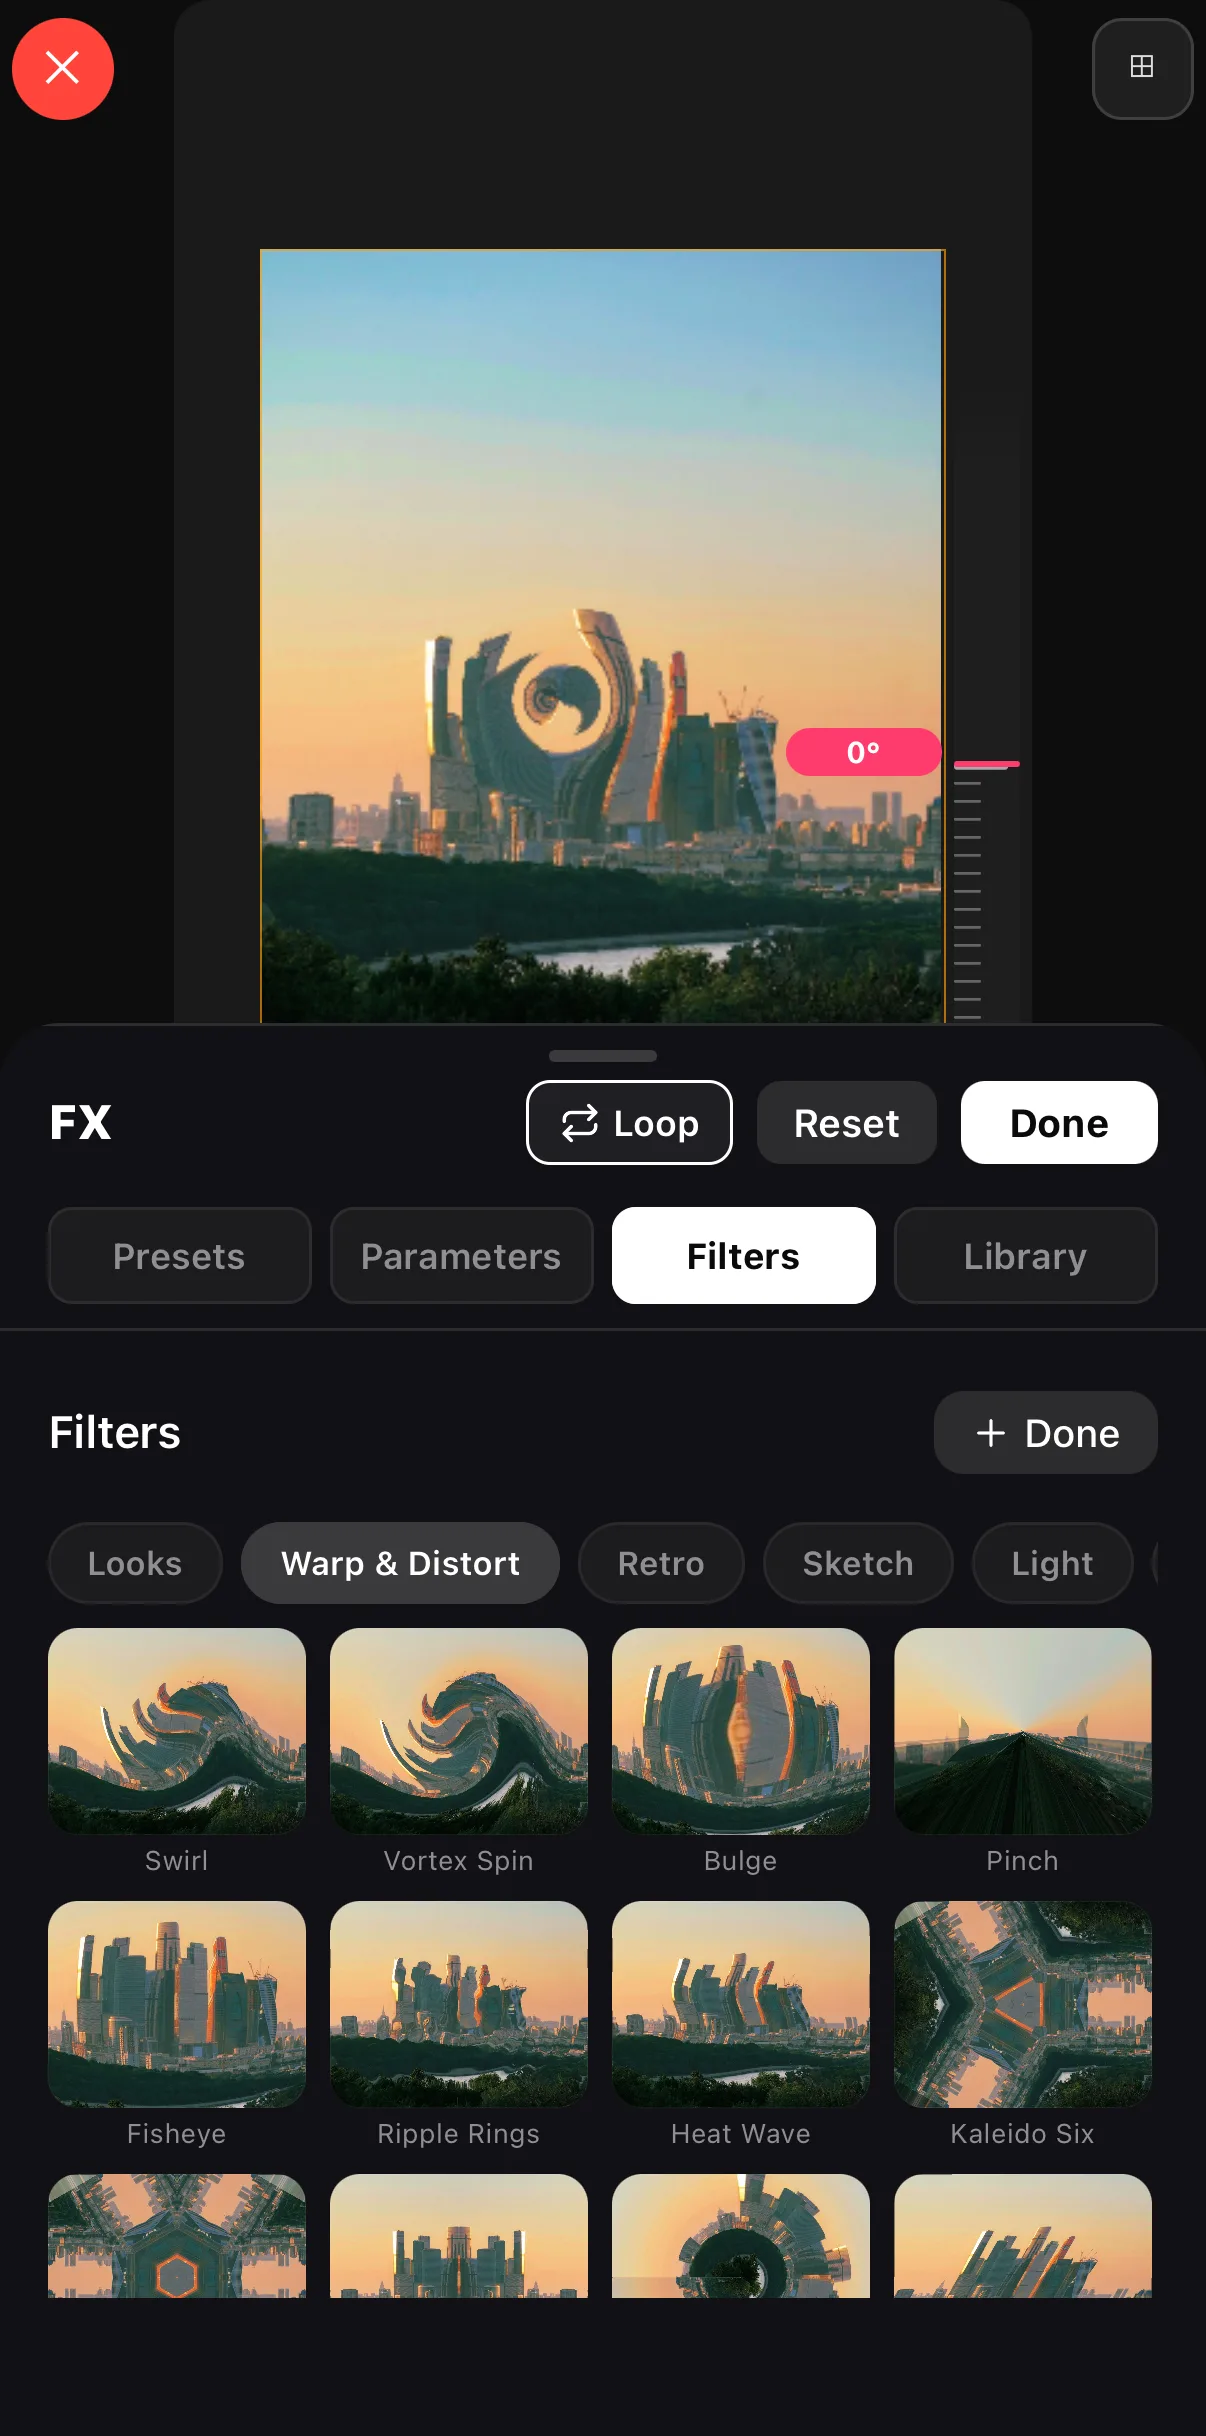 Looks · Warp & Distort · Retro · Sketch · Light…
Live previews on your own frame
Looks · Warp & Distort · Retro · Sketch · Light…
Live previews on your own frame
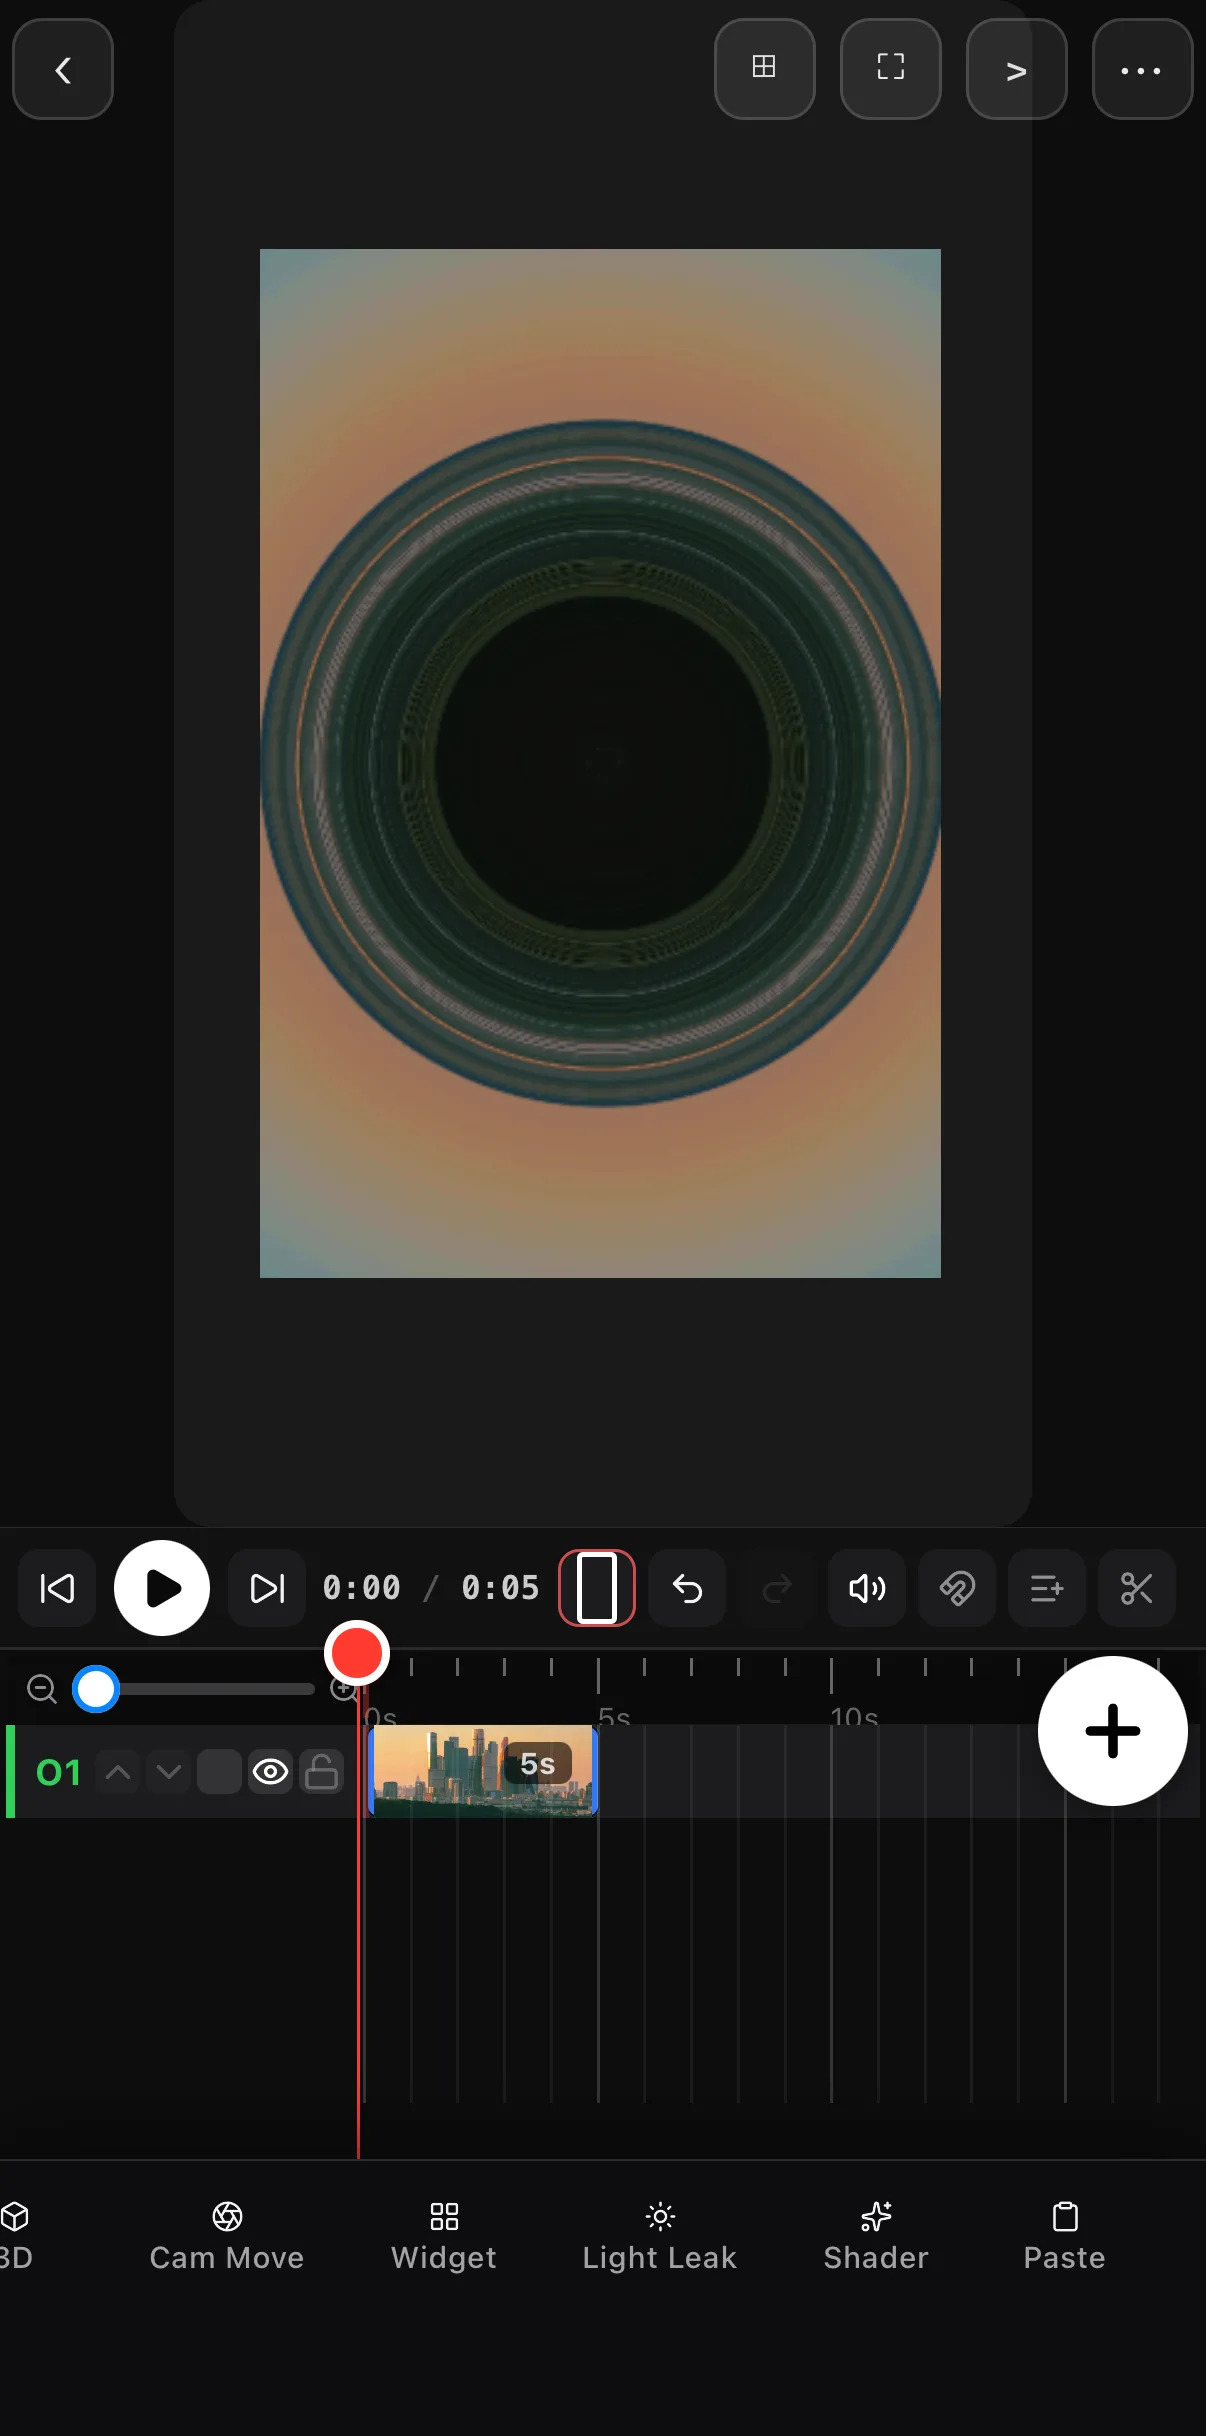
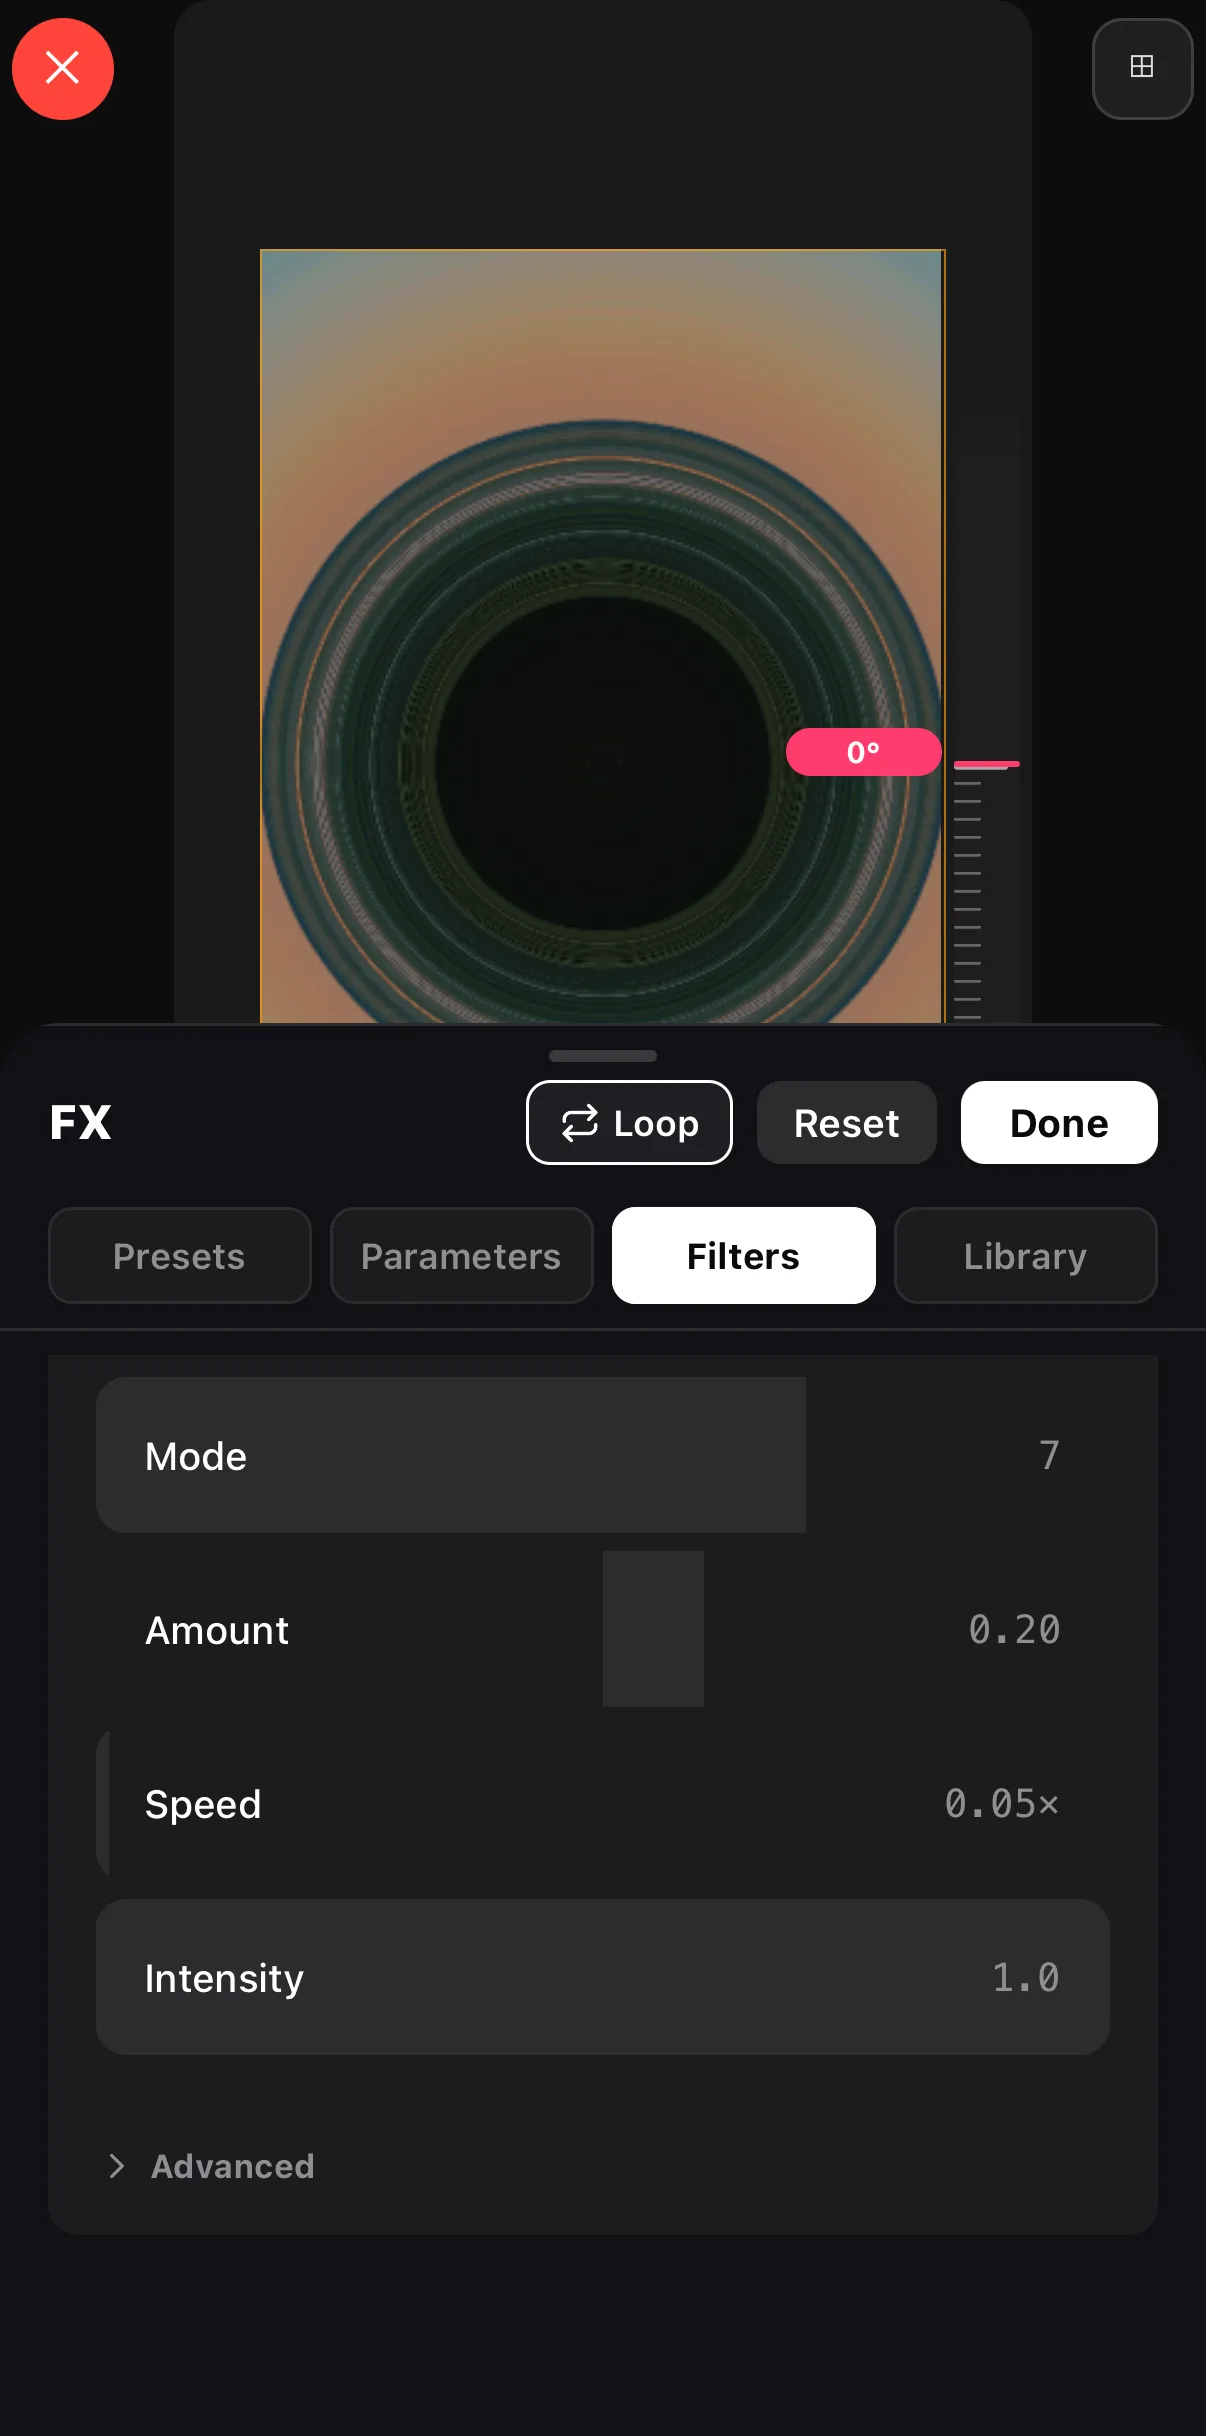 Tiny Planet on the canvas
Mode · Amount · Speed · Intensity
Tiny Planet on the canvas
Mode · Amount · Speed · Intensity
Which warp for what
| Warp | Use it for |
|---|---|
| Fisheye · Bulge · Pinch | Skate/action hooks, GoPro looks, product close-ups |
| Swirl · Vortex Spin · Shockwave | Transition frames, beat hits |
| Ripple Rings · Heat Wave | Water, heat, dream sequences |
| Kaleido Six / Twelve · Mirror Split | Music loops, psychedelic B-roll |
| Tiny Planet | Landscapes and skylines into a globe |
| Slant Shear · Frosted Glass · Displacement Map | Titles behind glass, glitchy intros, texture-driven warps |
Distort the B-roll, not the face. A Fisheye on a wide establishing shot is a look; a Fisheye on a talking head is a joke. Keep Amount low and let Intensity fade it in and out with a keyframe.
Where to go next
- The rest of the engine tabs: video effects guide.
- Blur the background instead of bending it: blur part of a video.
- Cut on the warp: add transitions between clips.
A stroke for the fix, a formula for the look — two tools, one bent frame.
Frequently asked questions
How do I liquify a video on my phone?
Select the clip, tap Liquify on its toolbar, choose Push, Bloat or Pucker, and drag strokes on the preview. Undo removes the last stroke, Reset clears them, Apply Liquify bakes the warp into the layer. Come back to the same button and tap Remove Warp to take it off.
What's the difference between Liquify and Warp & Distort?
Liquify is manual: your strokes move specific pixels, and the result is static. Warp & Distort is procedural: a whole-frame effect (fisheye, swirl, tiny planet…) driven by sliders that can animate over time. Use Liquify to fix or exaggerate one spot; use Warp & Distort for a look or a transition.
How do I make a tiny planet video?
Select the clip, tap Edit ▸ FX ▸ Filters ▸ + Add, open the Warp & Distort tab and tap Tiny Planet. Set Amount for the curvature and Speed for rotation, then Done. Wide, horizon-heavy footage works best.
Related guides
Bend the frame
Liquify by hand or drop a Fisheye, Swirl or Tiny Planet — fifteen warps with live previews, rendered on your phone.
Get ExpoCut Browse all guides