Camera Moves & Parallax on Your Phone (Cam Move Guide)
A camera move is what separates a slideshow from a film: the frame pushes in, drifts, tilts, breathes. ExpoCut gives every project a virtual camera — with presets, a gizmo you can drag, and depth parallax that makes layers slide past each other. Here’s the whole toolkit.
Quick answer
In ExpoCut, tap Cam Move in the bottom bar to open the project Camera. Select a layer, tap Presets and choose a set — Text, Video, Image or 3D, 22 presets each (3D Zoom In/Out, Slow Push/Pull, Dolly Left/Right, Crane Up/Down, Handheld, Crash Zoom, Vertigo, Orbit, Reveal Pan, Parallax Sweep, Earthquake…). The preset bakes camera keyframes over that layer’s time and an X/Y/Z gizmo appears on the canvas. Controls exposes Pan X/Y/Z, Size, easing (Linear, Ease, In, Out, InOut, Bounce) and Key/Prev/Next for hand-made moves. Only layers whose Camera toolbar button is lit follow the camera; Depth (Z) in Layer Properties (−1 far … +1 near) makes near layers move faster for parallax.
- Cam Move is a project-level camera: one move can drive every layer that follows it.
- 88 presets in four sets (Text · Video · Image · 3D); a preset bakes keyframes over the selected layer’s duration.
- The gizmo on the canvas shows the camera’s X/Y/Z axes; the dashed frame is what the camera sees at the current keyframe.
- Controls = Pan X, Pan Y, Pan Z, Size + easing chips; Key adds a keyframe at the playhead, Prev/Next jump between them, Reset Pose and Clear All undo.
- Parallax = different Depth (Z) values per layer: a background at −0.5 and a title at +0.5 slide past each other when the camera pans.
Watch any title sequence or documentary and the frame is rarely still: it pushes in on a face, drifts across a landscape, tilts to reveal a sky. ExpoCut puts that virtual camera on every project. Pick a preset, or keyframe the move yourself with a gizmo on the canvas — and add depth so layers slide past each other like a real scene.
Where the camera lives
Cam Move sits in the bottom bar between 3D and Widget. It opens the project Camera panel, which has two views: Presets (ready-made moves) and Controls (hand-made keyframes). The camera is one object for the whole project; each layer decides whether to follow it.
Step 1 — Apply a preset
Select the layer the move should span
The preset bakes its keyframes over that layer’s time on the timeline. Tap the clip first.
Tap Cam Move ▸ Presets
Pick the set that matches the layer — Text, Video, Image or 3D — 22 presets each.
Tap a preset
It’s applied immediately: the panel shows 2 kf and the camera gizmo appears on the canvas. Tap Done.
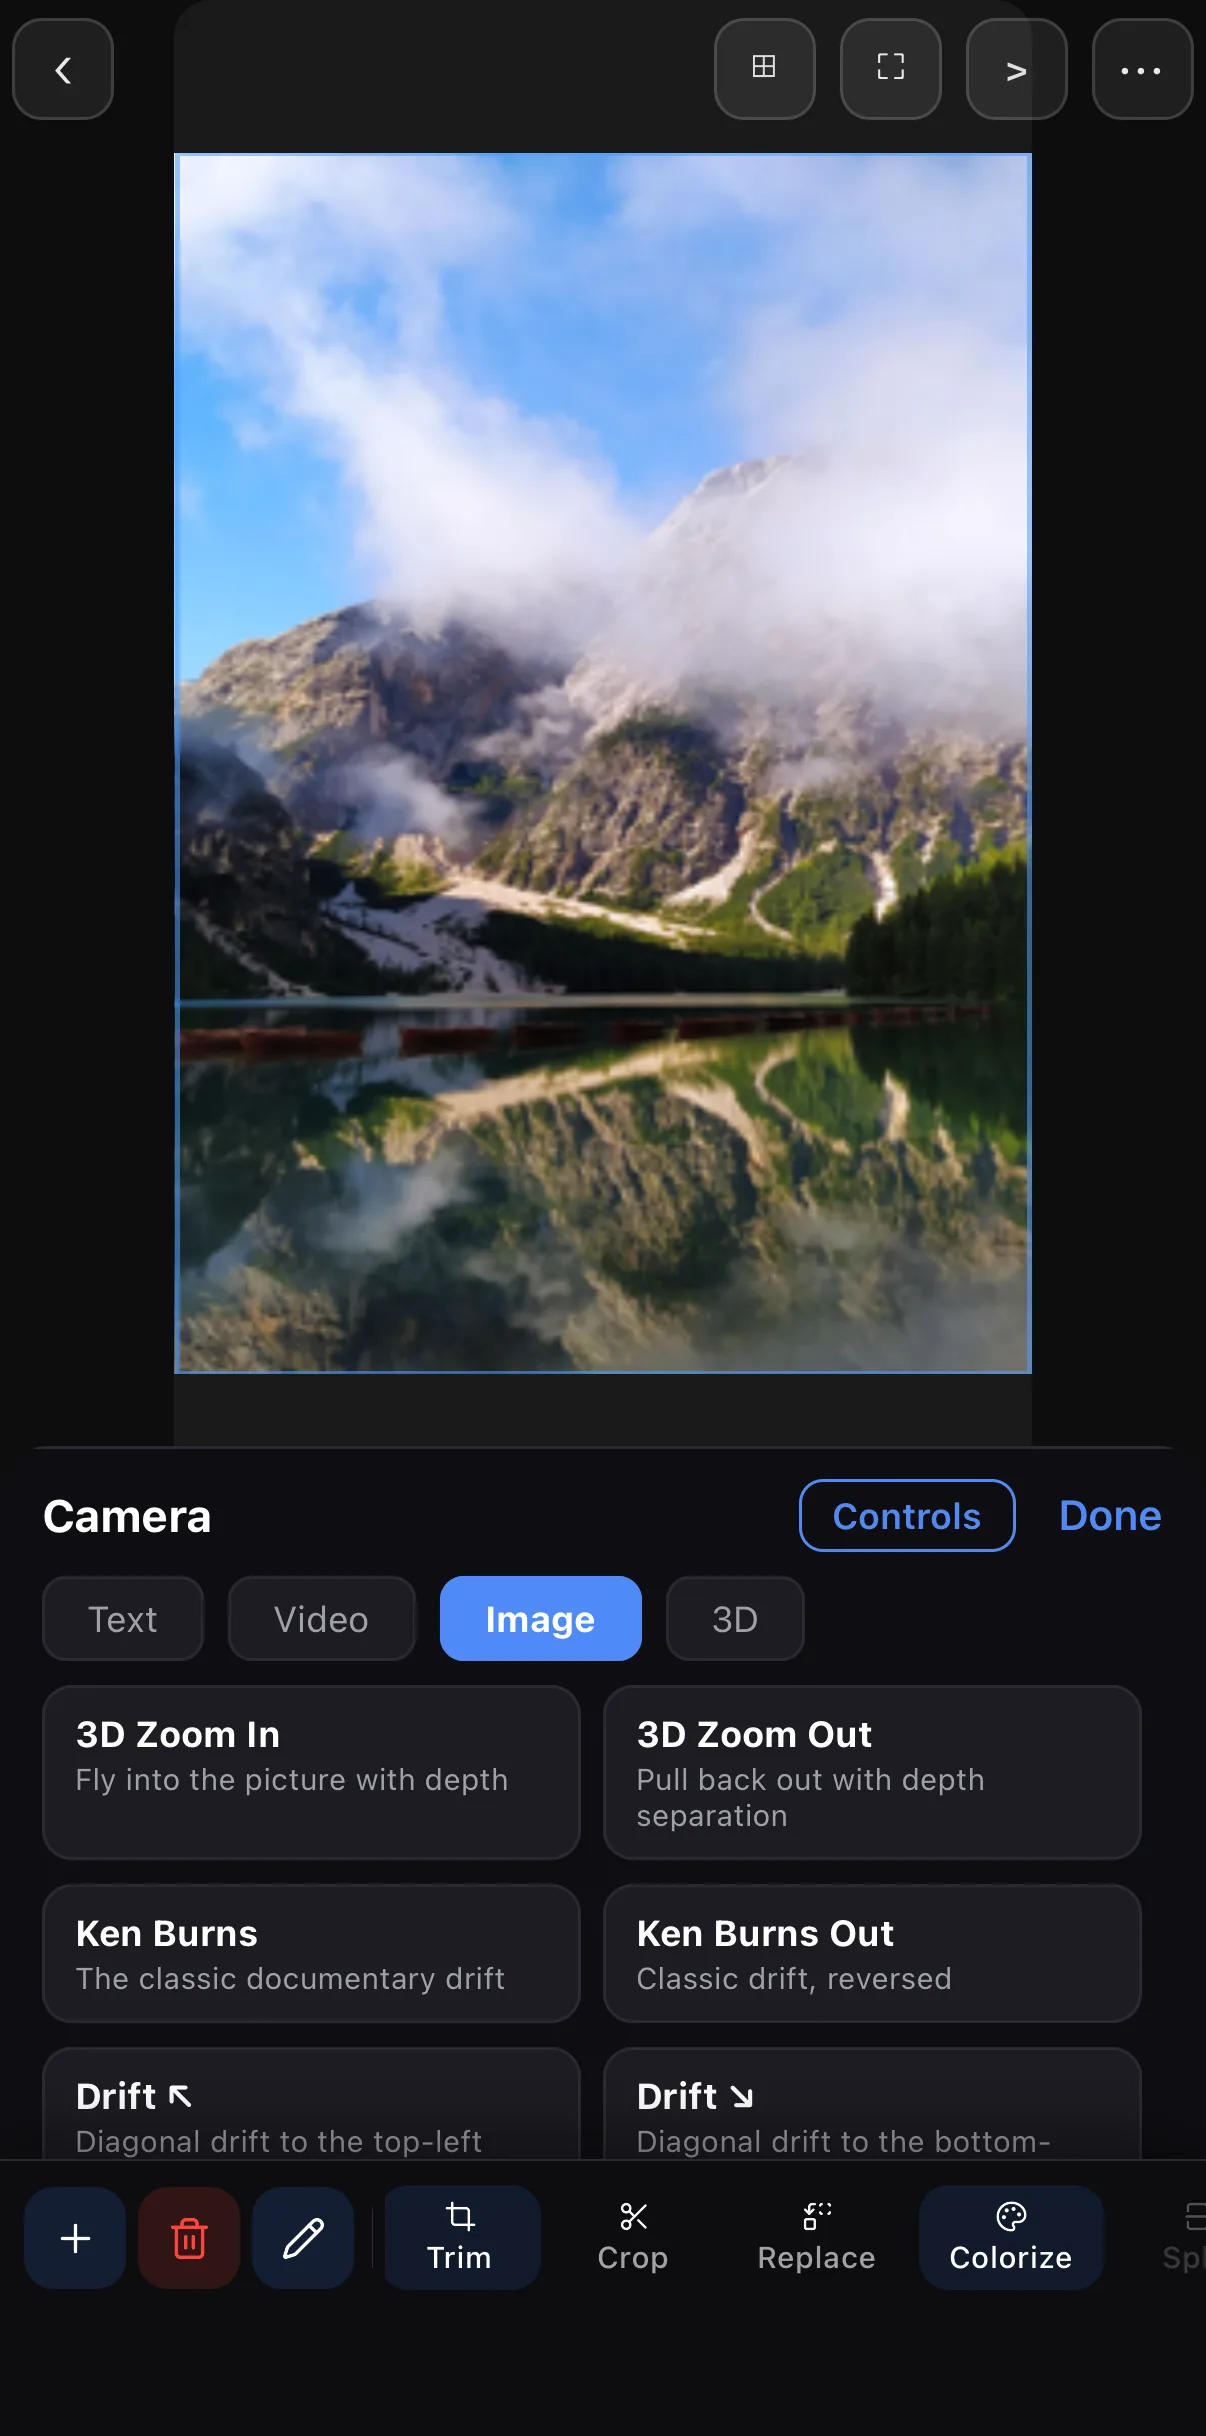 Controls
Text · Video · Image · 3D preset sets
Tap a preset — it bakes over the layer’s time
Controls
Text · Video · Image · 3D preset sets
Tap a preset — it bakes over the layer’s time
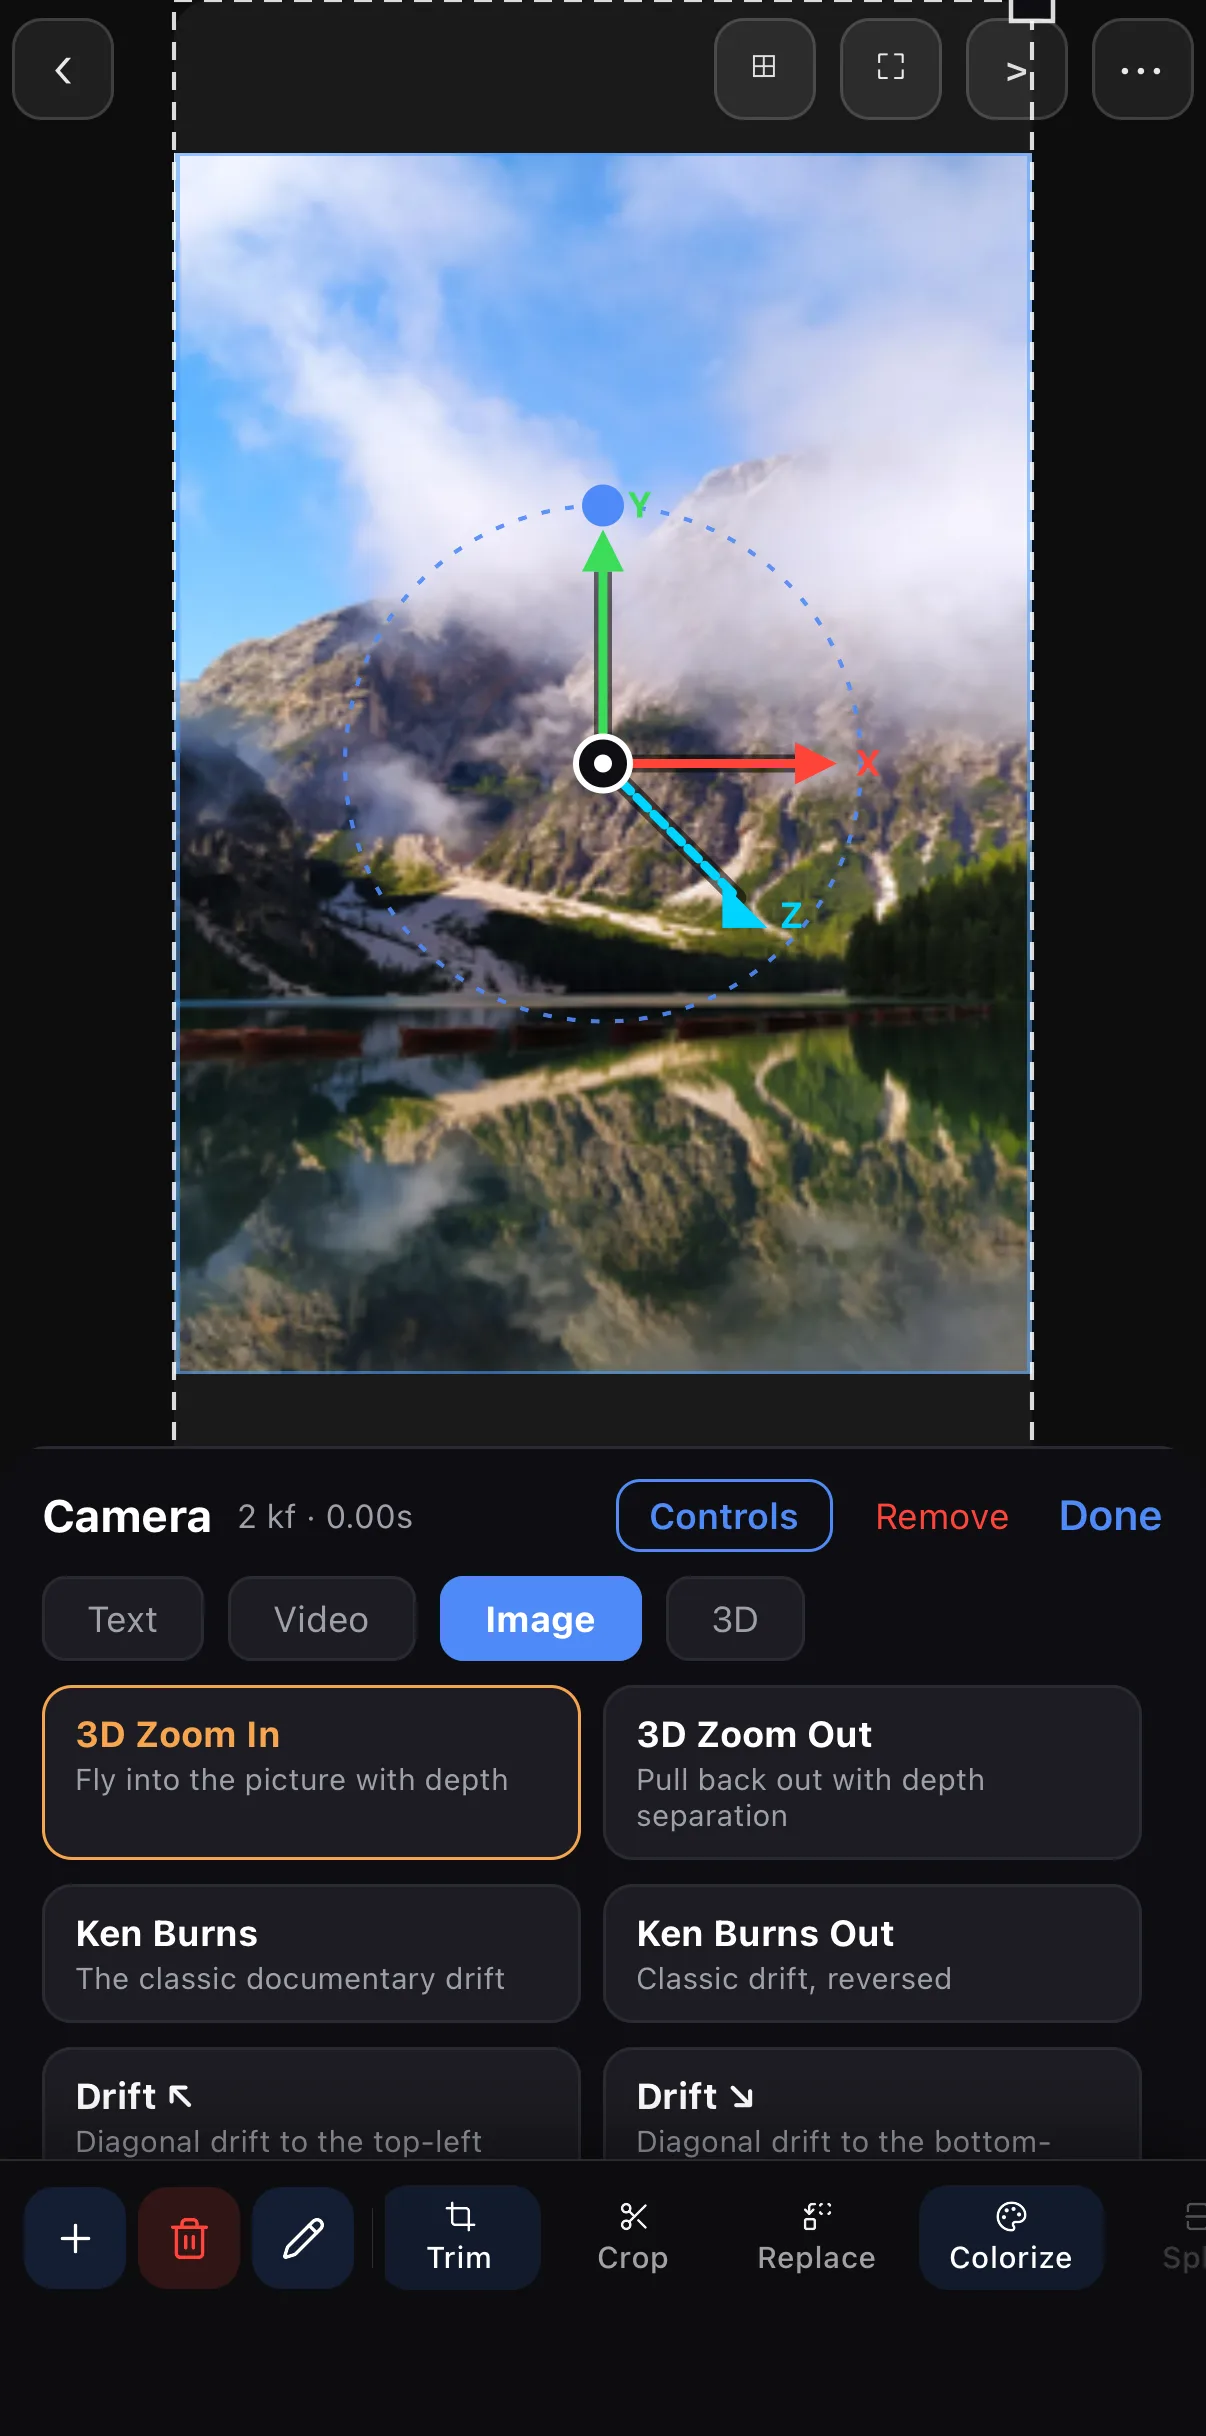 Camera gizmo — X · Y · Z axes
2 keyframes baked
3D Zoom In
Camera gizmo — X · Y · Z axes
2 keyframes baked
3D Zoom In
Step 2 — Shape the move by hand
Tap Controls to see the numbers behind the move and to build your own.
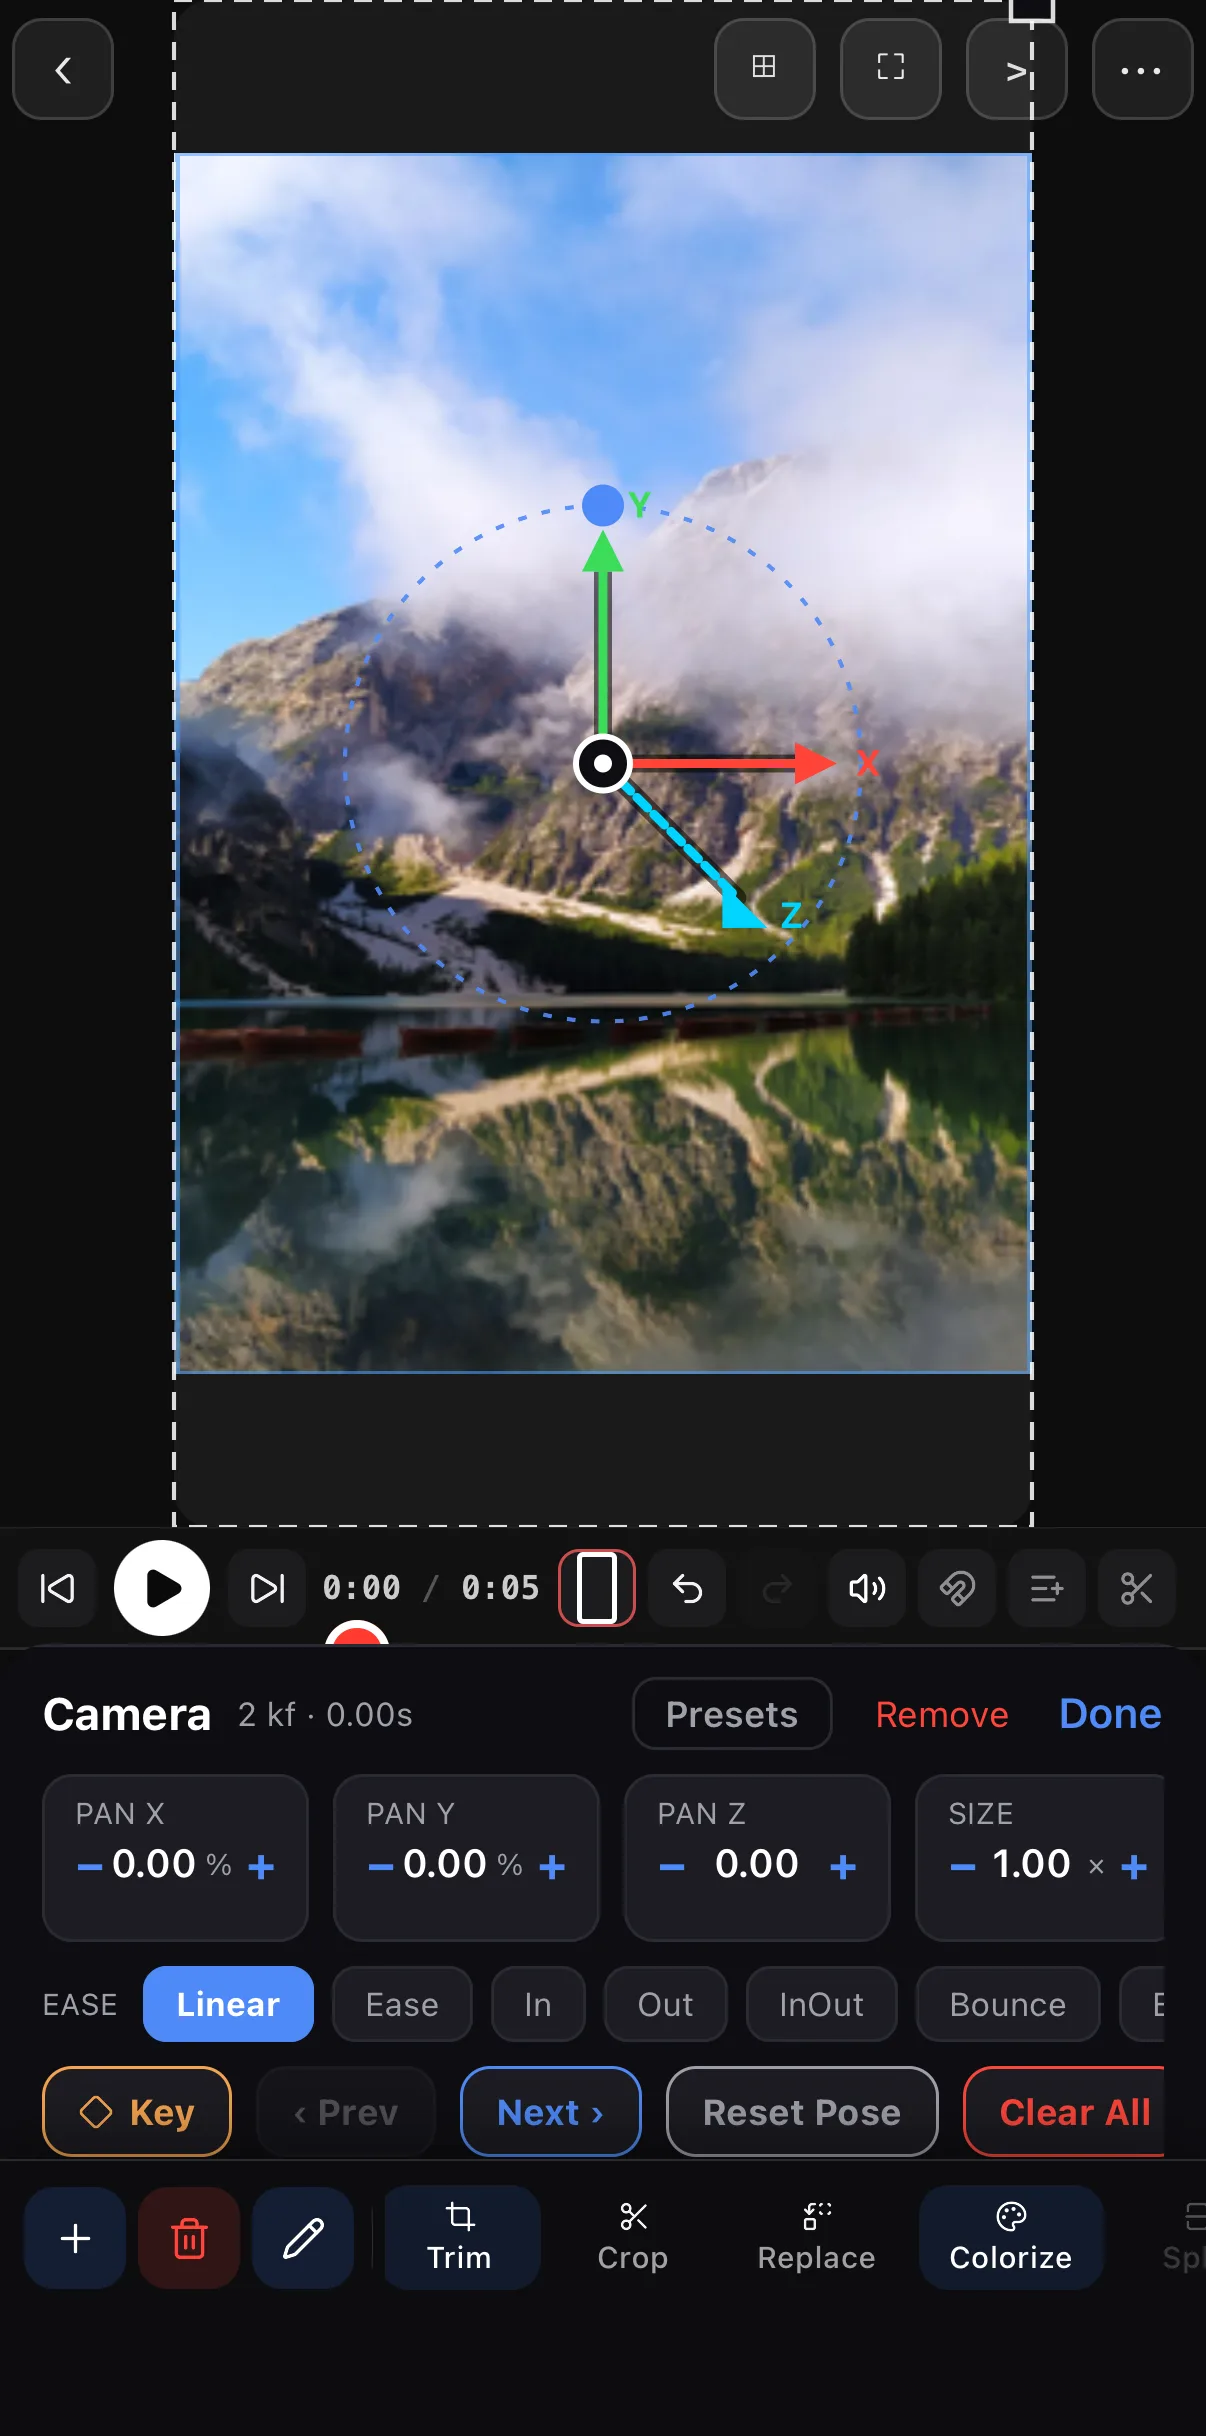 Pan X / Pan Y / Pan Z / Size
Ease — Linear · Ease · In · Out · InOut · Bounce
Key · Prev · Next · Reset Pose · Clear All
Pan X / Pan Y / Pan Z / Size
Ease — Linear · Ease · In · Out · InOut · Bounce
Key · Prev · Next · Reset Pose · Clear All
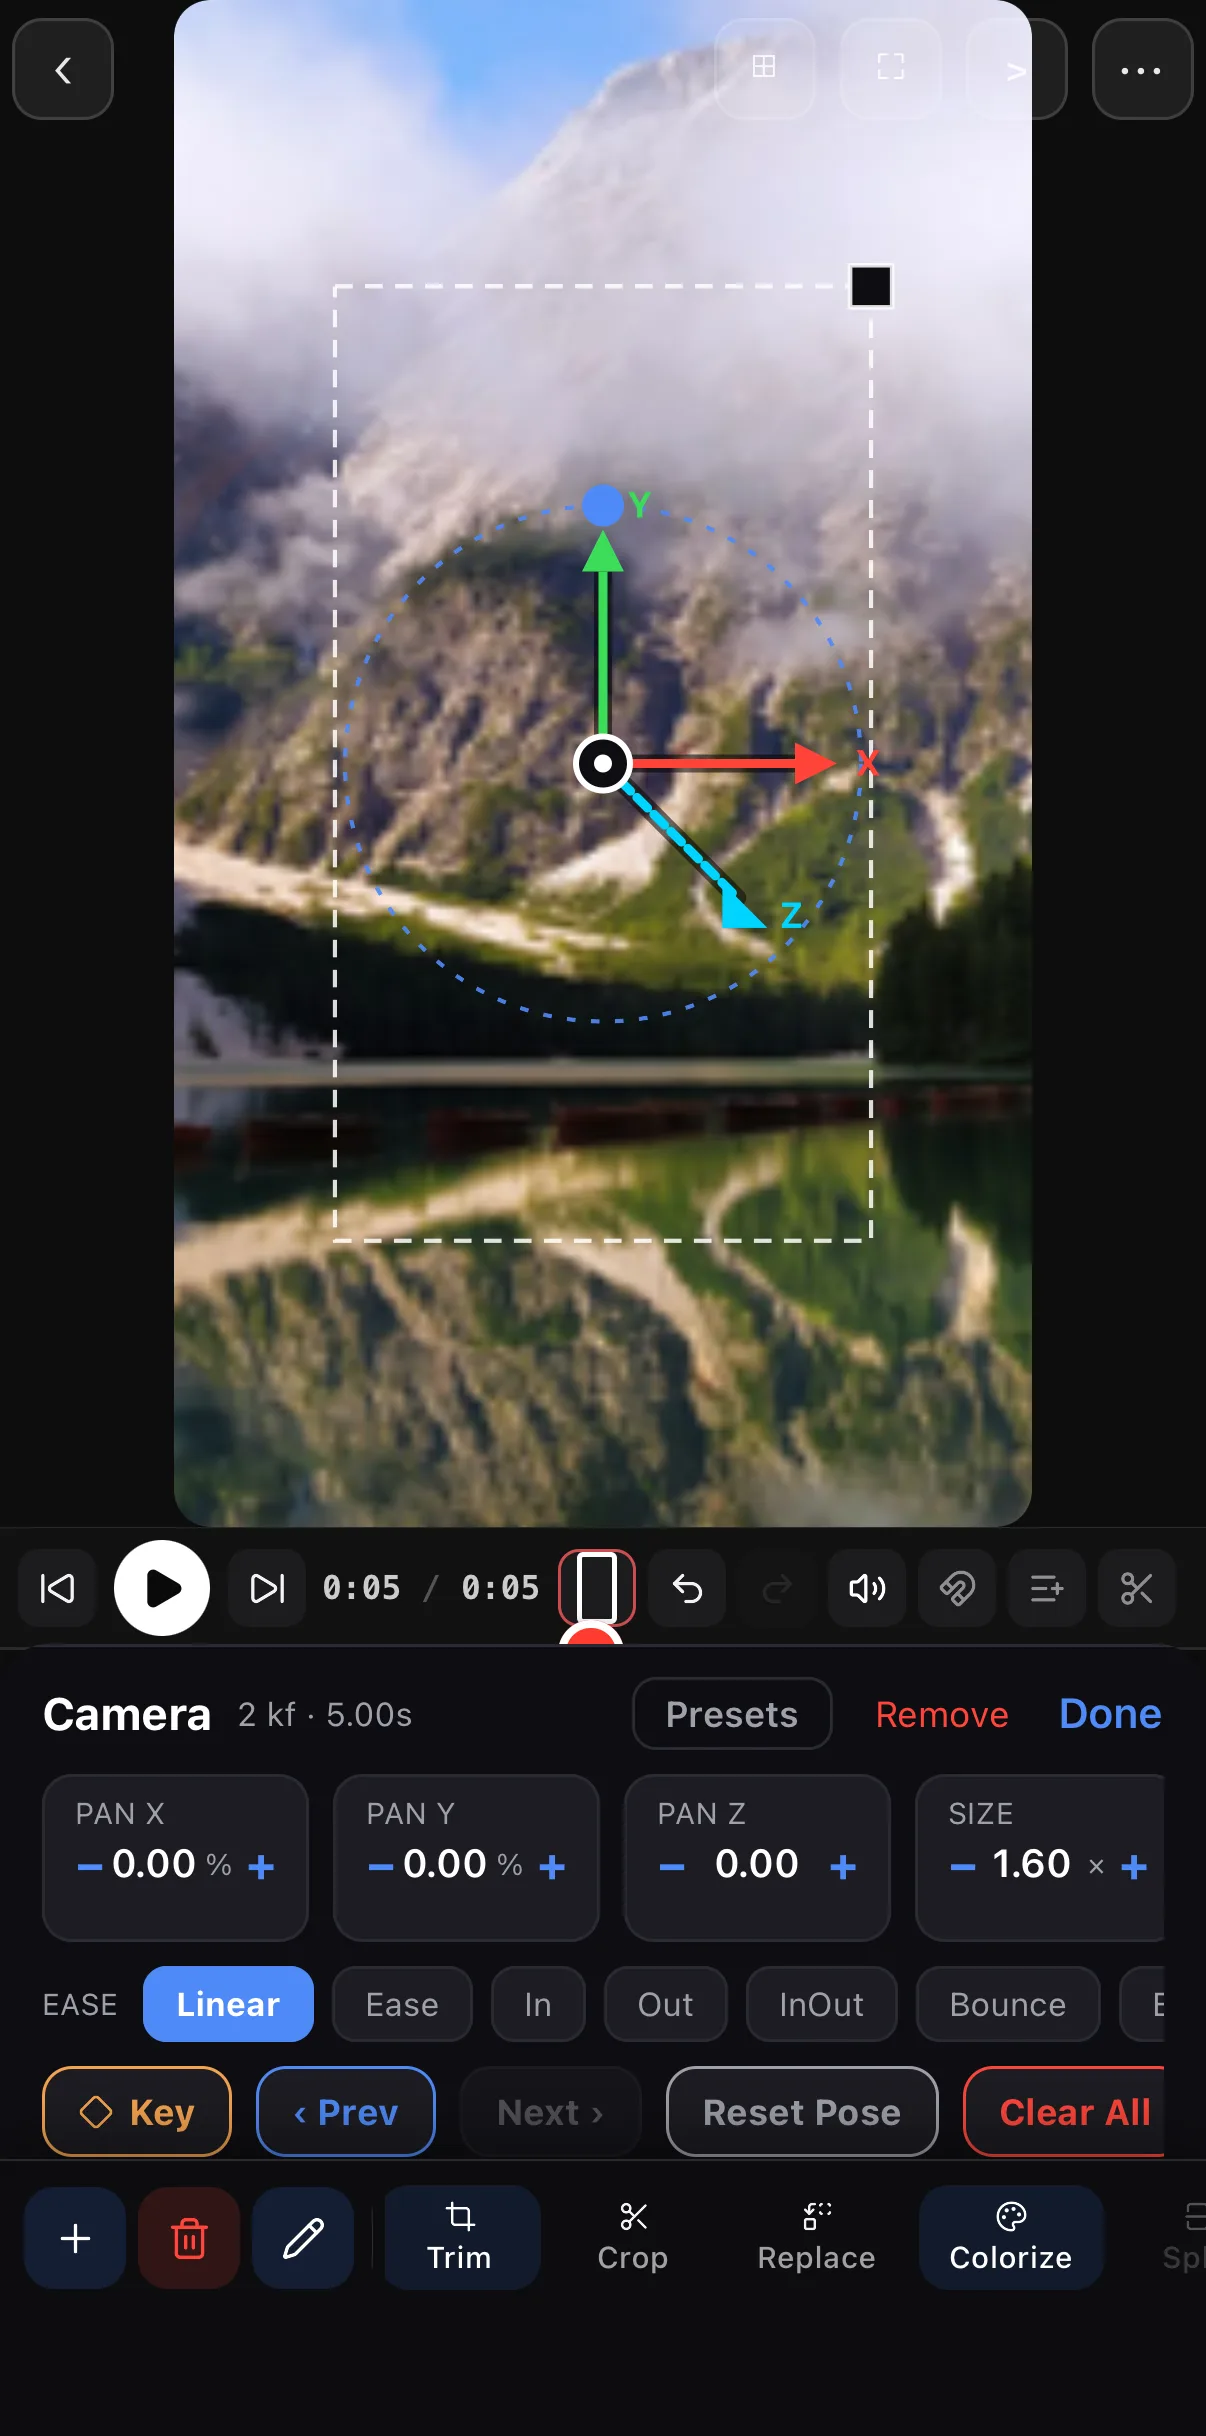 Camera frame at keyframe 2 — Size 1.60×
Size 1.60 ×
‹ Prev / Next ›
Camera frame at keyframe 2 — Size 1.60×
Size 1.60 ×
‹ Prev / Next ›
Presets are a starting point. Apply 3D Zoom In, then open Controls and pull Size back from 1.60× to 1.25× — a subtle push reads as cinematic; a fast one reads as a meme.
Step 3 — Decide who follows the camera
The camera only moves layers that ride it. Select a layer, tap the pencil (Edit) and swipe the transform toolbar to Camera — lit means the layer follows; off means it stays locked to the screen. Keep captions, logos and lower thirds off so they don’t drift with the shot.
Step 4 — Add parallax with Depth
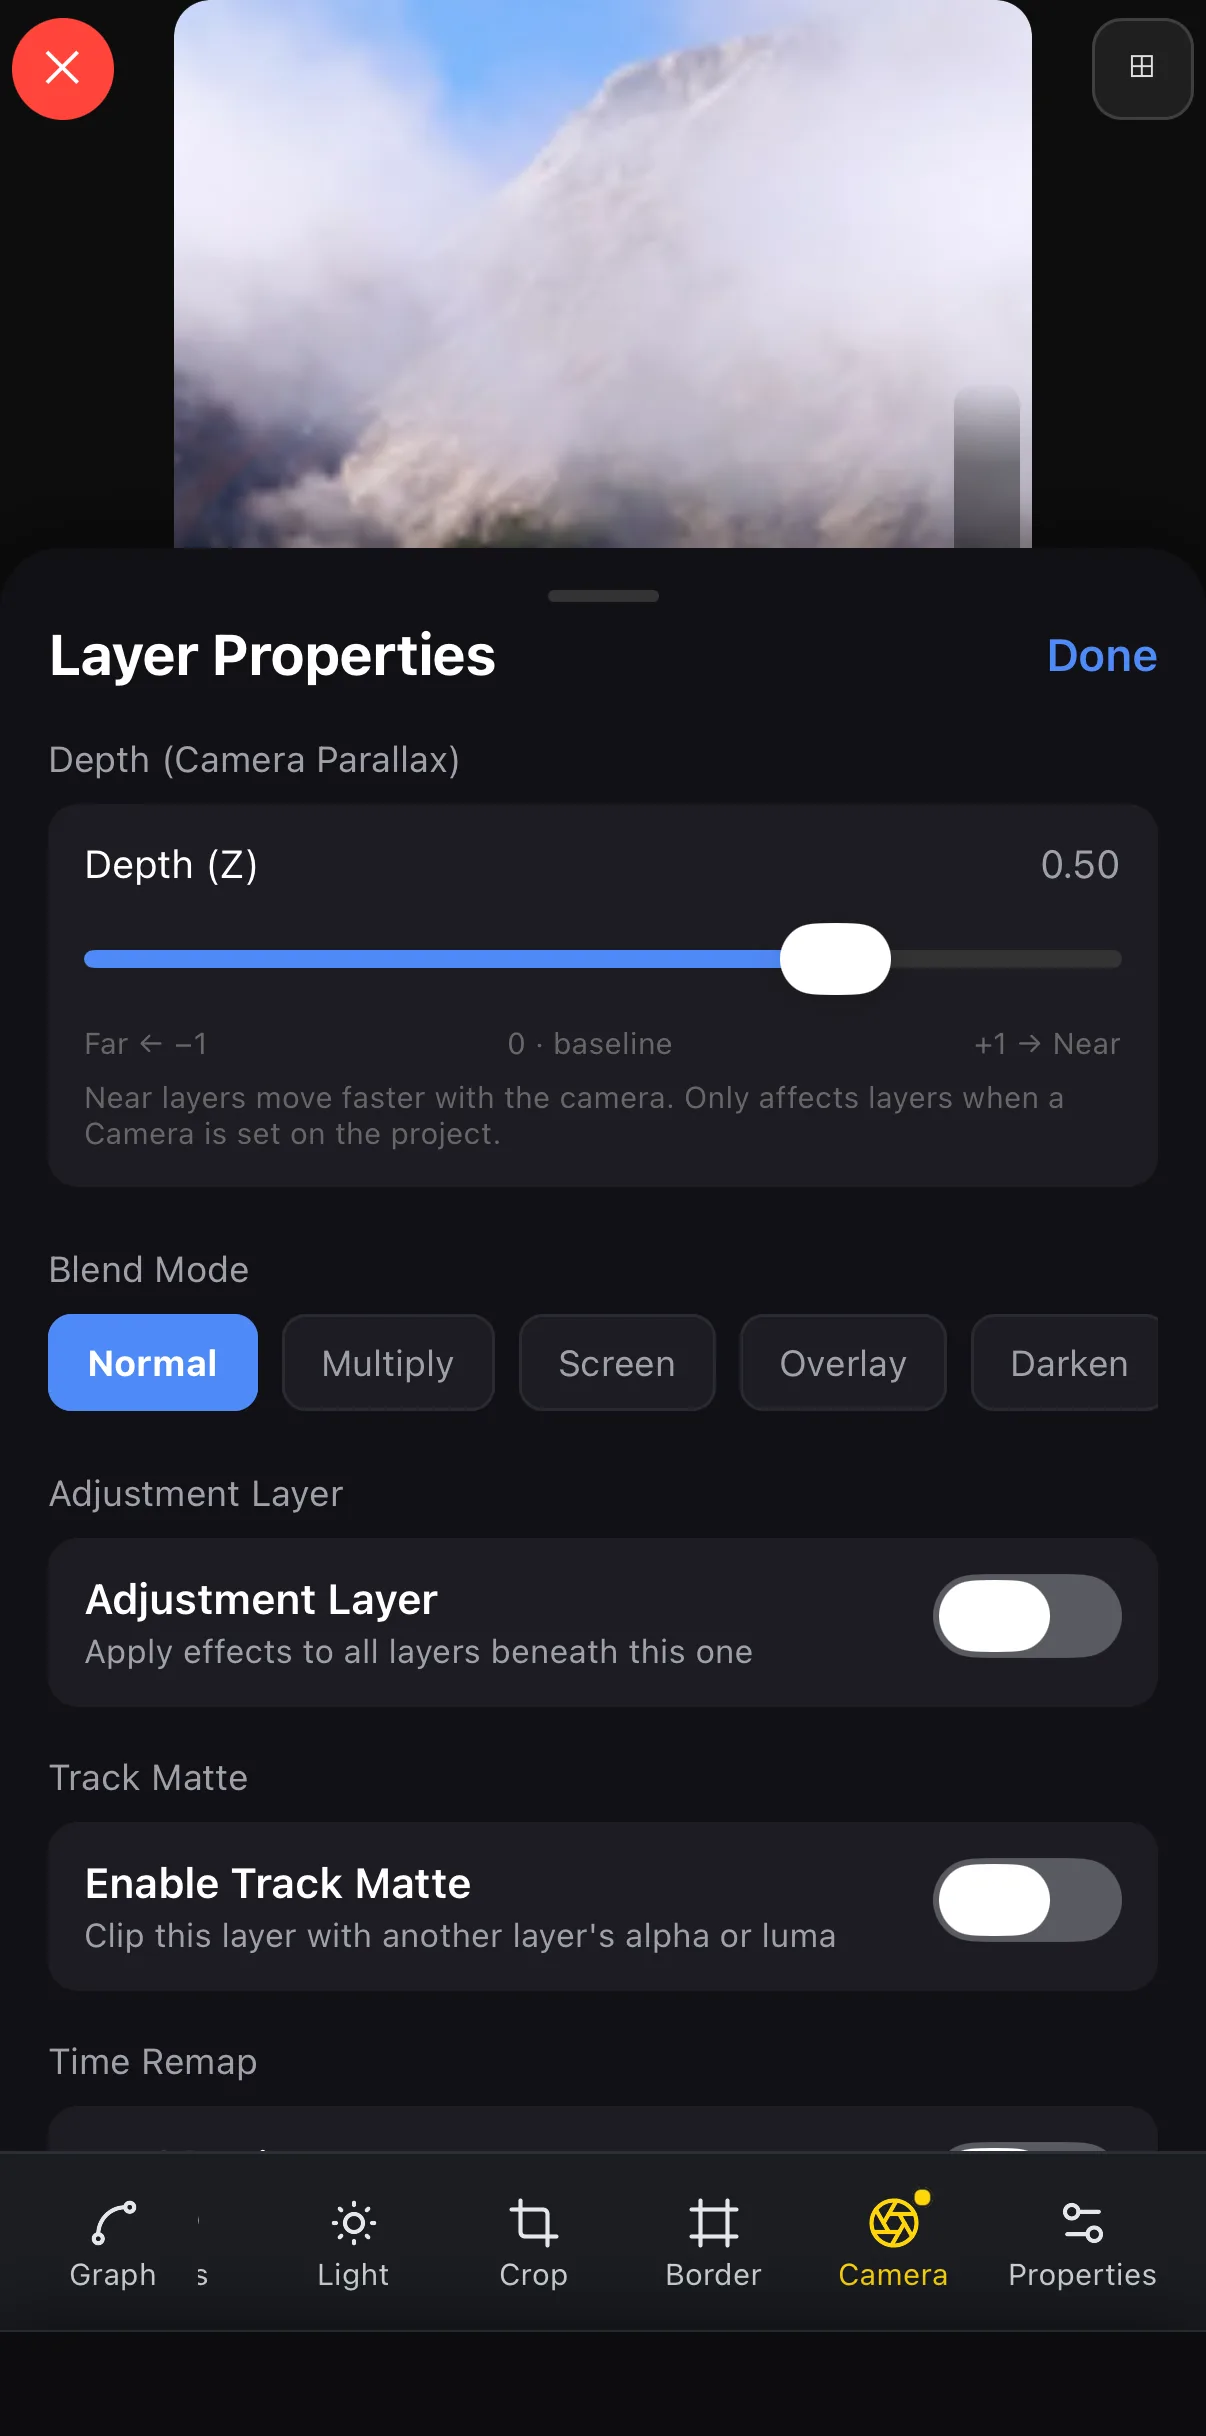 Depth (Z) — −1 far … +1 near
Camera — lit = this layer follows the camera
Depth (Z) — −1 far … +1 near
Camera — lit = this layer follows the camera
Background far
Select the backdrop layer, open Properties and set Depth (Z) around −0.5.
Subject or title near
Select the foreground layer and set Depth (Z) around +0.5. Make sure both have Camera lit.
Pan the camera
Apply Reveal Pan or Parallax Sweep from the Video set (or keyframe Pan X by hand). The layers slide past each other at different speeds.
Where to go next
- Move a single layer instead: keyframes & motion paths.
- Photos that never sit still: make a photo slideshow.
- Layer stacks worth moving: track mattes & compositing.
Pick a preset, tune it in Controls, choose who follows, set the depths — four steps and a flat frame becomes a shot with a camera in it.
Frequently asked questions
What is the difference between a camera move and a keyframe on the layer?
A layer keyframe moves one layer. A camera move moves the viewpoint, so every layer that follows the camera moves together — and, with different Depth values, at different speeds. Use layer keyframes for one element; use the camera for the whole shot.
Why doesn't my layer move with the camera?
Only layers with the Camera toolbar button lit ride the camera. Select the layer, tap the pencil (Edit), swipe the toolbar to Camera and turn it on. Layers you leave off — a logo, captions — stay locked to the screen.
How do I make a parallax effect?
Give layers different depths. Open Edit ▸ Properties on the background and drag Depth (Z) toward −1 (far); on the foreground push it toward +1 (near). Then apply a pan or dolly camera preset — near layers move faster than far ones, which reads as depth.
Related guides
Move the camera, not just the clip
88 camera presets, a drag-able gizmo and depth parallax — cinematic motion on any project, on your phone.
Get ExpoCut Browse all guides