Timeline Styles Explained: Classic, Main Track & Compact
The timeline is where every edit lives, and since 5.8 you get to choose how it behaves. Classic keeps clips exactly where you drop them; Main track snaps videos end to end like a phone-first editor; Compact is Main with smaller rows. Here’s how to pick and switch.
Quick answer
ExpoCut has three timeline styles. Classic is free-form: every insert gets its own row and clips sit where you drop them. Main track is magnetic: videos join end to end on one main row and deleting one closes the gap. Compact is the Main-track model with smaller rows — five on screen instead of three. Switch the current project from the Timeline style button at the right end of the transport strip (scroll the strip past the scissors); set the default for new projects in Settings ▸ Timeline.
- Classic = free-form rows (audio A-rows, video V-rows, text T-rows…); nothing moves unless you move it.
- Main track = one magnetic video row: clips butt together, deletions close the gap, no accidental black frames.
- Compact = Main track with smaller rows so five fit on screen — best for layered edits on a phone.
- The switch lives in the transport strip (scroll it right); the choice is saved per project.
- Settings ▸ Timeline sets the default style for new projects, plus preview frame rate and audio-row visibility.
Editors argue about magnetic timelines the way musicians argue about click tracks. ExpoCut sidesteps the argument: you choose. The three styles share the same layers, the same tools and the same export — they only change what the timeline does when you drop, trim and delete.
The three styles at a glance
| Style | Model | Rows | Best for |
|---|---|---|---|
| Classic | Free-form — every insert gets its own row, clips stay where you drop them | Full height, three on screen | Layered edits, overlays, precise placement |
| Main track | Magnetic — videos join end to end on one main row; deleting one closes the gap | Full height | Cut-and-sequence edits, vlogs, montages |
| Compact | The Main-track model with smaller rows | Five on screen | Layered edits on a phone screen |
Whatever the style, rows are grouped by family: V for video, O for images, T for text, A for audio, E for shaders, L for light leaks, C for collages. Tap a row label before adding a clip and the new clip appends to that row instead of starting a new one.
Classic — free-form rows
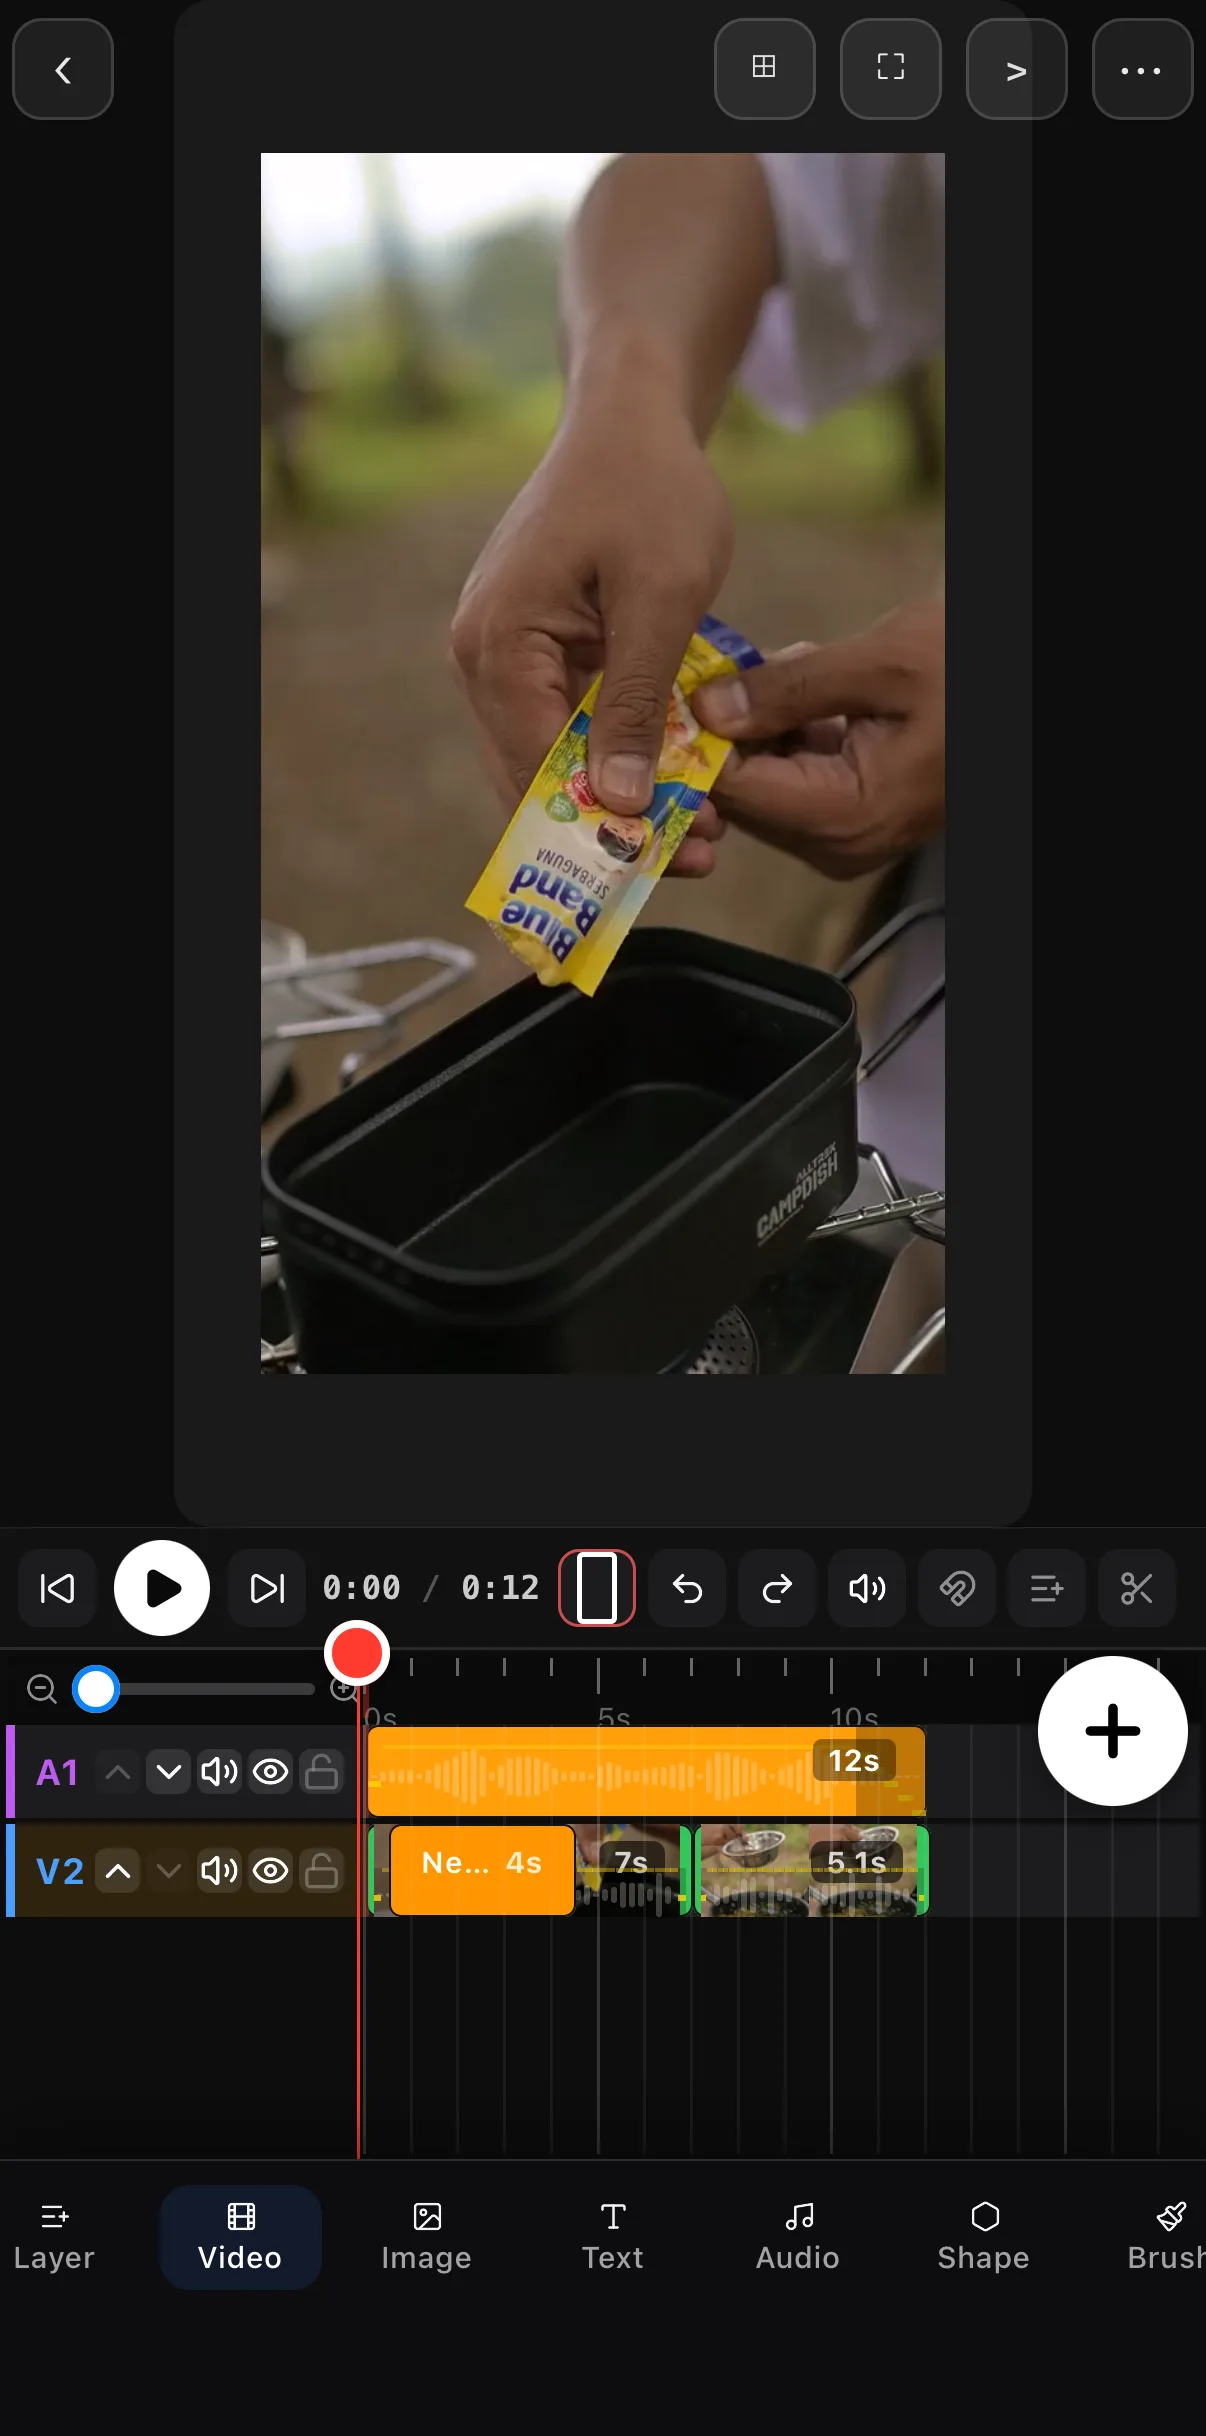 Row families — A (audio) · V (video)
Clips sit where you drop them
Row families — A (audio) · V (video)
Clips sit where you drop them
Classic is the default. It’s the right choice when you’re building up rather than along — picture-in-picture, a title over a shader, three overlays timed to a beat. Long-press a clip to enter arrange mode and drag it to a new time or row.
Main track — magnetic
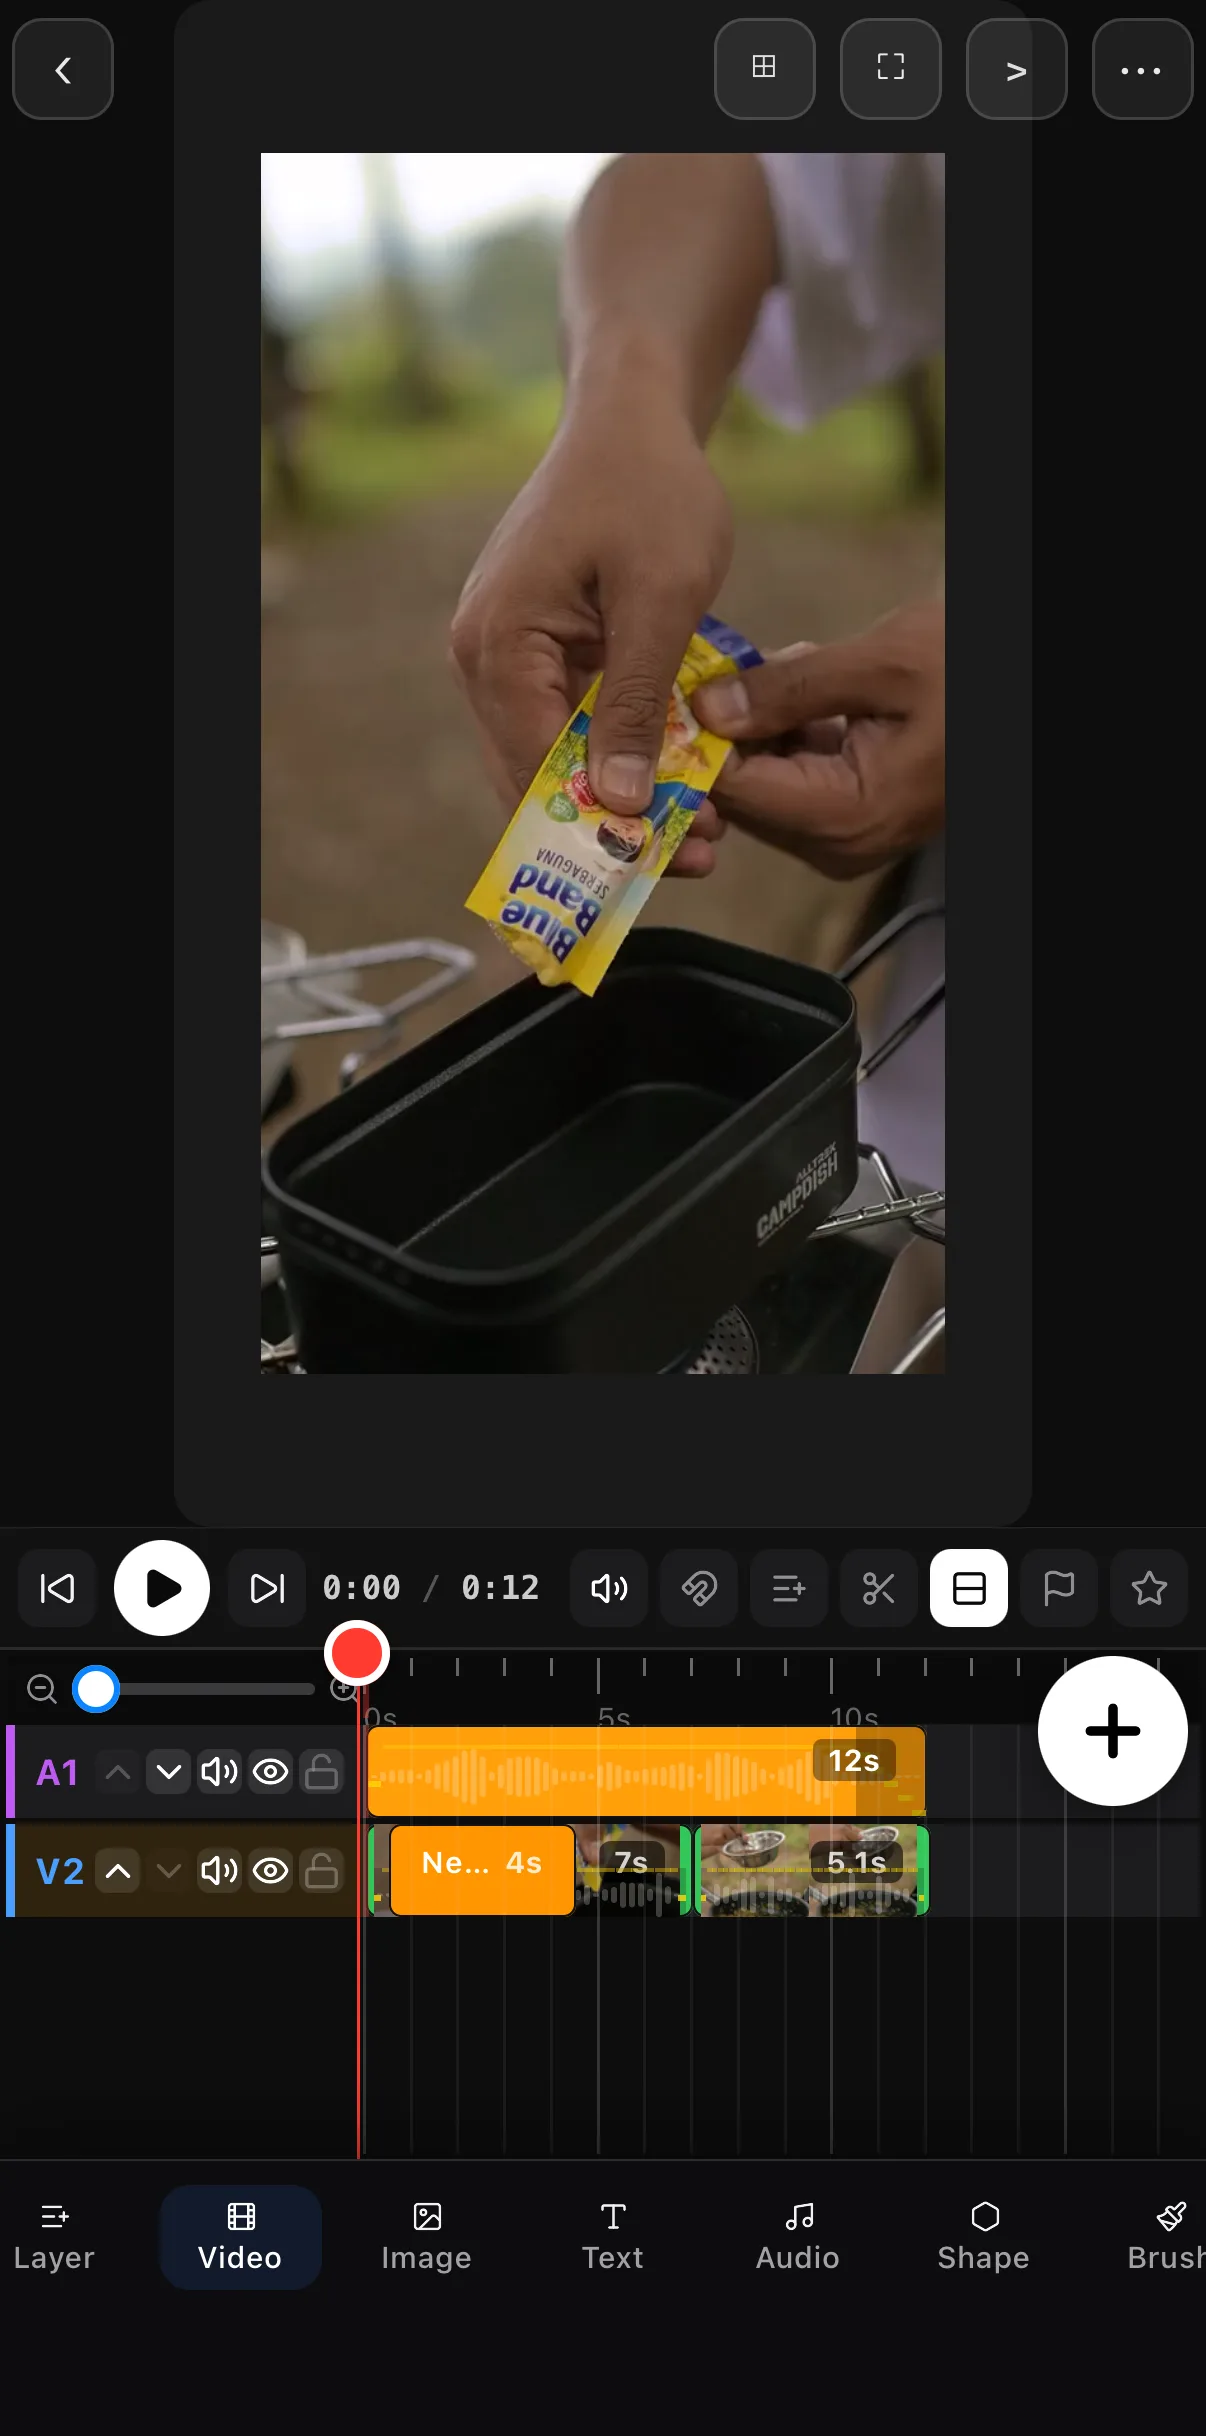 Main track active
Videos join end to end
Main track active
Videos join end to end
If you’ve edited on a phone before, this is the behaviour you expect: no black frames from a stray gap, no nudging clips to touch. Split, trim and reorder on the main row and everything downstream keeps up.
Compact — more rows on screen
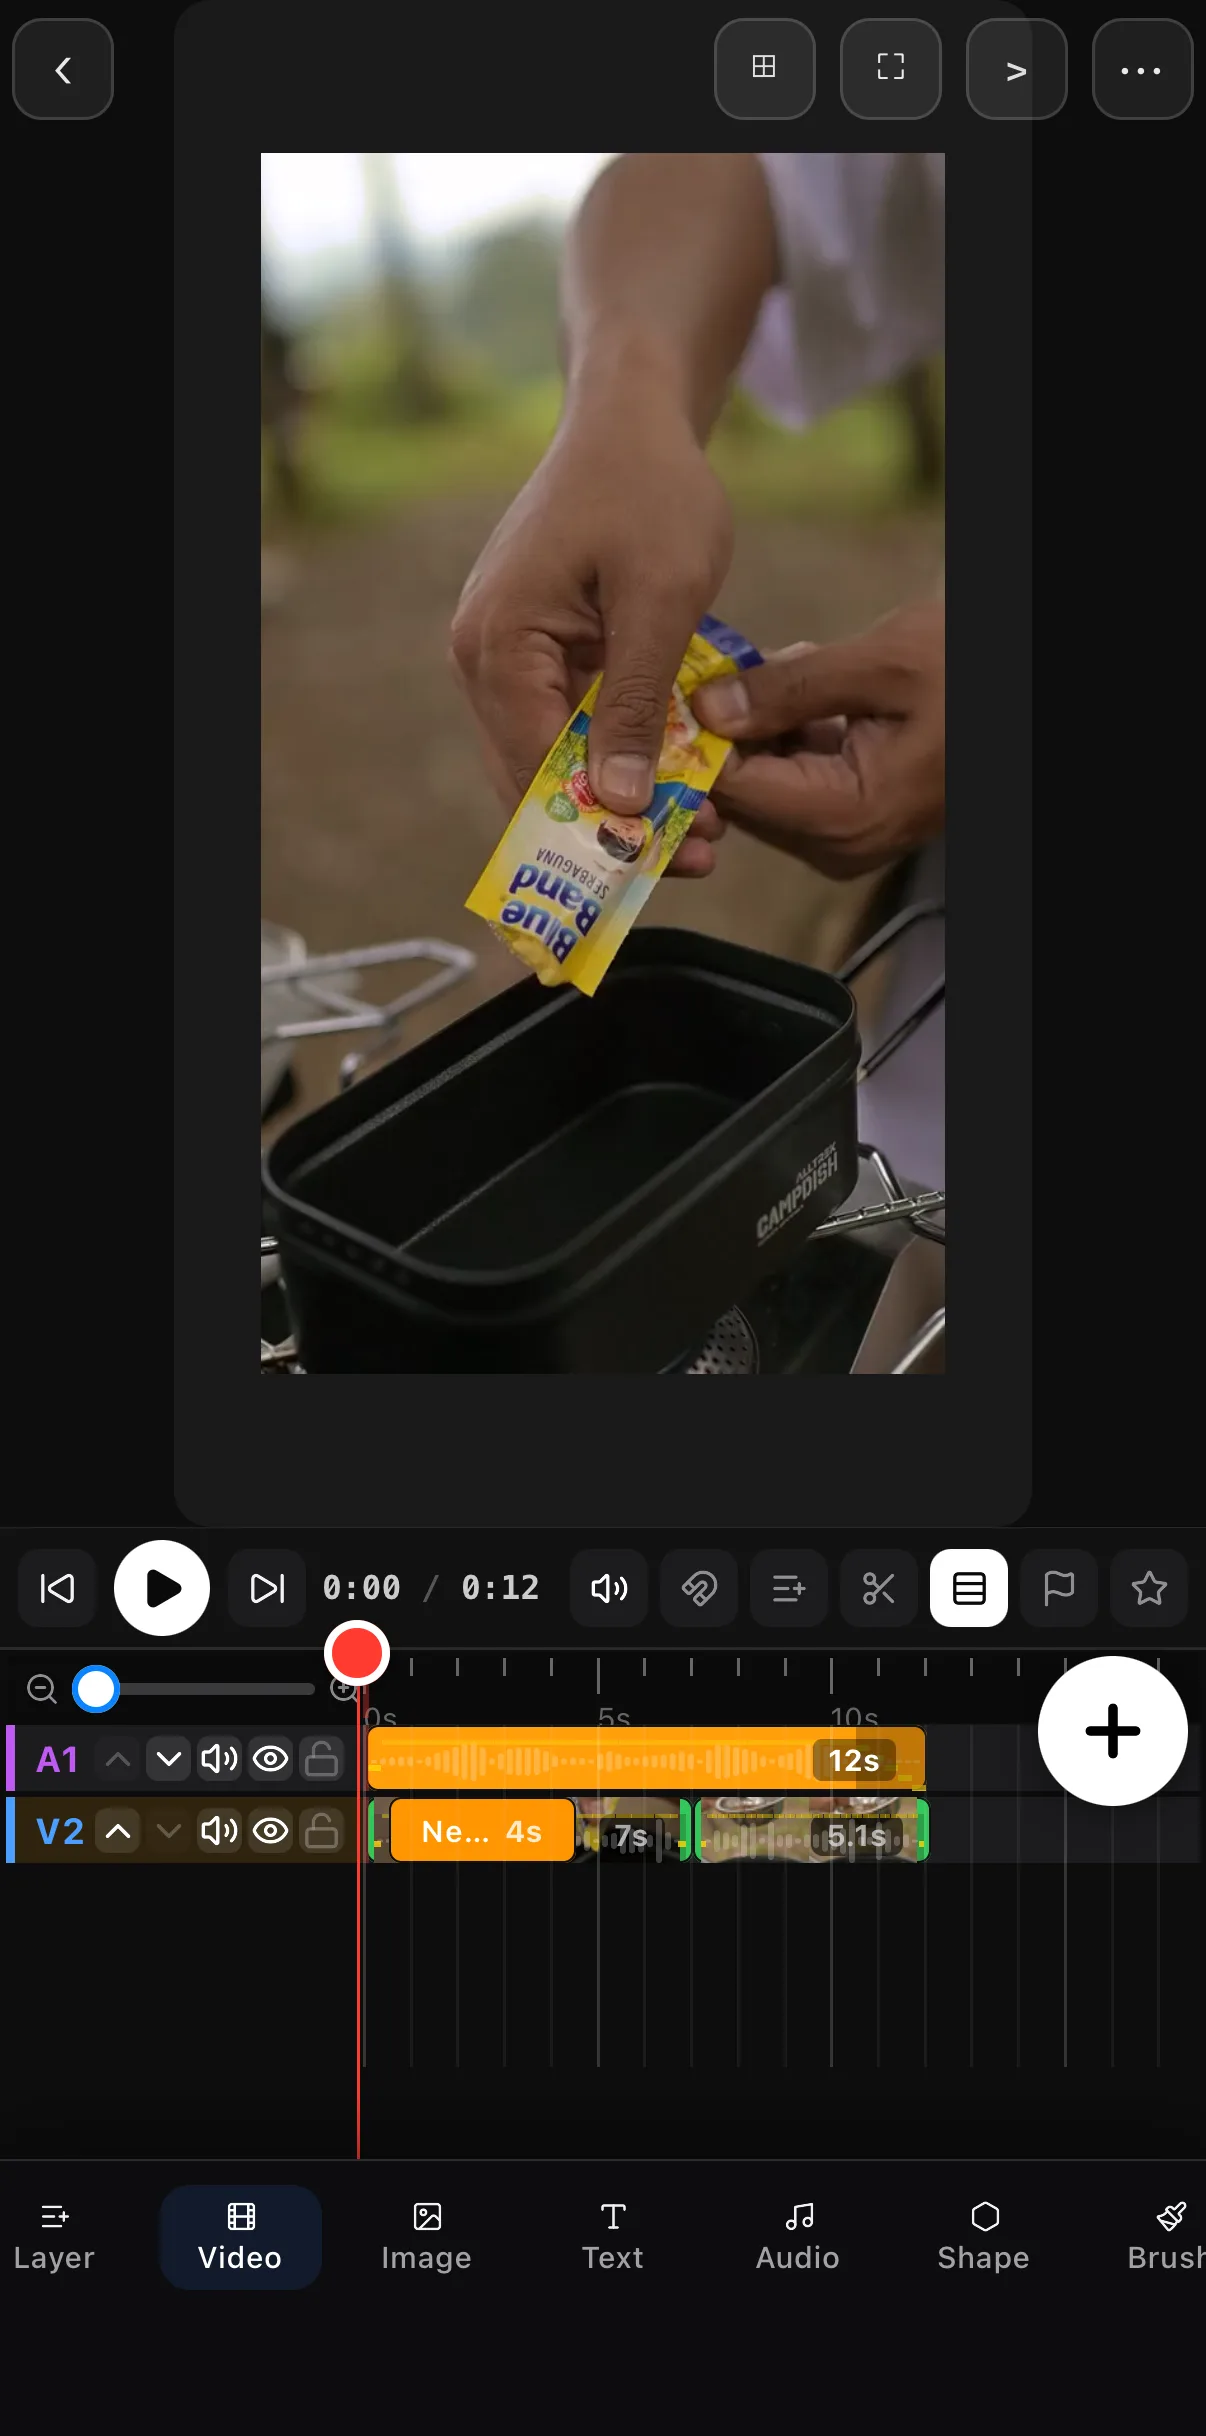 Smaller rows — five on screen
Compact active
Smaller rows — five on screen
Compact active
Compact is Main track for busy projects — captions, music, a logo and two overlays on top of the cut. Thumbnails get smaller, but the row labels and joiners stay tappable.
Switch the style for this project
Scroll the transport strip
The strip under the canvas (⏮ ▶ ⏭ · time · undo · redo…) scrolls sideways. Swipe it left past the scissors.
Tap the Timeline style button
It’s the list-shaped icon after Blade cut; it turns white when a non-Classic style is active.
Pick Classic, Main track or Compact
If the switch has to join videos or close gaps, ExpoCut asks to confirm first; Undo reverses it either way.
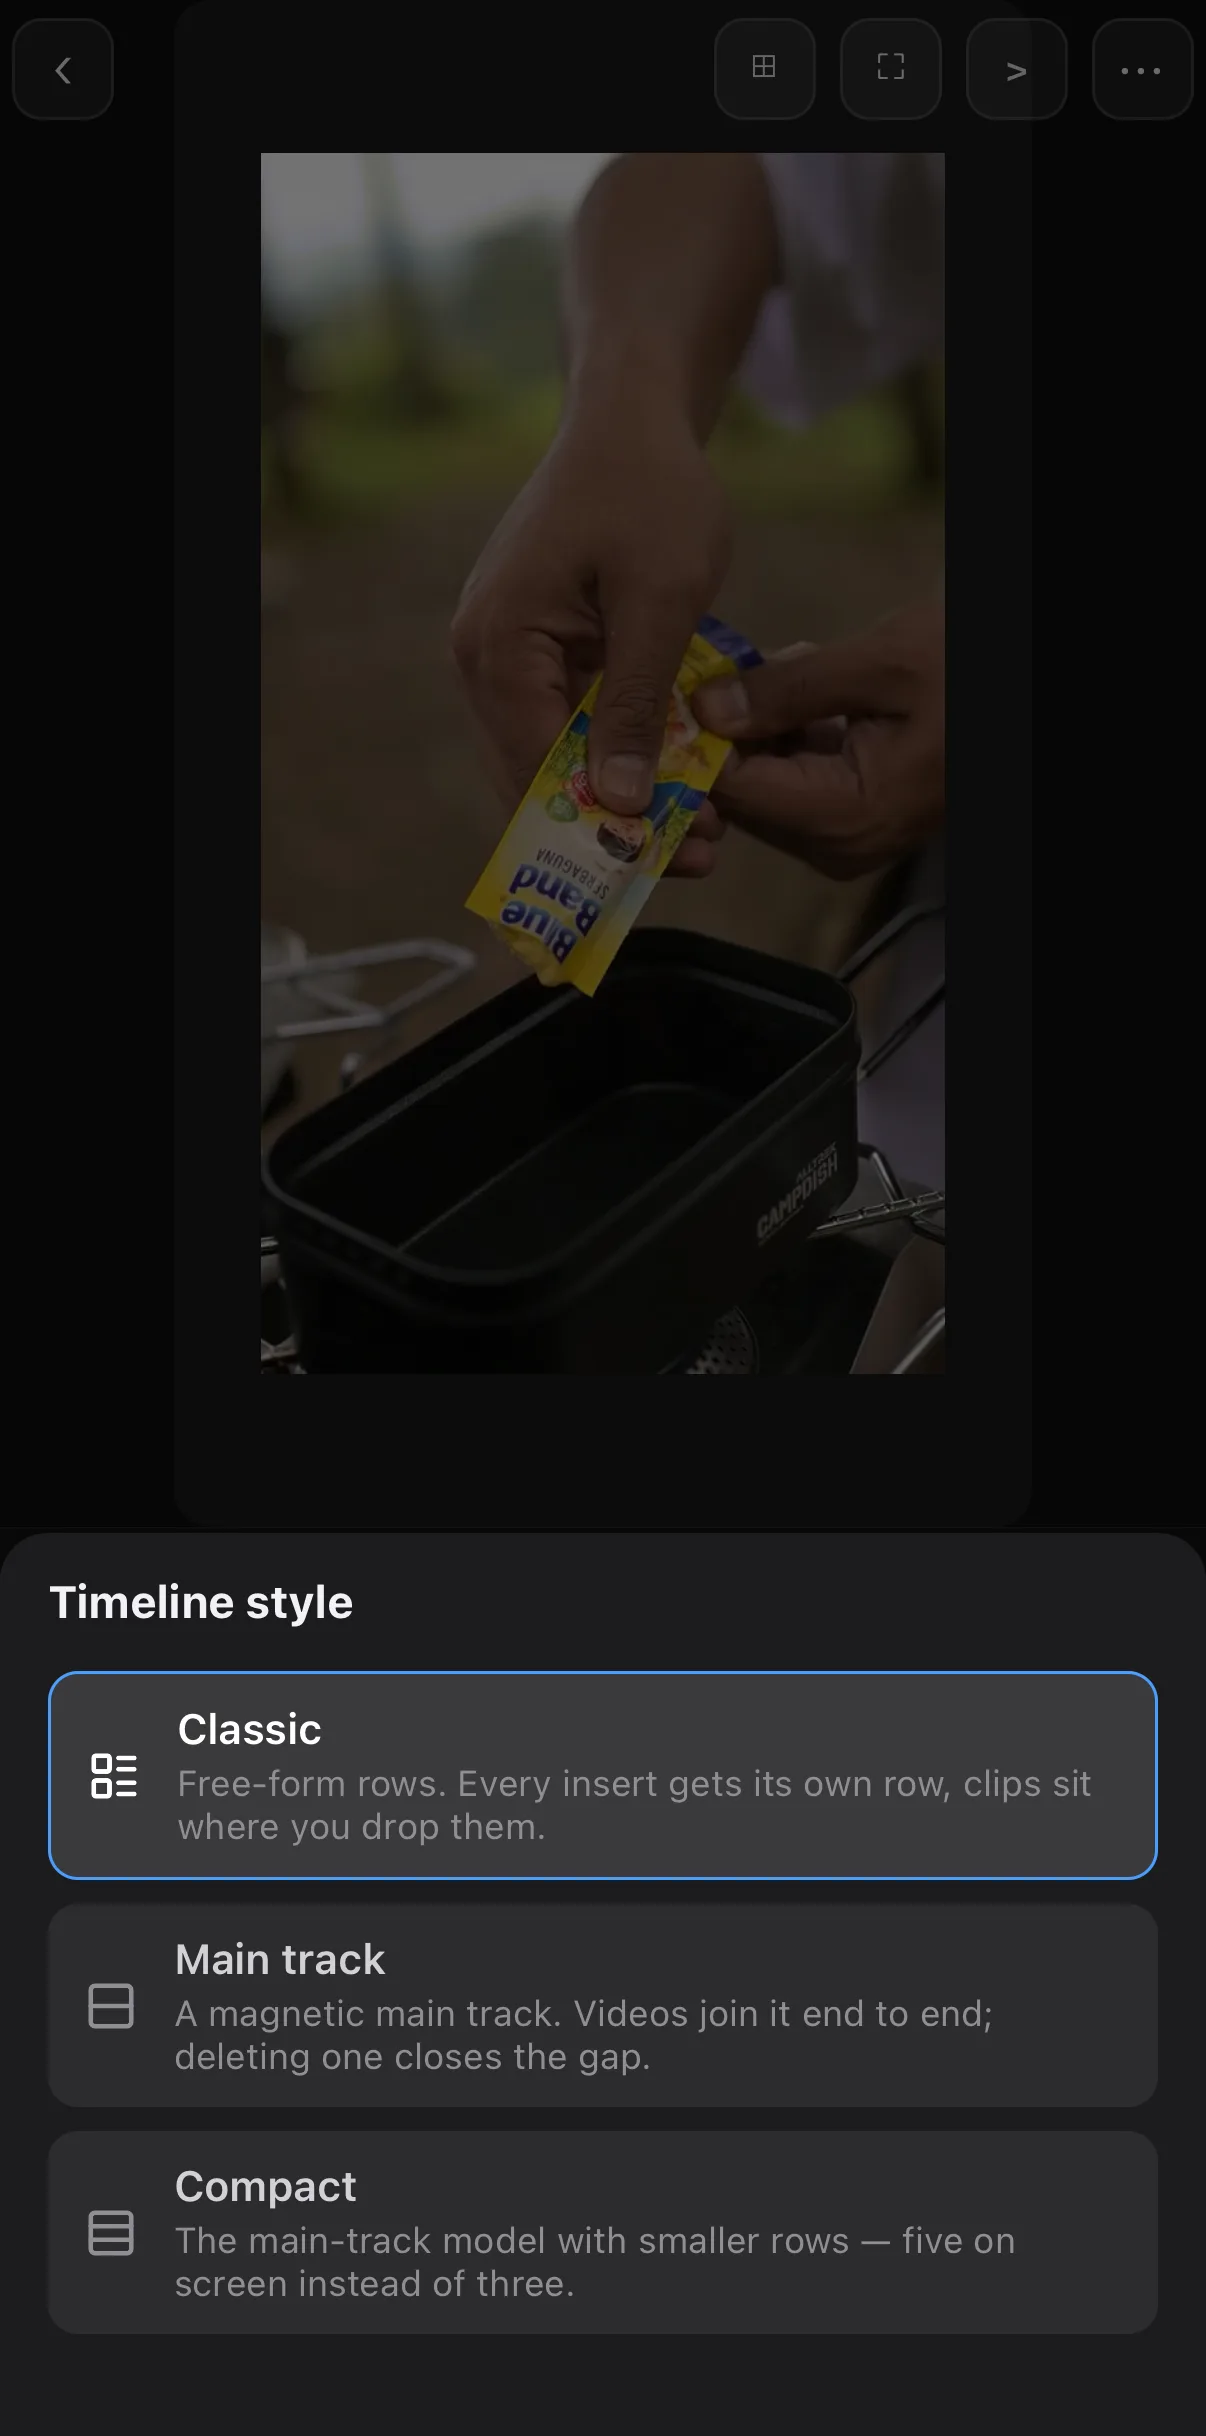 Classic — free-form rows
Main track — magnetic, closes gaps
Compact — Main with 5 rows on screen
Classic — free-form rows
Main track — magnetic, closes gaps
Compact — Main with 5 rows on screen
Set the default for new projects
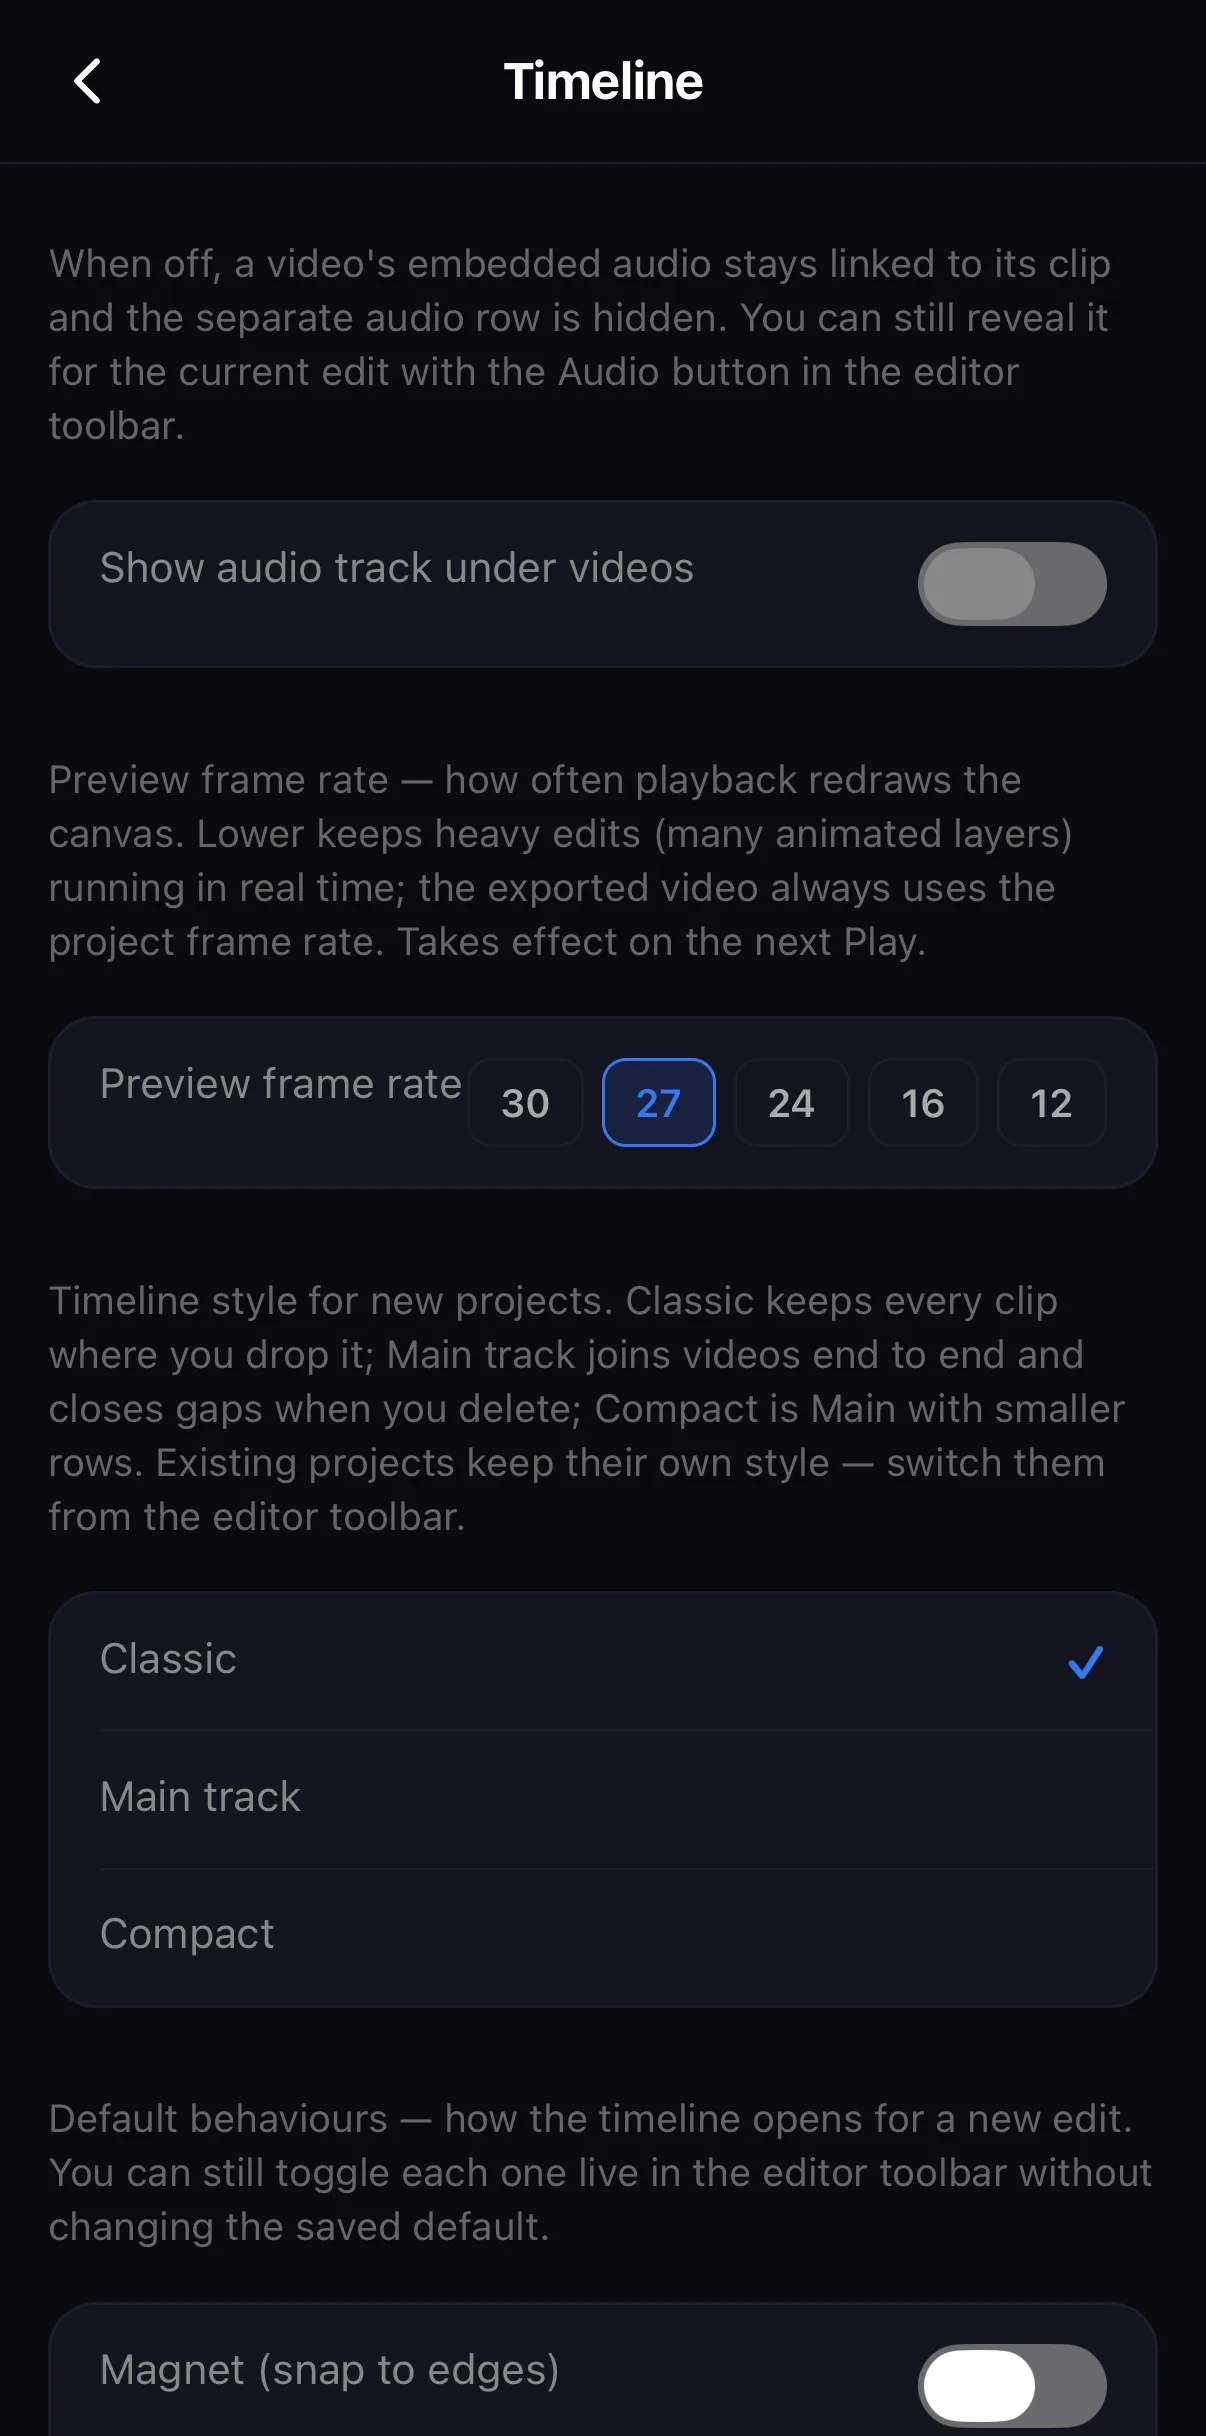 Preview frame rate
Default style for new projects
Preview frame rate
Default style for new projects
Existing projects keep their own style — this only changes what a fresh New Project starts with. The Magnet (snap to edges) switch below sets whether clips snap to each other’s edges while you drag, in any style.
Which one, honestly?
- You cut talking-head or travel footage into a sequence → Main track. Fewer gaps, faster cuts.
- You build motion graphics — text over shaders, PiP, stacked overlays → Classic. Nothing moves unless you move it.
- You do both on a small screen → Compact, and zoom the timeline with the slider by the ⊖ icon when you need detail.
Where to go next
- The whole editor, tour-style: the mobile video editor guide.
- Cuts, joiners and transitions on the main row: add transitions between clips.
- Stack layers on purpose: picture-in-picture.
Three styles, one project format. Try Main track for a cut, Classic for a composite — and switch whenever the edit changes shape.
Frequently asked questions
Which timeline style should I use?
Main track if you mostly cut clips one after another — it behaves like the phone editors you already know and never leaves gaps. Classic if you layer freely, stack overlays, or want a clip to stay exactly where you put it. Compact when a layered edit needs more rows on screen at once.
Does switching the timeline style change my edit?
It changes how the rows behave, not your layers. Moving from Classic to Main track joins the videos on the main row end to end and closes any gaps; ExpoCut asks before it moves anything, and Undo puts everything back. Switching between Main track and Compact only changes row height.
How do I set the timeline style for every new project?
Open Settings ▸ Timeline and pick Classic, Main track or Compact under Timeline style for new projects. Existing projects keep their own style — change those from the transport strip in the editor.
Related guides
Pick the timeline that fits your edit
Free-form rows, a magnetic main track, or compact rows for layered edits — switch per project, set your default once.
Get ExpoCut Browse all guides