How to Edit Video on Your Phone (2026 Complete Guide)
You don’t need a laptop to make a video that looks professional. Everything — multi-track editing, effects, color grading, captions, even bulk automation — now runs on the phone in your pocket. This is the complete, no-jargon guide to editing video on mobile in 2026, with links to a hands-on walkthrough for every step.
Editing video on your phone used to mean trimming a clip and slapping on a song. Not anymore. In 2026 a mobile video editor is a full studio: multi-track timeline, dozens of effects and filters, real color grading, keyframe animation, on-device captions, and one-tap export for every platform. This guide walks through the whole craft — and links to a hands-on, screenshot-by-screenshot tutorial for each part.
Why edit video on your phone at all?
Because that’s where the footage already is, and that’s where it’s going. Your clips are shot on the phone; your audience watches on a phone. Editing in the same place removes every transfer step — no cables, no cloud round-trips, no “I’ll finish it on my laptop later.” For short-form social video, a good phone editor is simply faster end to end than a desktop suite.
The trade-off used to be power. That gap is gone. A modern editor like ExpoCut runs a true multi-track timeline, professional color tools, and 4K export entirely on-device — nothing is uploaded, and it works offline.
The one idea that makes editing click: a video is just layers stacked on a timeline. Footage is one layer, your title is another, music is another. You stack them, line them up in time, and the editor plays them together. Every feature below is just a richer version of that idea.
What you need to start
Almost nothing:
- A phone (iOS or Android) from the last few years.
- A clip or two — shot on your phone, or pulled from a built-in stock library.
- About ten minutes for your first video.
That’s it. No subscription to learn the basics, no plugins, no render farm.
The core workflow (six steps)
Every video — a quick story or a polished brand promo — is made with the same six-step loop:
- Add a clip to the timeline.
- Trim it to the good part.
- Title it so viewers know what they’re watching.
- Music to set the mood.
- Filter / color to make it feel intentional.
- Export and share.
We built an entire walkthrough around exactly this loop, with a real screenshot for every tap: How to Make Your First Video in ExpoCut. If you’re brand new, start there, then come back here to go deeper on each step.
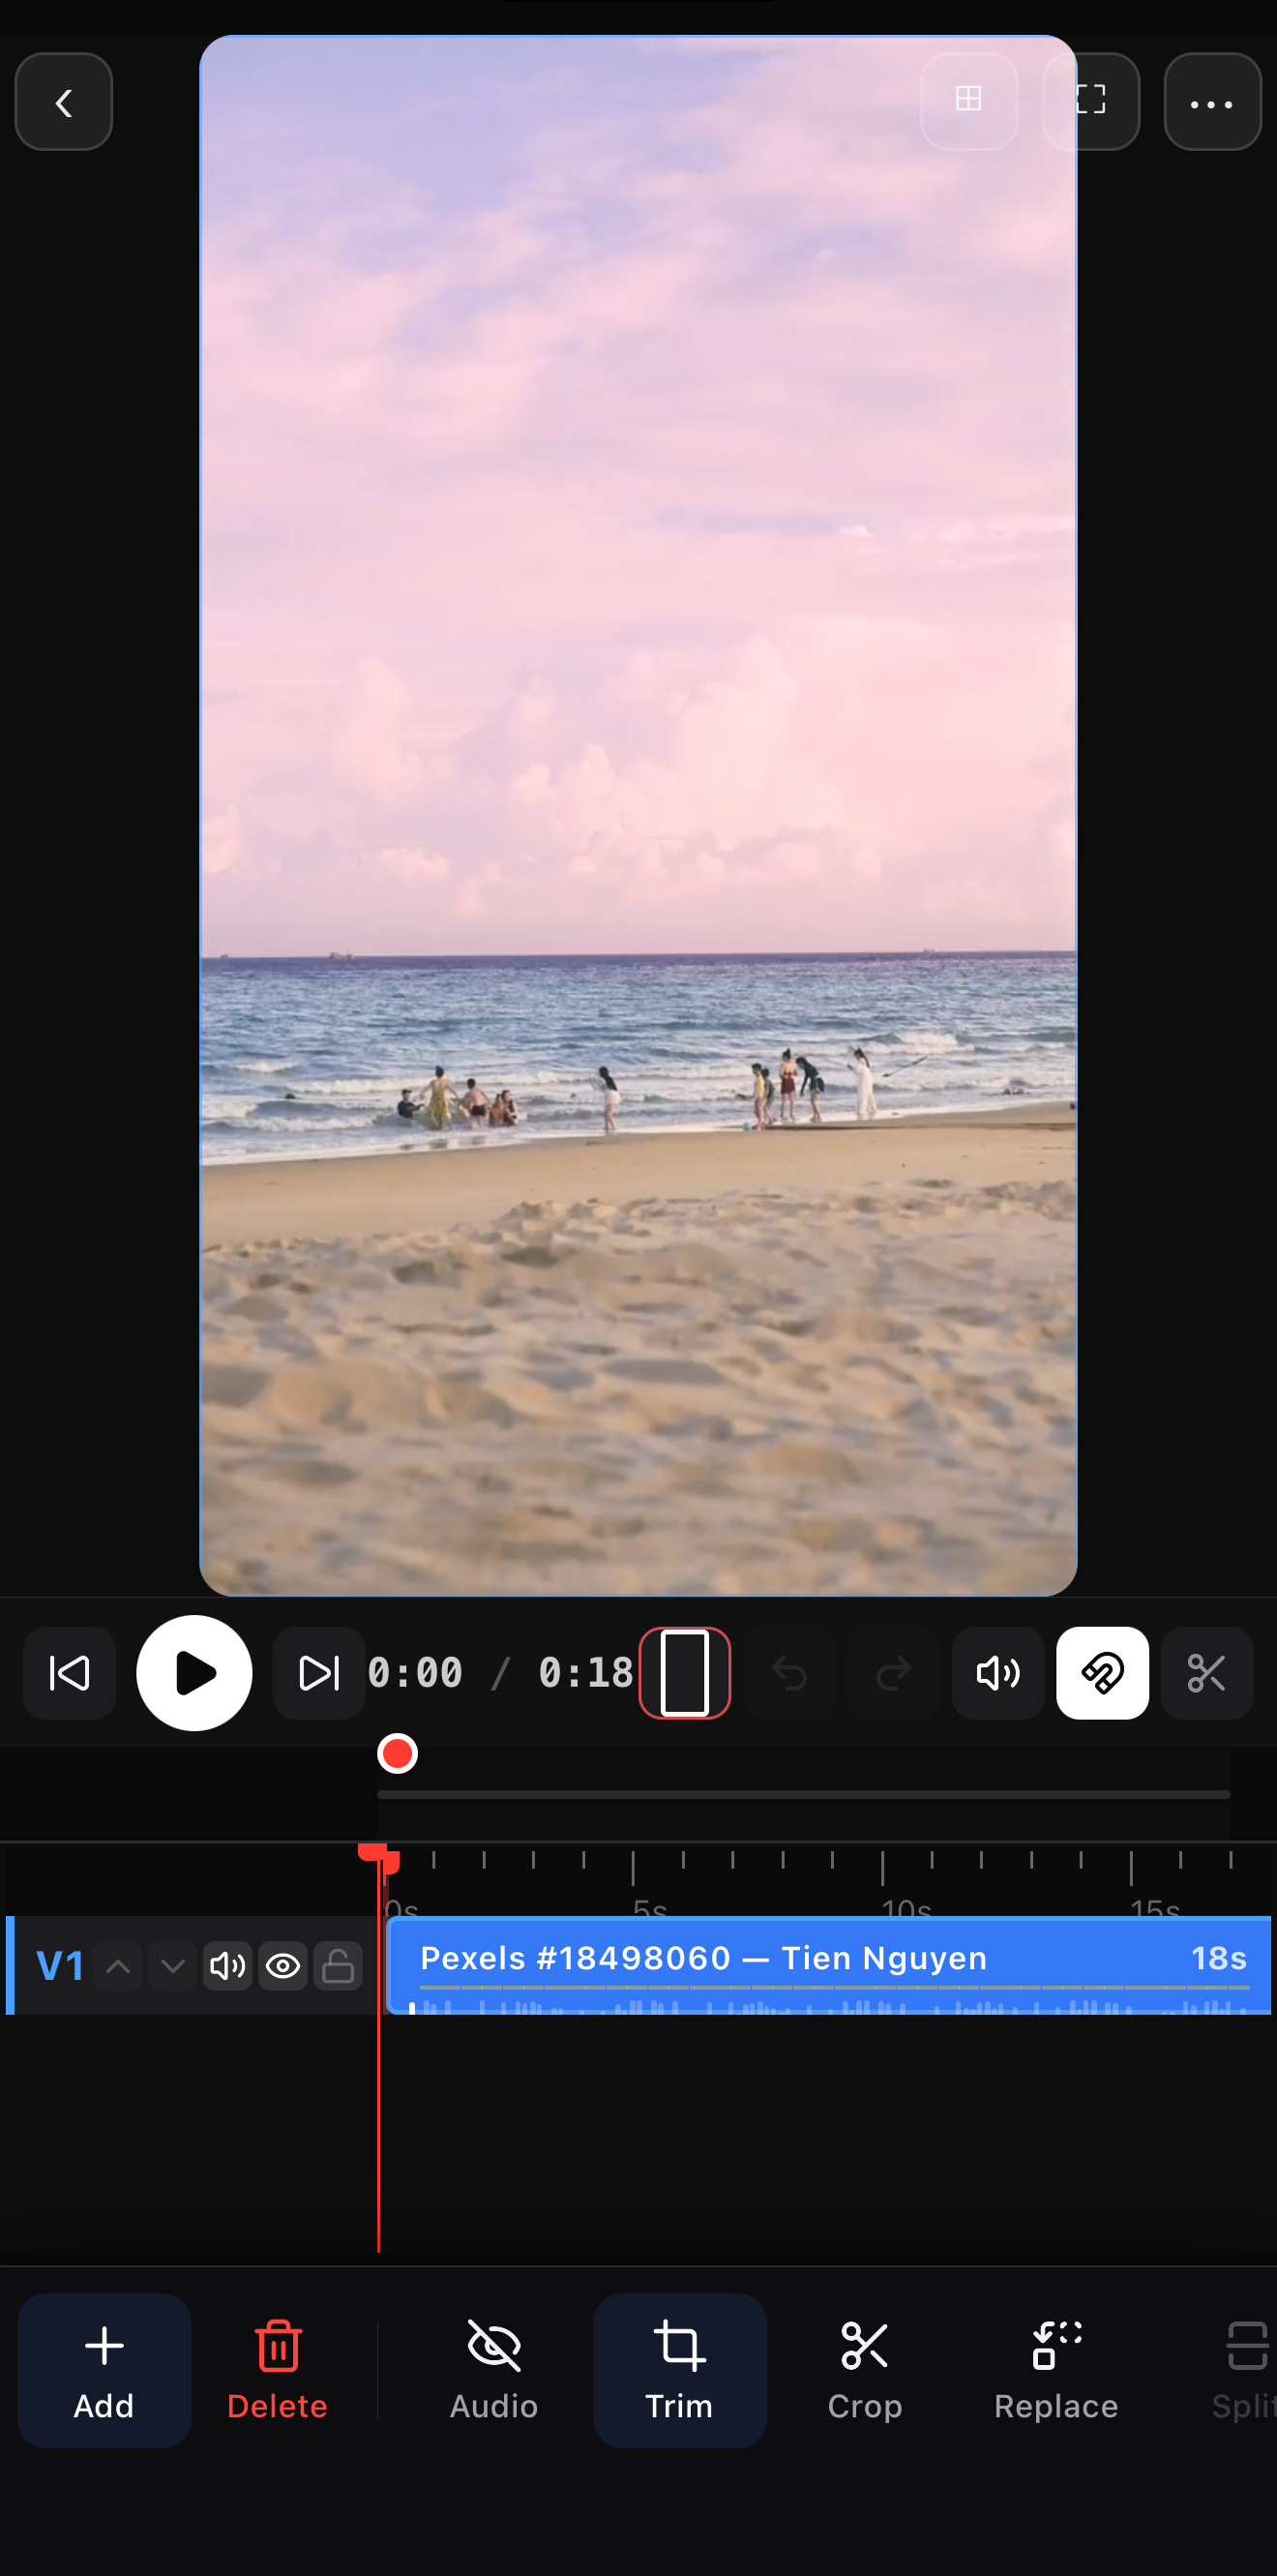
Layers & the timeline
The timeline is the heart of any mobile video editor. Each element — video, image, text, shape, audio — lives on its own track, stacked top to bottom. Higher tracks render in front. You drag clips left and right to control when they appear, and resize them to control how long.
Master three moves and you can build anything:
- Trim — drag a clip’s edge to shorten it.
- Split — cut a clip in two at the playhead (the scissors), then delete the part you don’t want.
- Layer — add a track above to put text, a logo, or a second video on top.
Effects & filters — the fun part
This is where a flat phone clip becomes something that looks made. There are two families worth knowing:
- Filters / looks remap your colors to a curated palette — film, Instagram-style, VSCO-style, cinematic, vintage. One tap changes the whole mood. Full walkthrough: How to Use Filters & LUTs.
- Effects add motion and texture — glitch, blur, light leaks, shake, zoom, speed ramps, shaders.
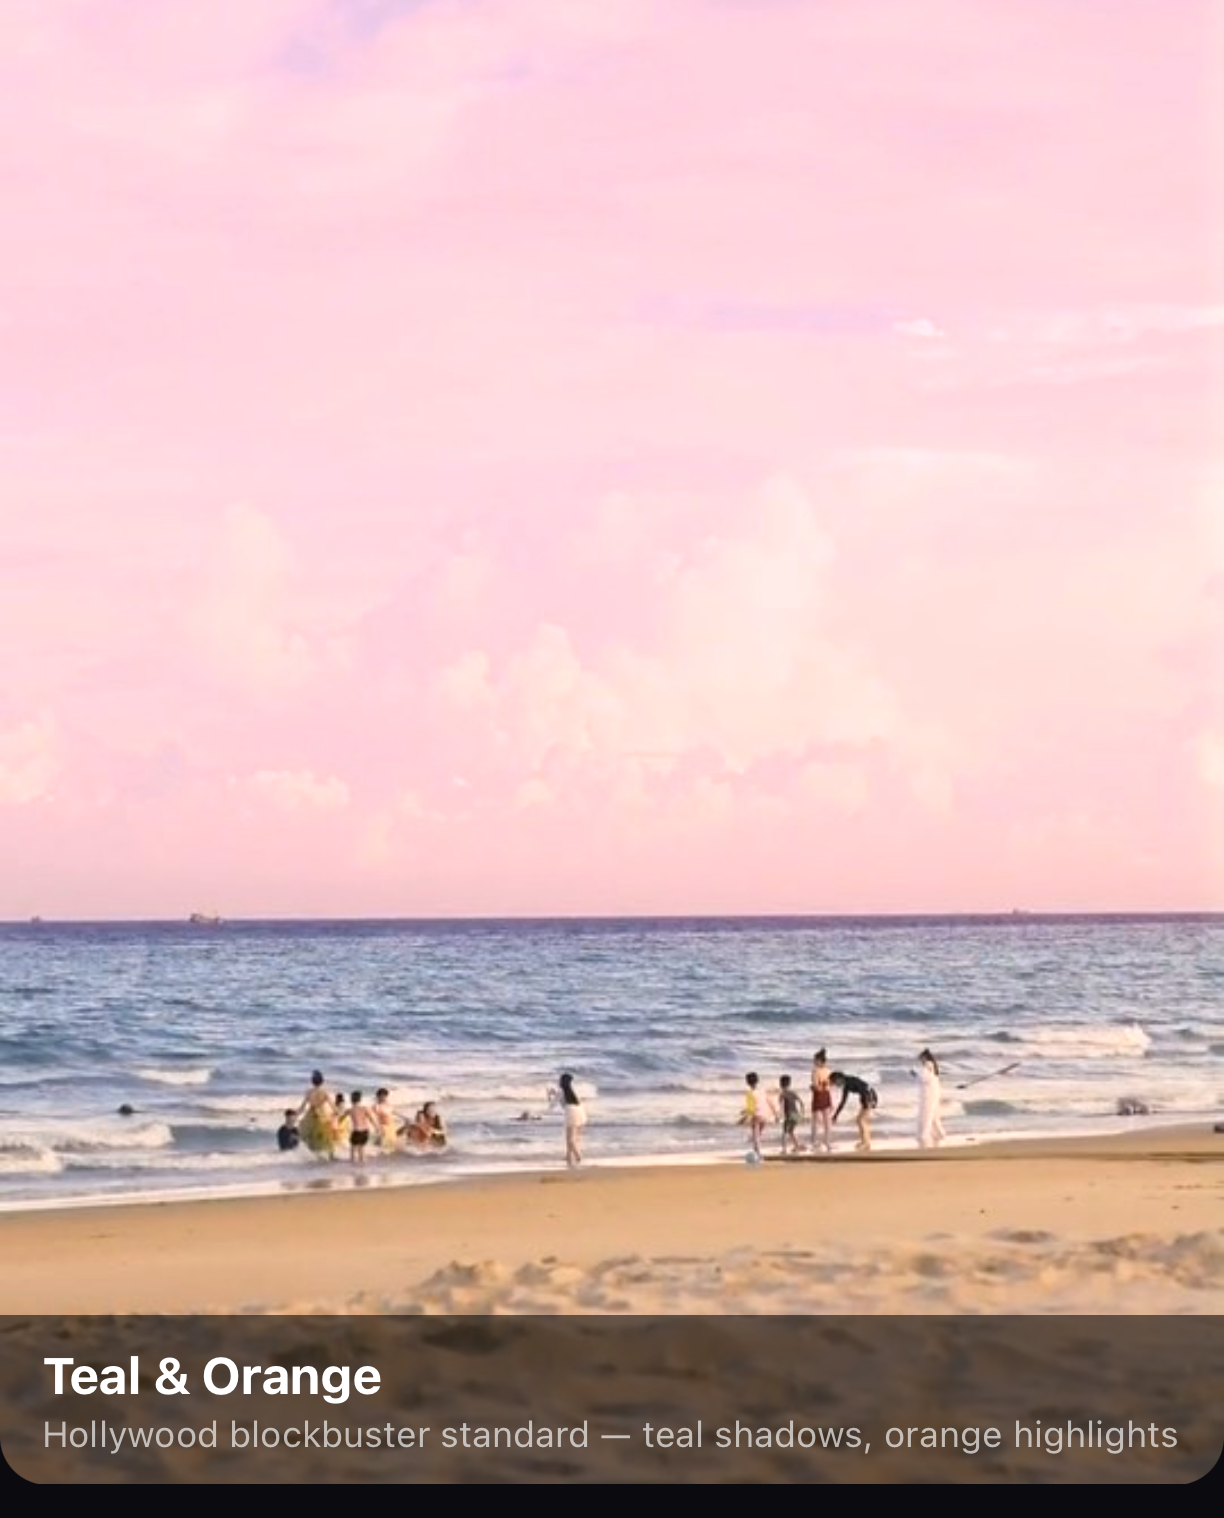
Subtle wins. Whatever effect or filter you pick, pull its intensity down to 40–70%. A maxed-out effect screams “filter”; a dialed-back one reads as grading. Consistency matters too — pick one look and use it on every clip so the whole video feels designed.
Text, titles & captions
A title in the first second tells viewers what they’re watching — the moment that decides whether they keep scrolling. On mobile you can add text as its own layer, animate it in (fade, typewriter, word-by-word), and style it with shadows, strokes and backdrops. Auto-captions — generated on-device, no upload — make your video watchable with the sound off, which is how most of social actually watches.
Audio
Music sets mood more than any single visual choice. Drop a track on its own audio layer beneath your video, line the beat up with your cut, and add a fade in and fade out so it eases in and out instead of cutting abruptly. Keep voice and music balanced — duck the music under any spoken word.
Color grading
Filters are the one-tap version of color; grading is the manual version. Exposure, contrast, saturation, white balance, and pro LUTs let you match shots, fix a flat phone profile, or build a signature look. You can even keyframe a grade so a clip blooms from flat to cinematic over a few seconds.
Transitions
Cuts are clean; transitions are flavor. Swipe, liquid, tile and shader transitions bridge two clips with motion. Use them sparingly — a hard cut on the beat is often stronger than a fancy wipe.
Templates & automation — make many videos fast
Here’s where mobile editing leaps ahead of “just trimming clips.” Save any finished video as a reusable template, then swap in new footage and text to produce a whole series with a consistent look. Push it further and you reach video automation — generating many videos from a template plus data (a spreadsheet, a product feed), or driving the editor with an AI assistant.
That’s a deep topic with its own guide: Automate Video Rendering with the ExpoCut MCP & Render Engine, and the .ectpl template format that makes it possible. If you build at scale, also see the MCP reference and Skills.
Exporting for every platform
The payoff. A good editor exports a clean file (no watermark) and lets you choose:
| Setting | Pick this for social |
|---|---|
| Resolution | 1080p — crisp, fast to upload, supported everywhere (step up to 4K only when needed) |
| Aspect ratio | 9:16 for TikTok / Reels / Shorts, 1:1 for feed, 16:9 for YouTube |
| Format | MP4 (H.264) for maximum compatibility |
| Frame rate | 30 fps for most social; 24 for a filmic feel; 60 for motion |
| Quality | High |
Then post. Because nothing was uploaded during editing, your footage never left the device until you chose to share it.
Where to go next
You now have the map. Pick the thread that matches your next video:
- Total beginner? Do the first-video walkthrough — ten minutes, start to export.
- Want it to look cinematic? Go deep on filters & looks.
- Making lots of videos? Learn video automation and templates.
Editing on your phone isn’t the compromise it used to be. For social video, it’s the best tool for the job — and it’s already in your hand.
Frequently asked questions
Can you really edit professional video on a phone?
Yes. A modern mobile video editor gives you a full multi-track timeline, effects, color grading, keyframe animation, audio mixing and 4K export — the same building blocks as desktop software, designed for a touchscreen. For social video especially, editing on your phone is now faster than on a laptop because the footage already lives there.
What is the best mobile video editor in 2026?
The best editor is the one that matches your goal. For quick social clips, look for sensible defaults, captions and one-tap effects. For serious work, you want true multi-track layers, real color grading and high-bitrate export. ExpoCut is built to do both — beginner-simple on the surface, with pro depth (multi-track, LUTs, keyframes, automation) underneath — and it runs fully on-device.
How do I edit a video for Instagram or TikTok on my phone?
Start a project in a 9:16 (vertical) aspect ratio, add your clip, trim it tight, drop on a title and music, add a filter, and export at 1080p. Vertical, short and captioned is what performs. Our step-by-step first-video walkthrough covers the exact taps.
Do mobile editors add a watermark?
Some free editors do. A good editor exports a clean file with no watermark and lets you choose resolution, format and frame rate. Always check the export screen before you post.
Edit your next video on your phone
A full multi-track studio — effects, color, captions and 4K export — running entirely on-device. Start your first project in minutes.
Get ExpoCut Browse all guides