Light & Grade Regions: Power Windows on Your Phone
Every colourist’s first real trick is the power window: darken the sky, lift the face, warm the lamp — without touching the rest of the frame. ExpoCut’s Light Studio is that tool. Here’s how to build regions, stack them, and keep them looking like light rather than a cut-out.
Quick answer
In ExpoCut, select a layer, tap the pencil (Edit) and swipe the toolbar to Light to open Light Studio. Tap + Add region, then on the Scope tab choose the shape — Area (rectangle), Gradient (a line with soft falloff), Radial (an oval), Object (drawn) or Trident — and raise Feather so the edge reads as light. On the Light tab set that region’s own Exposure, Contrast, Highlights, Shadows, Blacks, Vibrance, Saturation; on Look scope a filter or LUT to the region. Tap + Region to stack more, Compare to toggle everything off, Copy/Paste to reuse a region set on another layer, and Done.
- Light lives on the Edit toolbar (between Graph and Crop) and opens a full-screen studio with a live preview.
- Scope shapes: Area, Gradient, Radial, Object, Trident — Feather (px) is what makes a region read as lighting.
- Each region has its own tone stack (Exposure → Saturation) and its own Look (filter / LUT).
- Stack regions: a gradient to tame a window, a radial to lift a face, a drawn object for a lamp.
- Copy/Paste carries a whole region set to another clip; Capture keyframe animates a region over time.
A global grade is a blunt instrument. The frame usually has one thing too bright and one thing too dark, and they’re in different places. Light Studio lets you treat them separately — a region for each, feathered so the eye reads light, not mask.
Where it lives
Select a video or image layer, tap the pencil (Edit) and swipe the transform toolbar to Light (between Graph and Crop). Light Studio opens full-screen with a live preview and a Compare button on the frame.
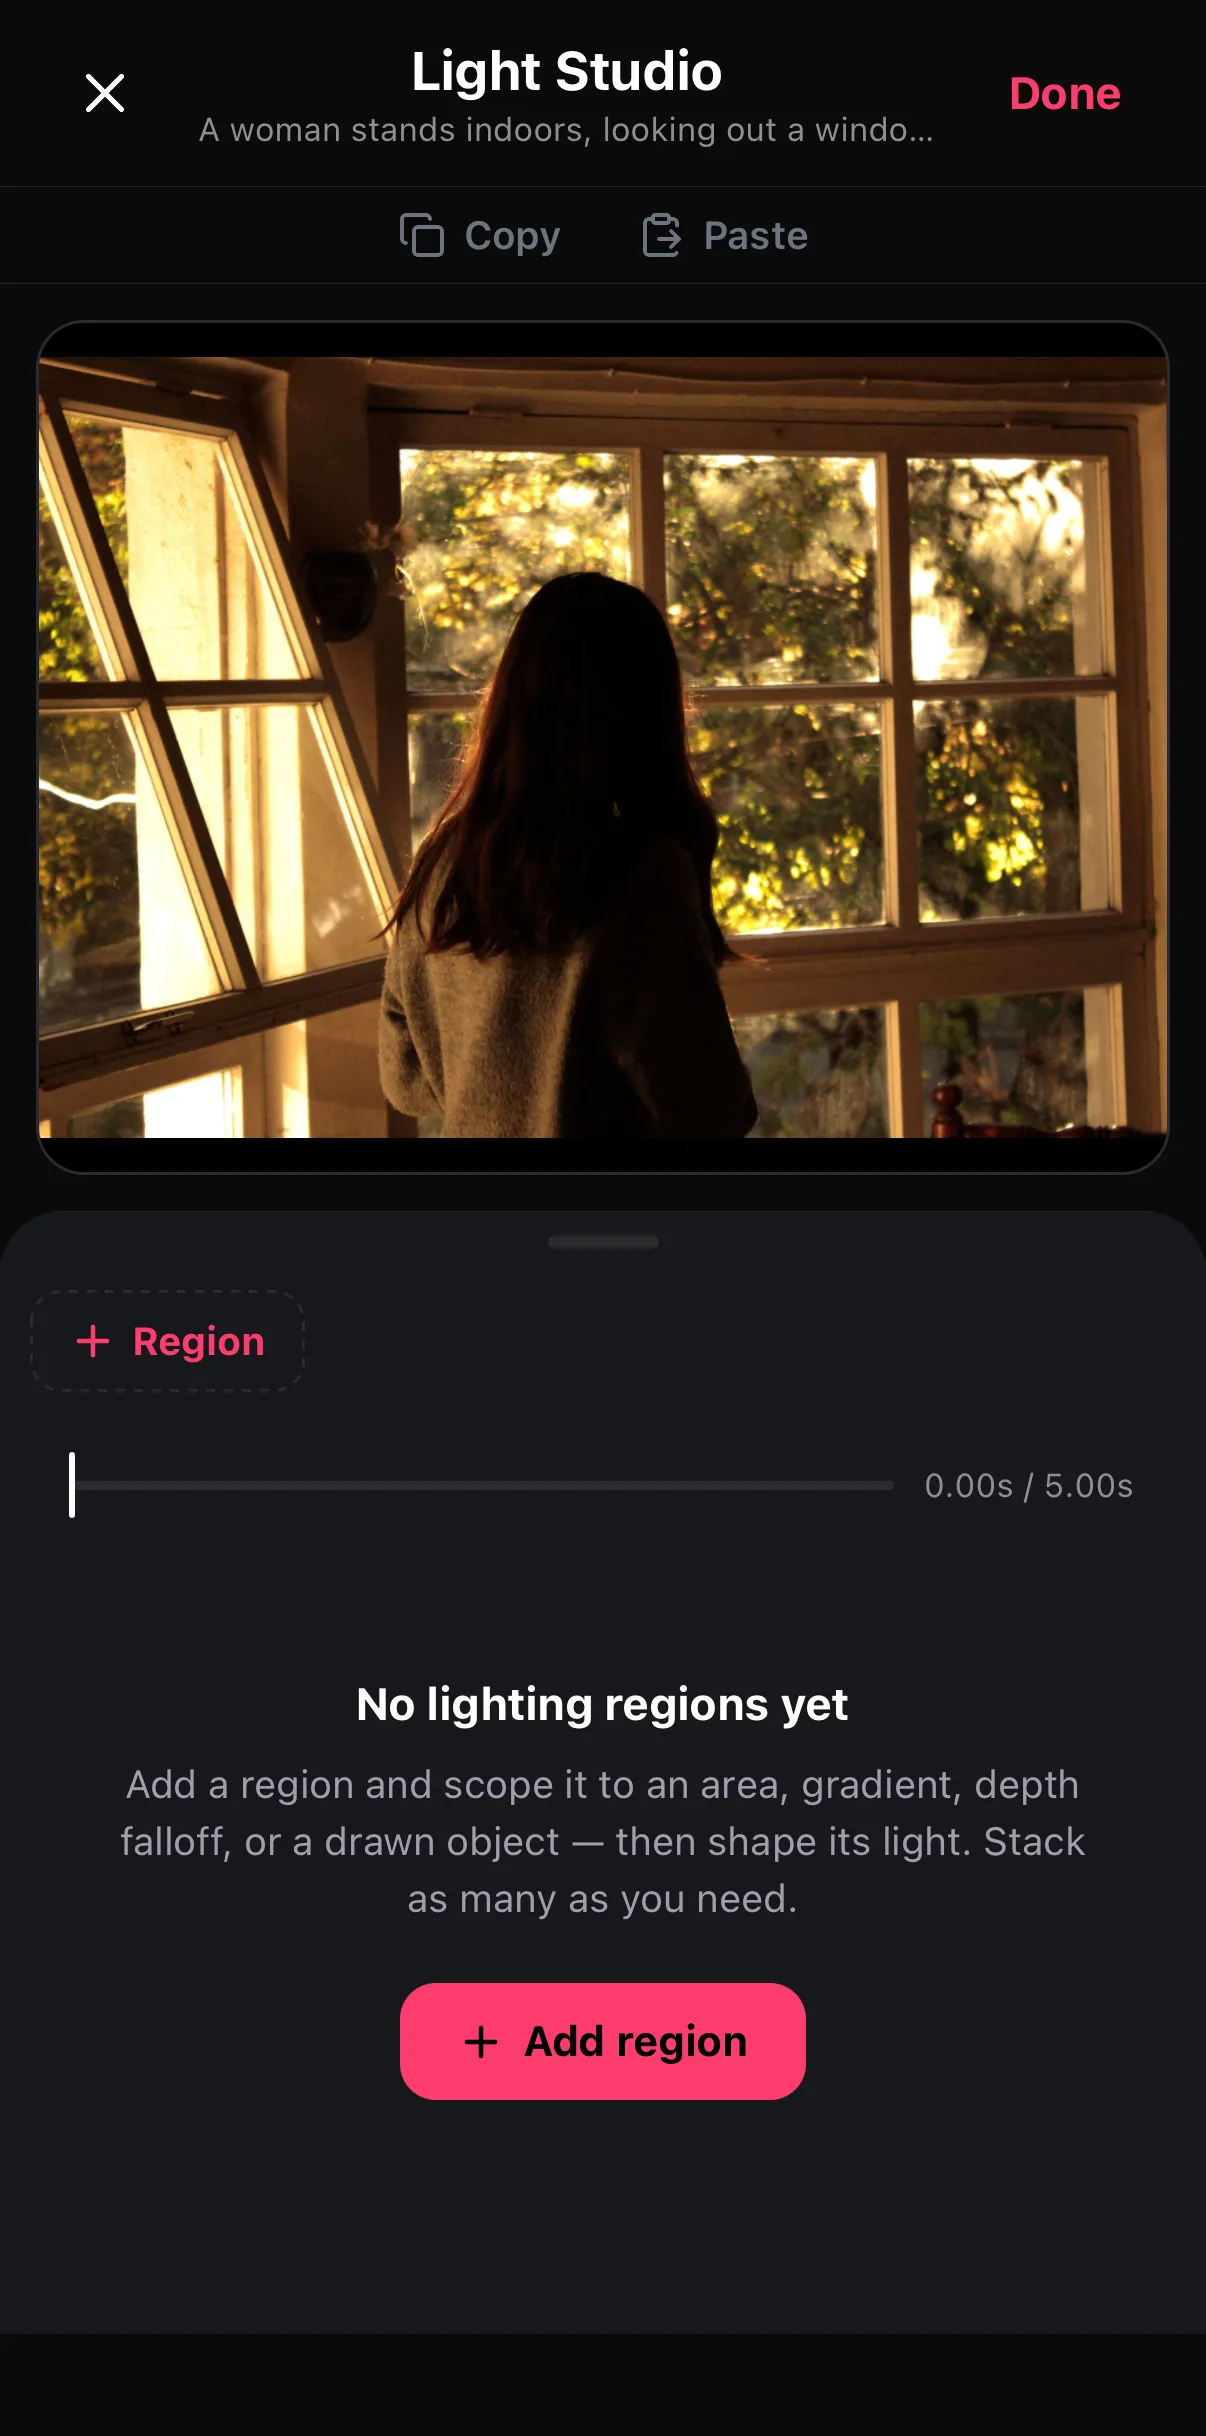 Copy / Paste a region set between layers
+ Add region
Copy / Paste a region set between layers
+ Add region
Step 1 — Add a region and shape it (Scope)
Tap + Add region
A region appears with handles on the preview and a chip in the strip above the tabs.
Choose a Scope
Area (rectangle), Gradient (a line — everything past it, fading over the feather), Radial (an oval), Object (a drawn shape) or Trident (a three-way split).
Raise Feather
Higher feather = softer edge. 60–120 px reads as light; below 20 reads as a cut-out.
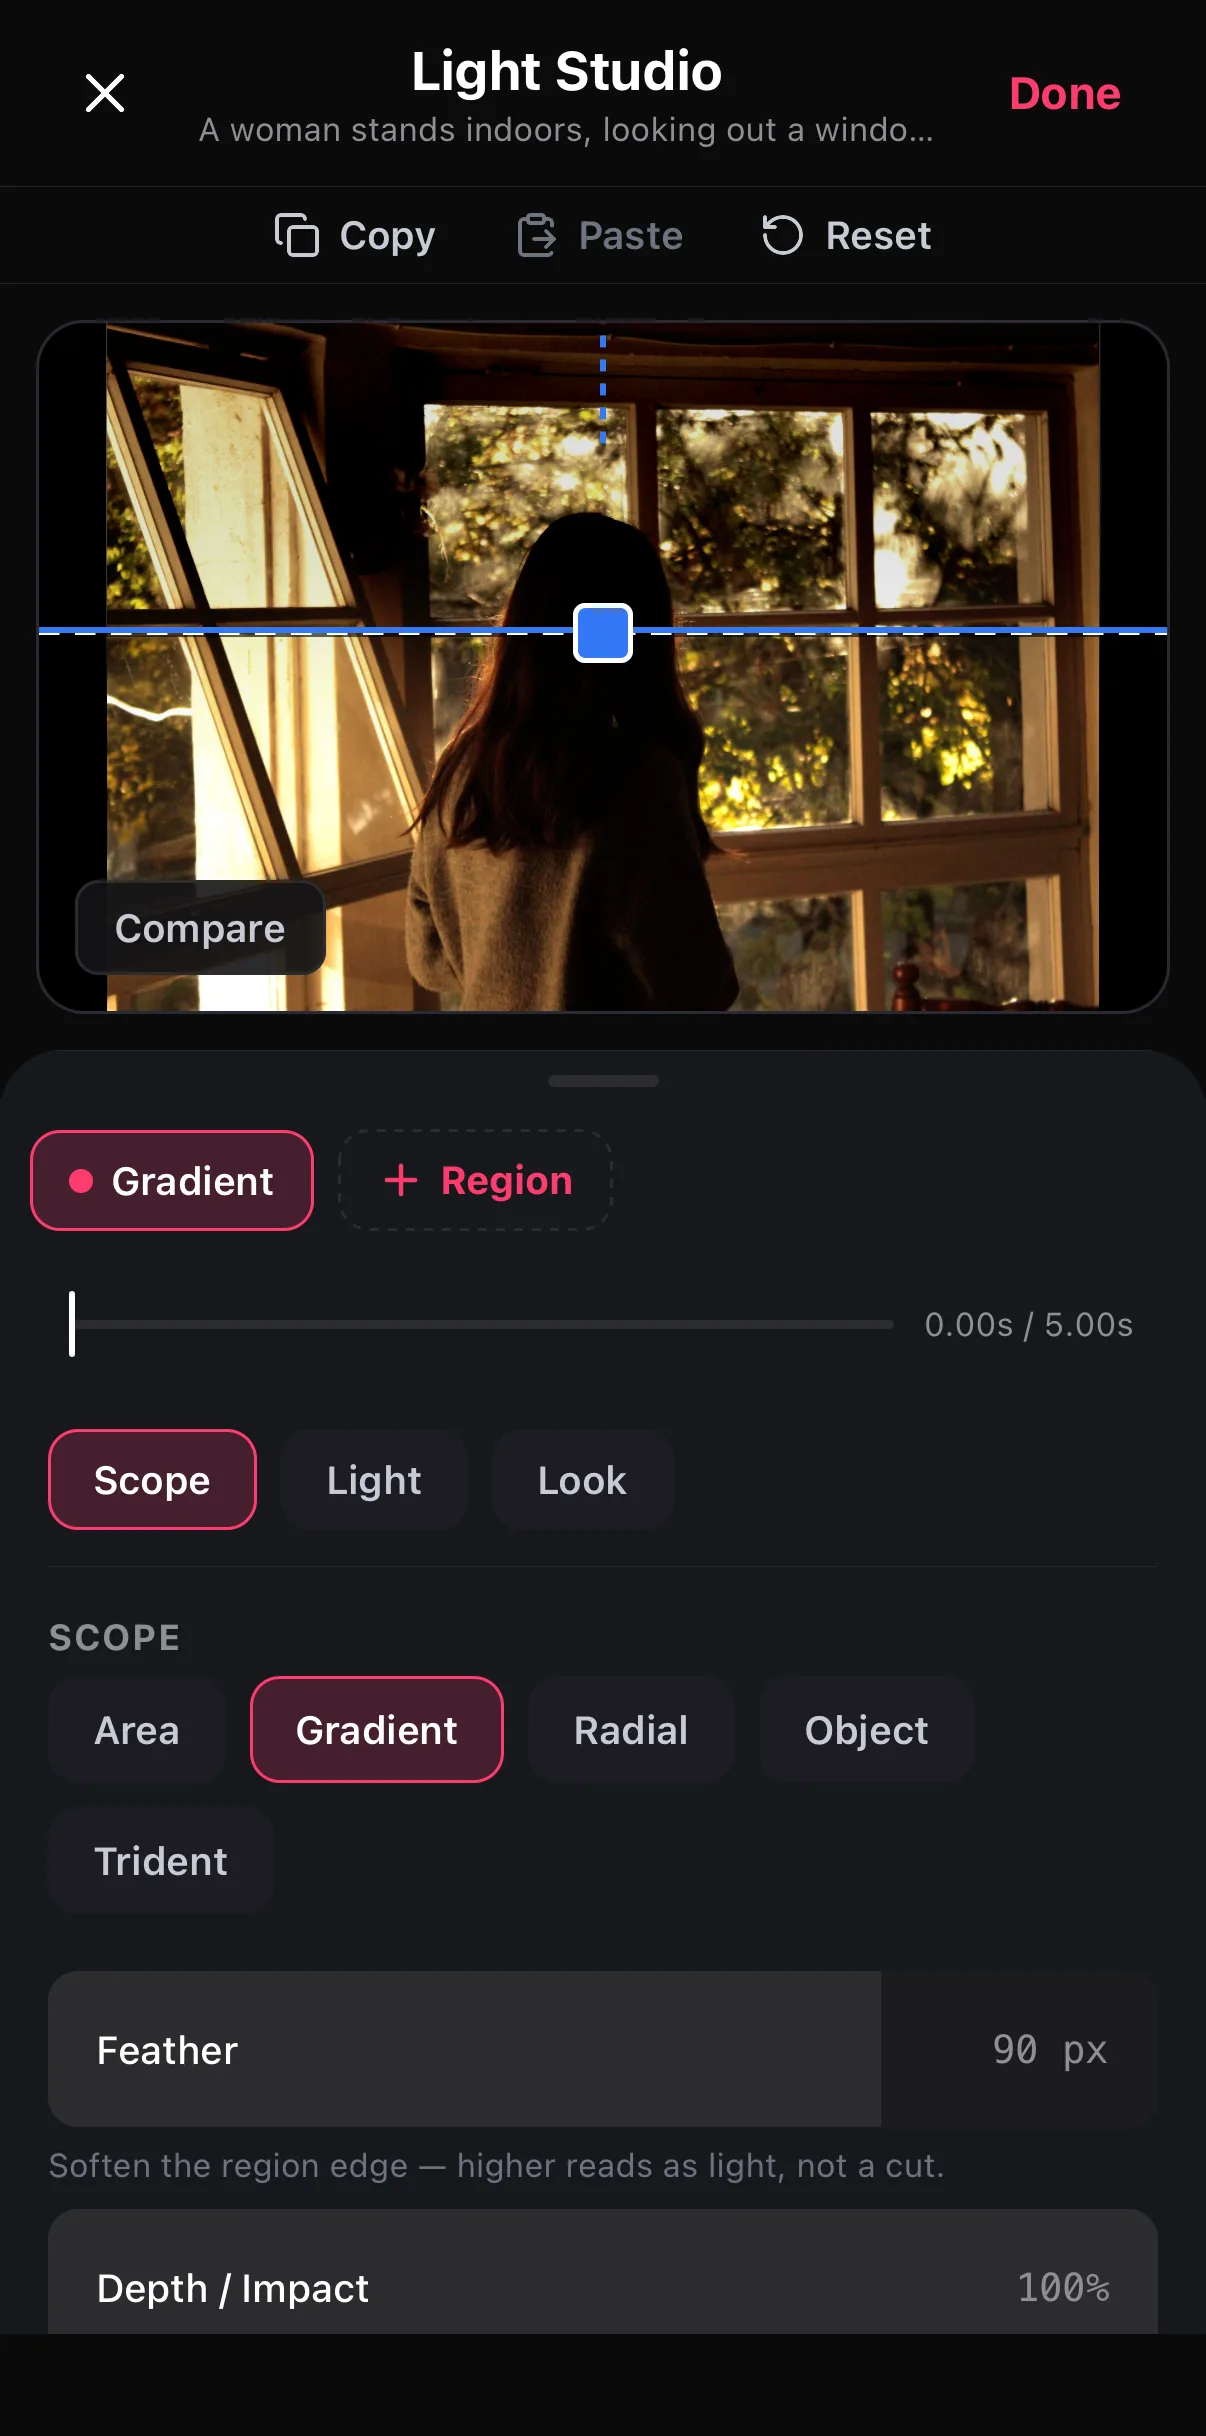 Gradient line — drag the handle to move it
Scope · Light · Look
Area · Gradient · Radial · Object · Trident
Feather — higher reads as light, not a cut
Gradient line — drag the handle to move it
Scope · Light · Look
Area · Gradient · Radial · Object · Trident
Feather — higher reads as light, not a cut
Step 2 — Set the region’s light
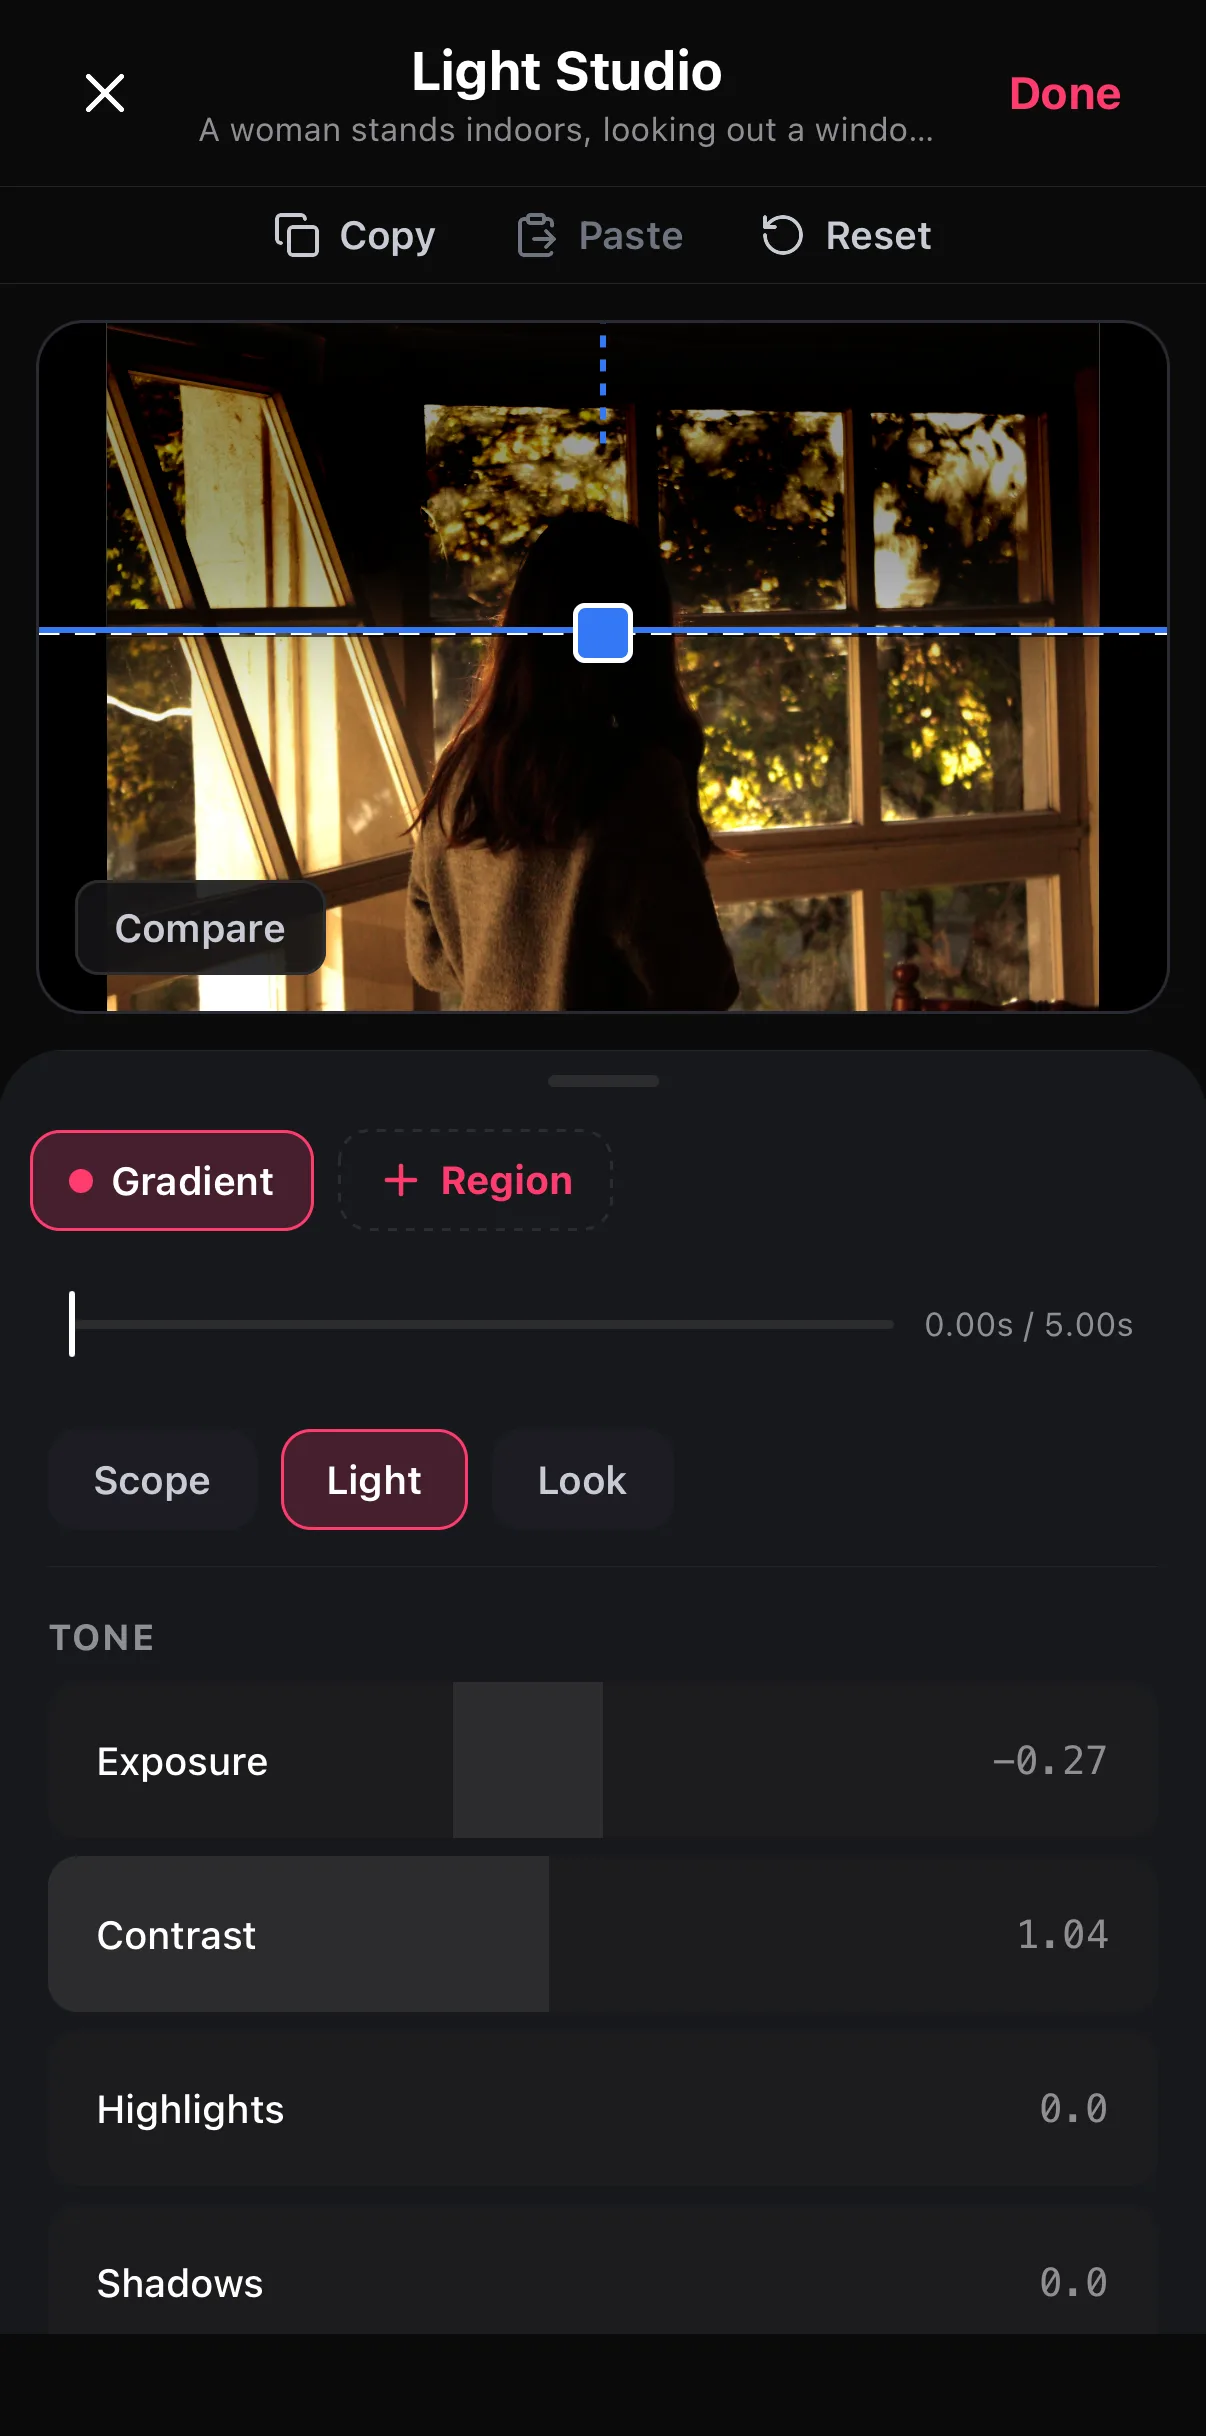 Exposure −0.27 on the gradient
Contrast · Highlights · Shadows…
Exposure −0.27 on the gradient
Contrast · Highlights · Shadows…
Each row is a scrubber: drag left or right on it. Scroll down for Capture keyframe (animate the region — a sun that moves) and Delete region.
Step 3 — Stack a second region
Tap + Region and shape it differently. A Radial over the subject with Shadows lifted is the classic face light; a small Object region traced around a lamp can be warmed with a Look.
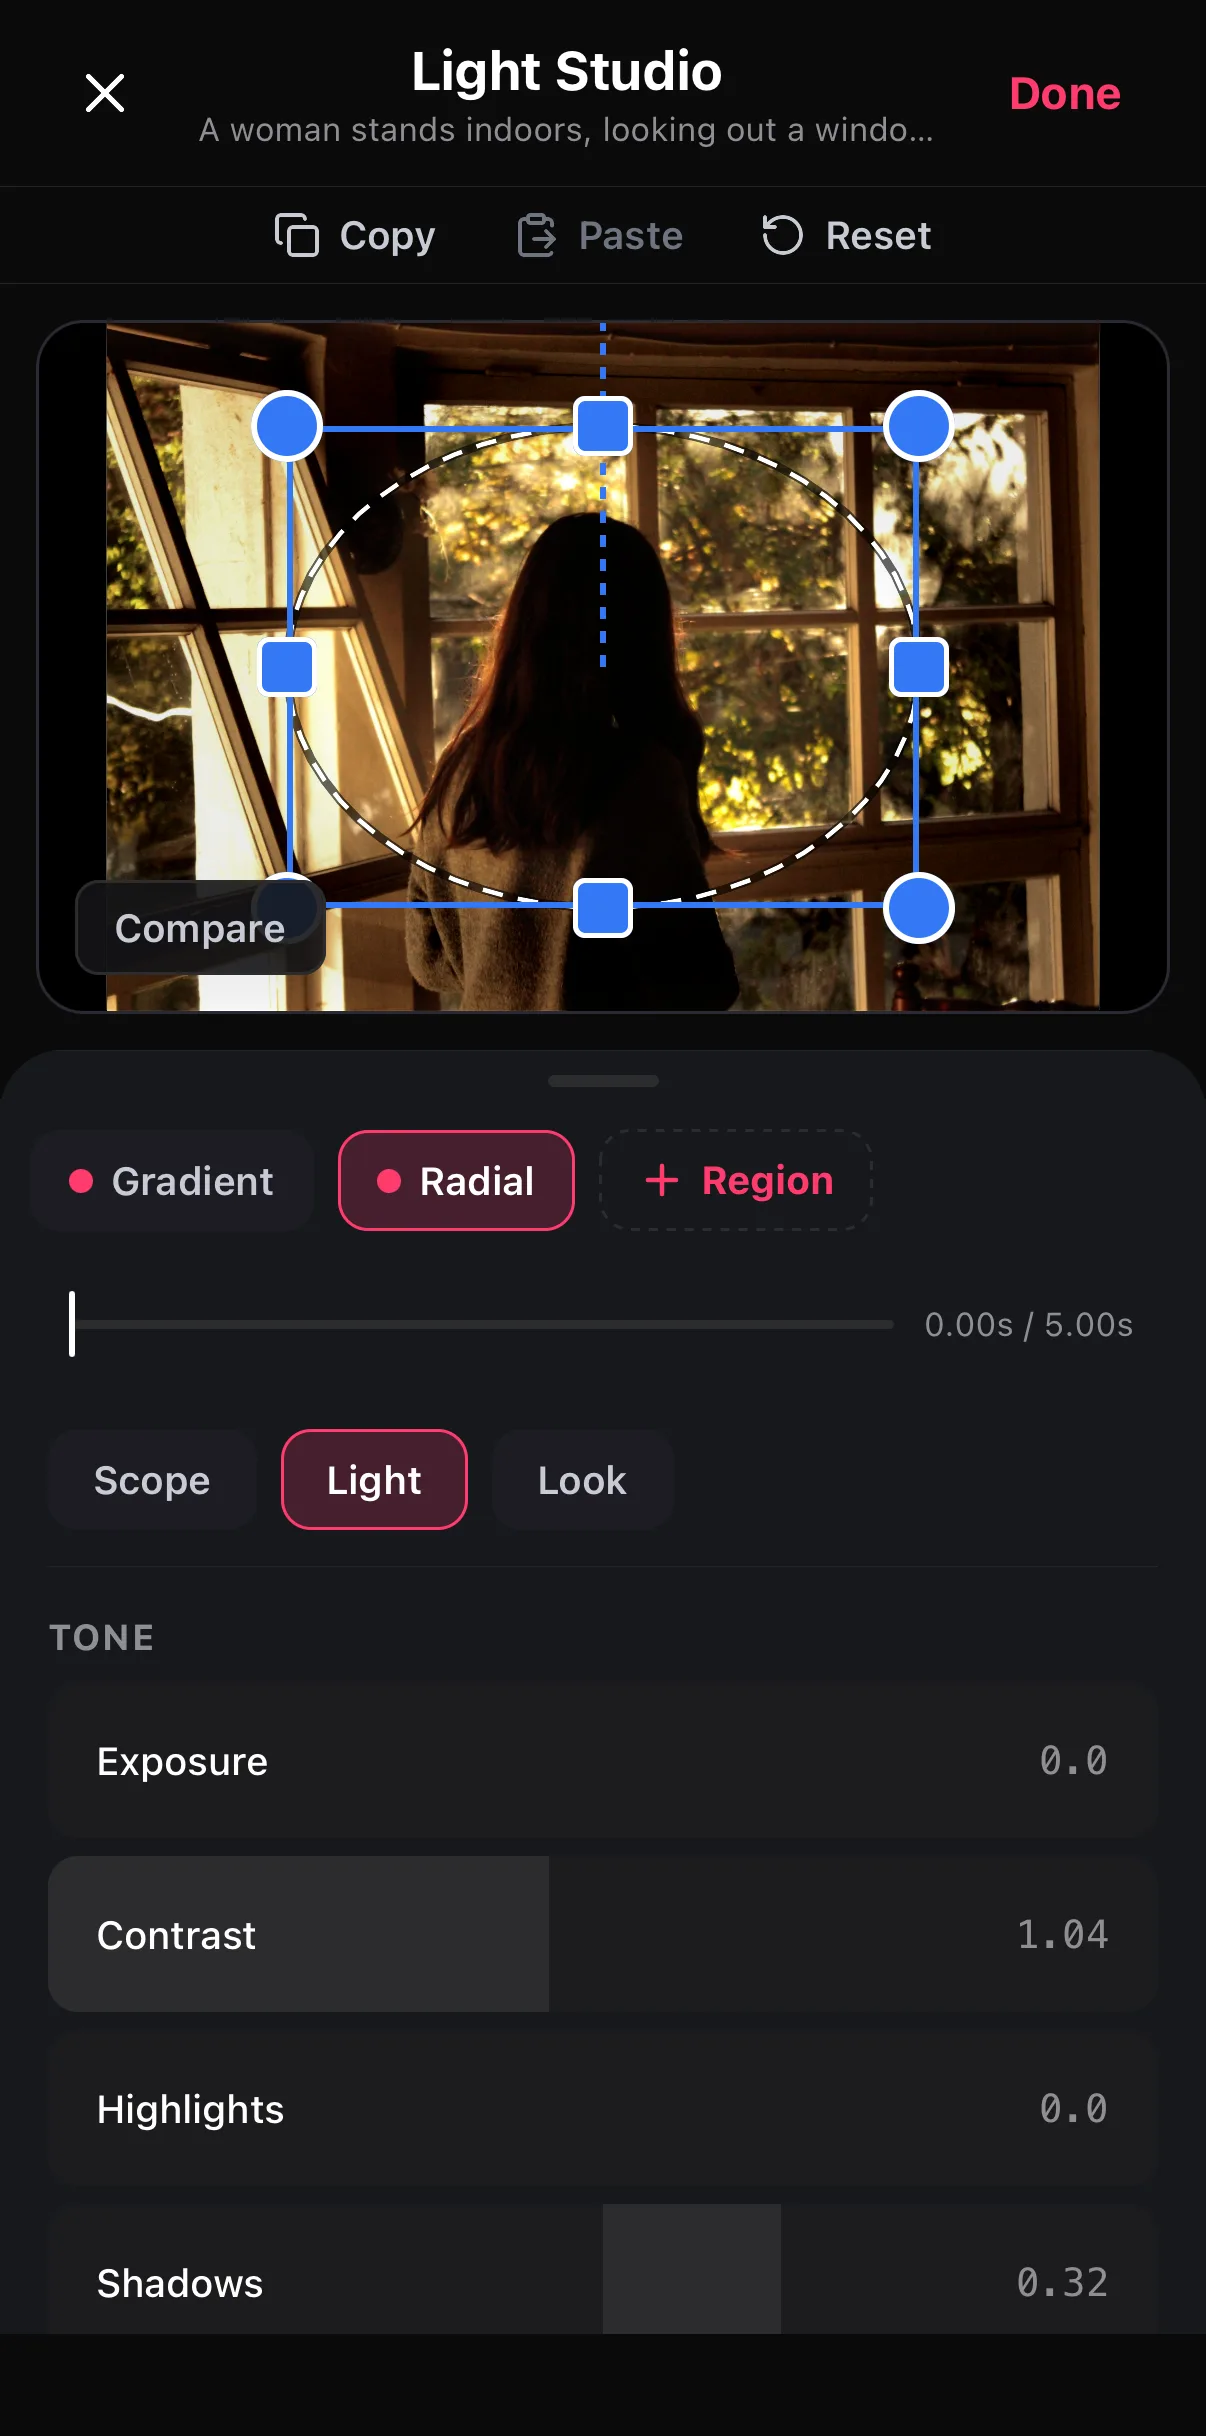 Two regions stacked
Radial over the subject
Shadows +0.32
Two regions stacked
Radial over the subject
Shadows +0.32
Step 4 — Give a region its own look
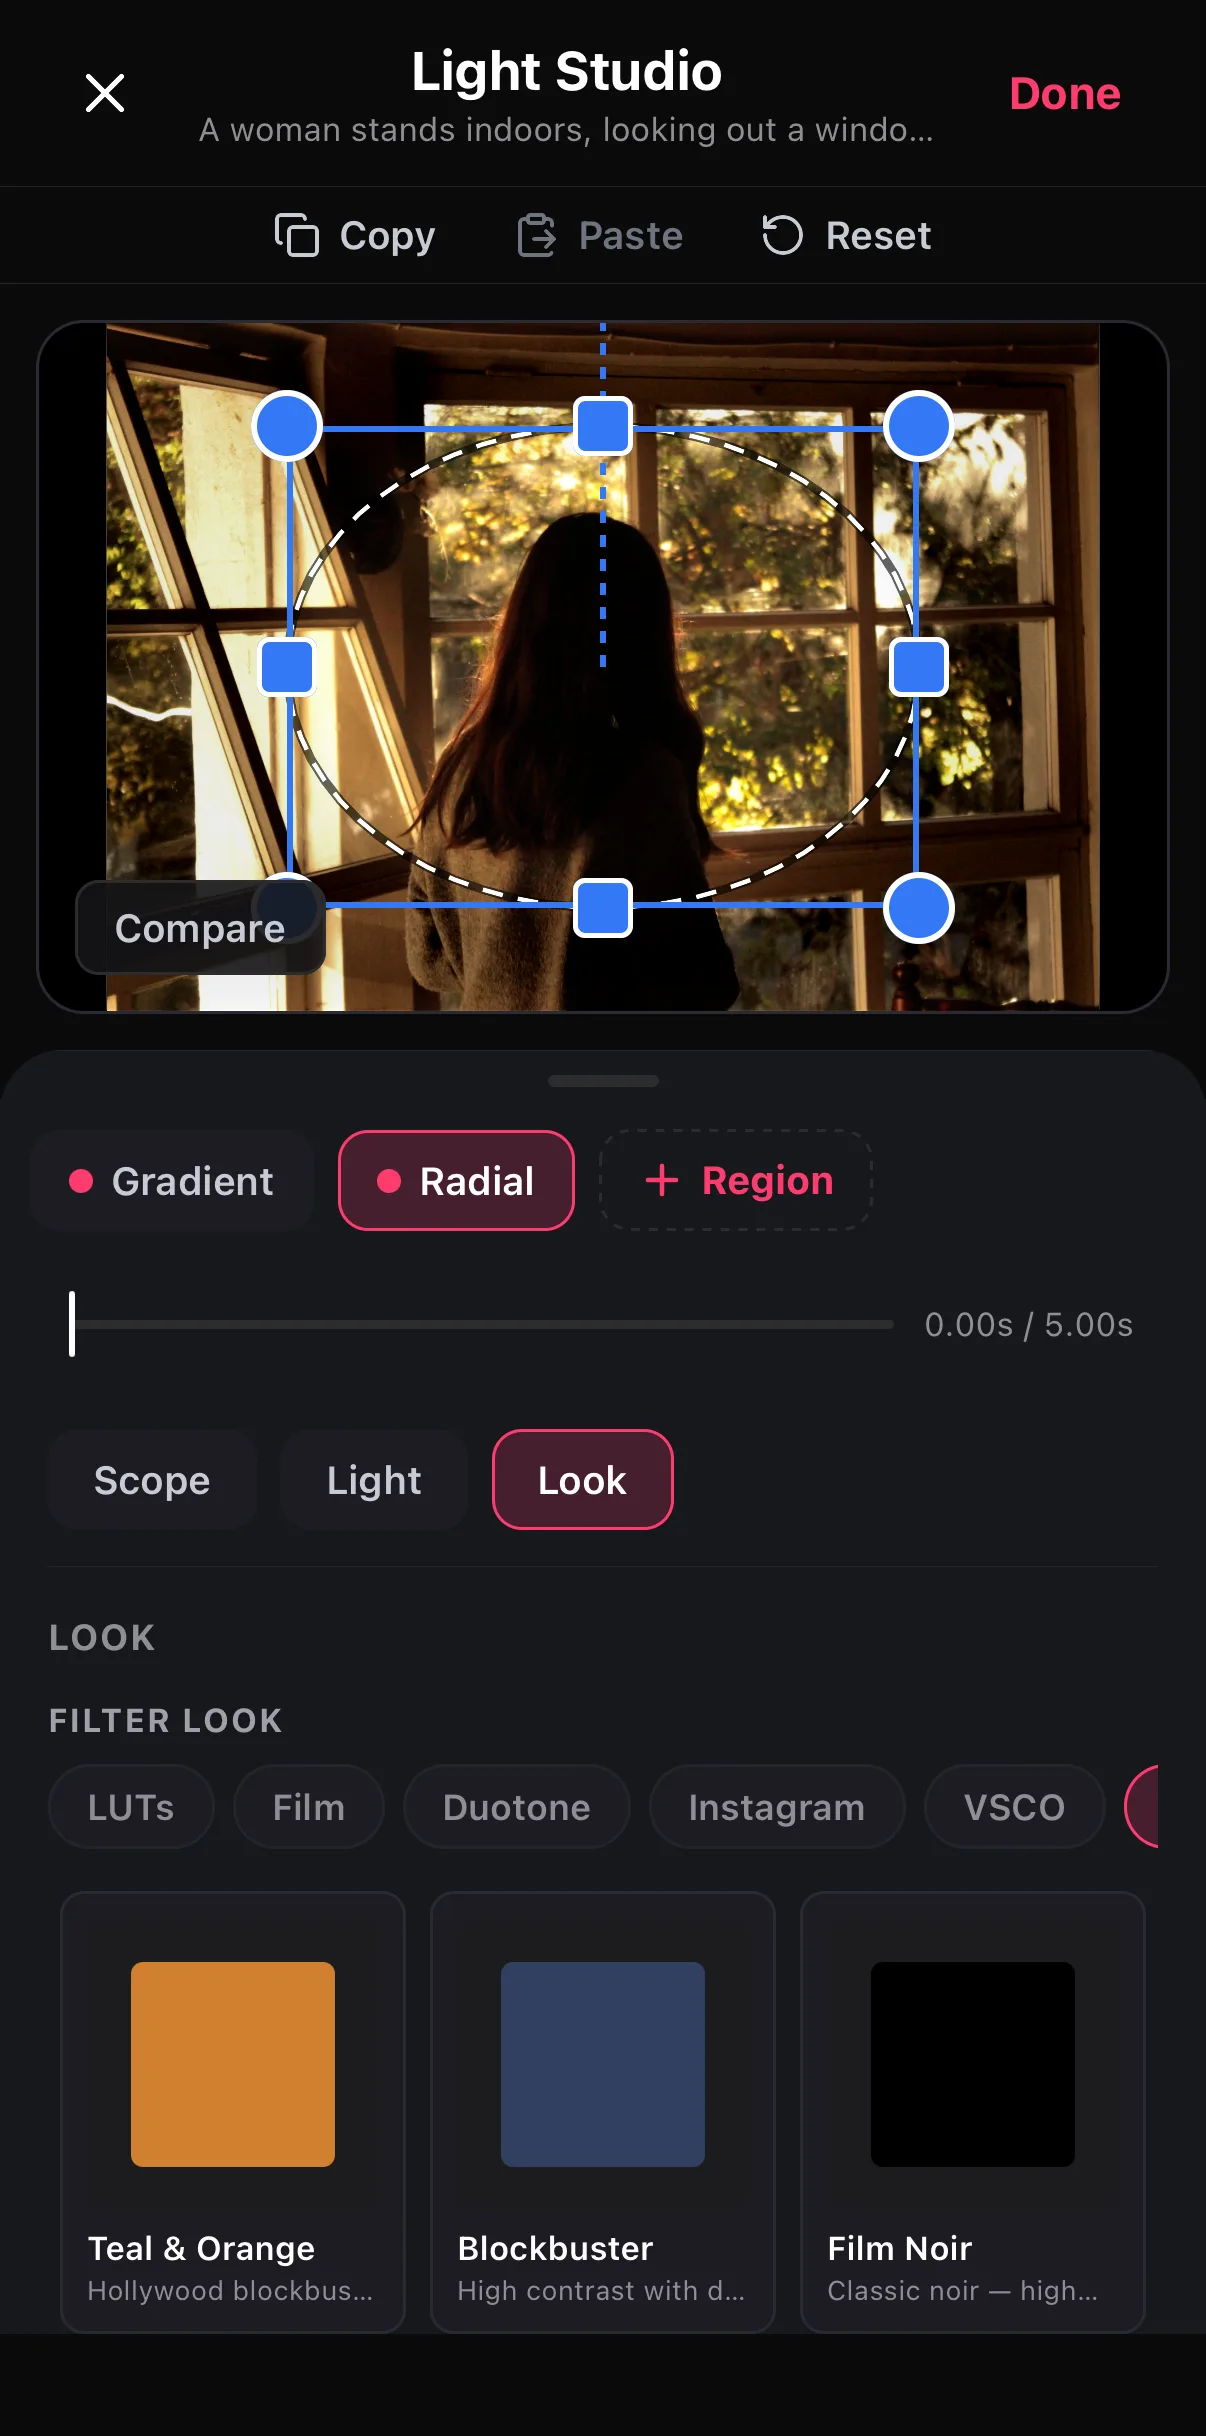 LUTs · Film · Duotone · Instagram · VSCO…
A look scoped to this region only
LUTs · Film · Duotone · Instagram · VSCO…
A look scoped to this region only
Feather first, then judge. Every “that looks fake” region is an under-feathered one. Set Feather before you touch the tone rows, and toggle Compare with the region selected to see exactly what it’s doing.
Recipes
- Window taming: Gradient from the bright side, Exposure −0.3, Highlights −0.2, Feather 90.
- Face lift: Radial on the face, Shadows +0.3, Vibrance +0.1, Feather 100.
- Lamp warmth: Object drawn round the lamp, Look ▸ Film ▸ a warm preset, Depth 70 %.
- Vignette that isn’t a vignette: Radial covering the centre, then Exposure −0.4 — everything outside the oval darkens.
Where to go next
- The global tools that pair with regions: colour grading on your phone.
- Portable looks for the Look tab: how to use LUTs.
- Hard-edged masks instead of soft light: shapes, masks & overlays.
Shape it, feather it, light it — one region at a time, until the frame looks the way the room felt.
Frequently asked questions
What is a power window in colour grading?
A shaped mask that limits a grade to part of the frame — an oval on a face, a gradient over a sky — with a soft edge so the change reads as light. In ExpoCut it's a Light Studio region: pick a Scope shape, feather the edge, and adjust that region's tone or look.
How do I brighten just a face in a video?
Select the clip, tap Edit ▸ Light ▸ + Add region, choose Radial on the Scope tab and drag the oval over the face. On the Light tab raise Shadows or Exposure a little, and set Feather high so there's no visible edge. Tap Done.
Can a region have a different filter from the rest of the frame?
Yes. Each region's Look tab holds the same filter library as the Filters tool — LUTs, Film, Duotone, Instagram, VSCO and more — applied only inside that region. A Teal & Orange window over the subject with a neutral background is a classic use.
Related guides
Grade the part that matters
Shaped light regions with their own exposure, contrast and look — stackable, keyframeable, on-device.
Get ExpoCut Browse all guides