How to Use & Import LUTs (.cube) on Your Phone
A LUT is a one-tap color recipe the pros use to lock a consistent look across an entire project. ExpoCut ships a library of them and lets you import your own .cube files. Here’s how to use them well.
A LUT is the color world’s copy-paste: a precise recipe that turns flat footage into a film look, identically, across every clip. ExpoCut gives you a built-in library and lets you import your own .cube files — so the same grade your favorite creator uses can be one tap on your phone.
Filter vs. LUT — what’s the difference?
Both apply a look with one tap and both have an intensity slider. The difference is precision and source:
- Filters — curated presets, great for fast vibe-setting (see the filters guide).
- LUTs — exact color mappings, often exported from pro grading tools. Use them when you need a specific, repeatable look, or to match a studio grade.
Step 1 — Apply a built-in LUT
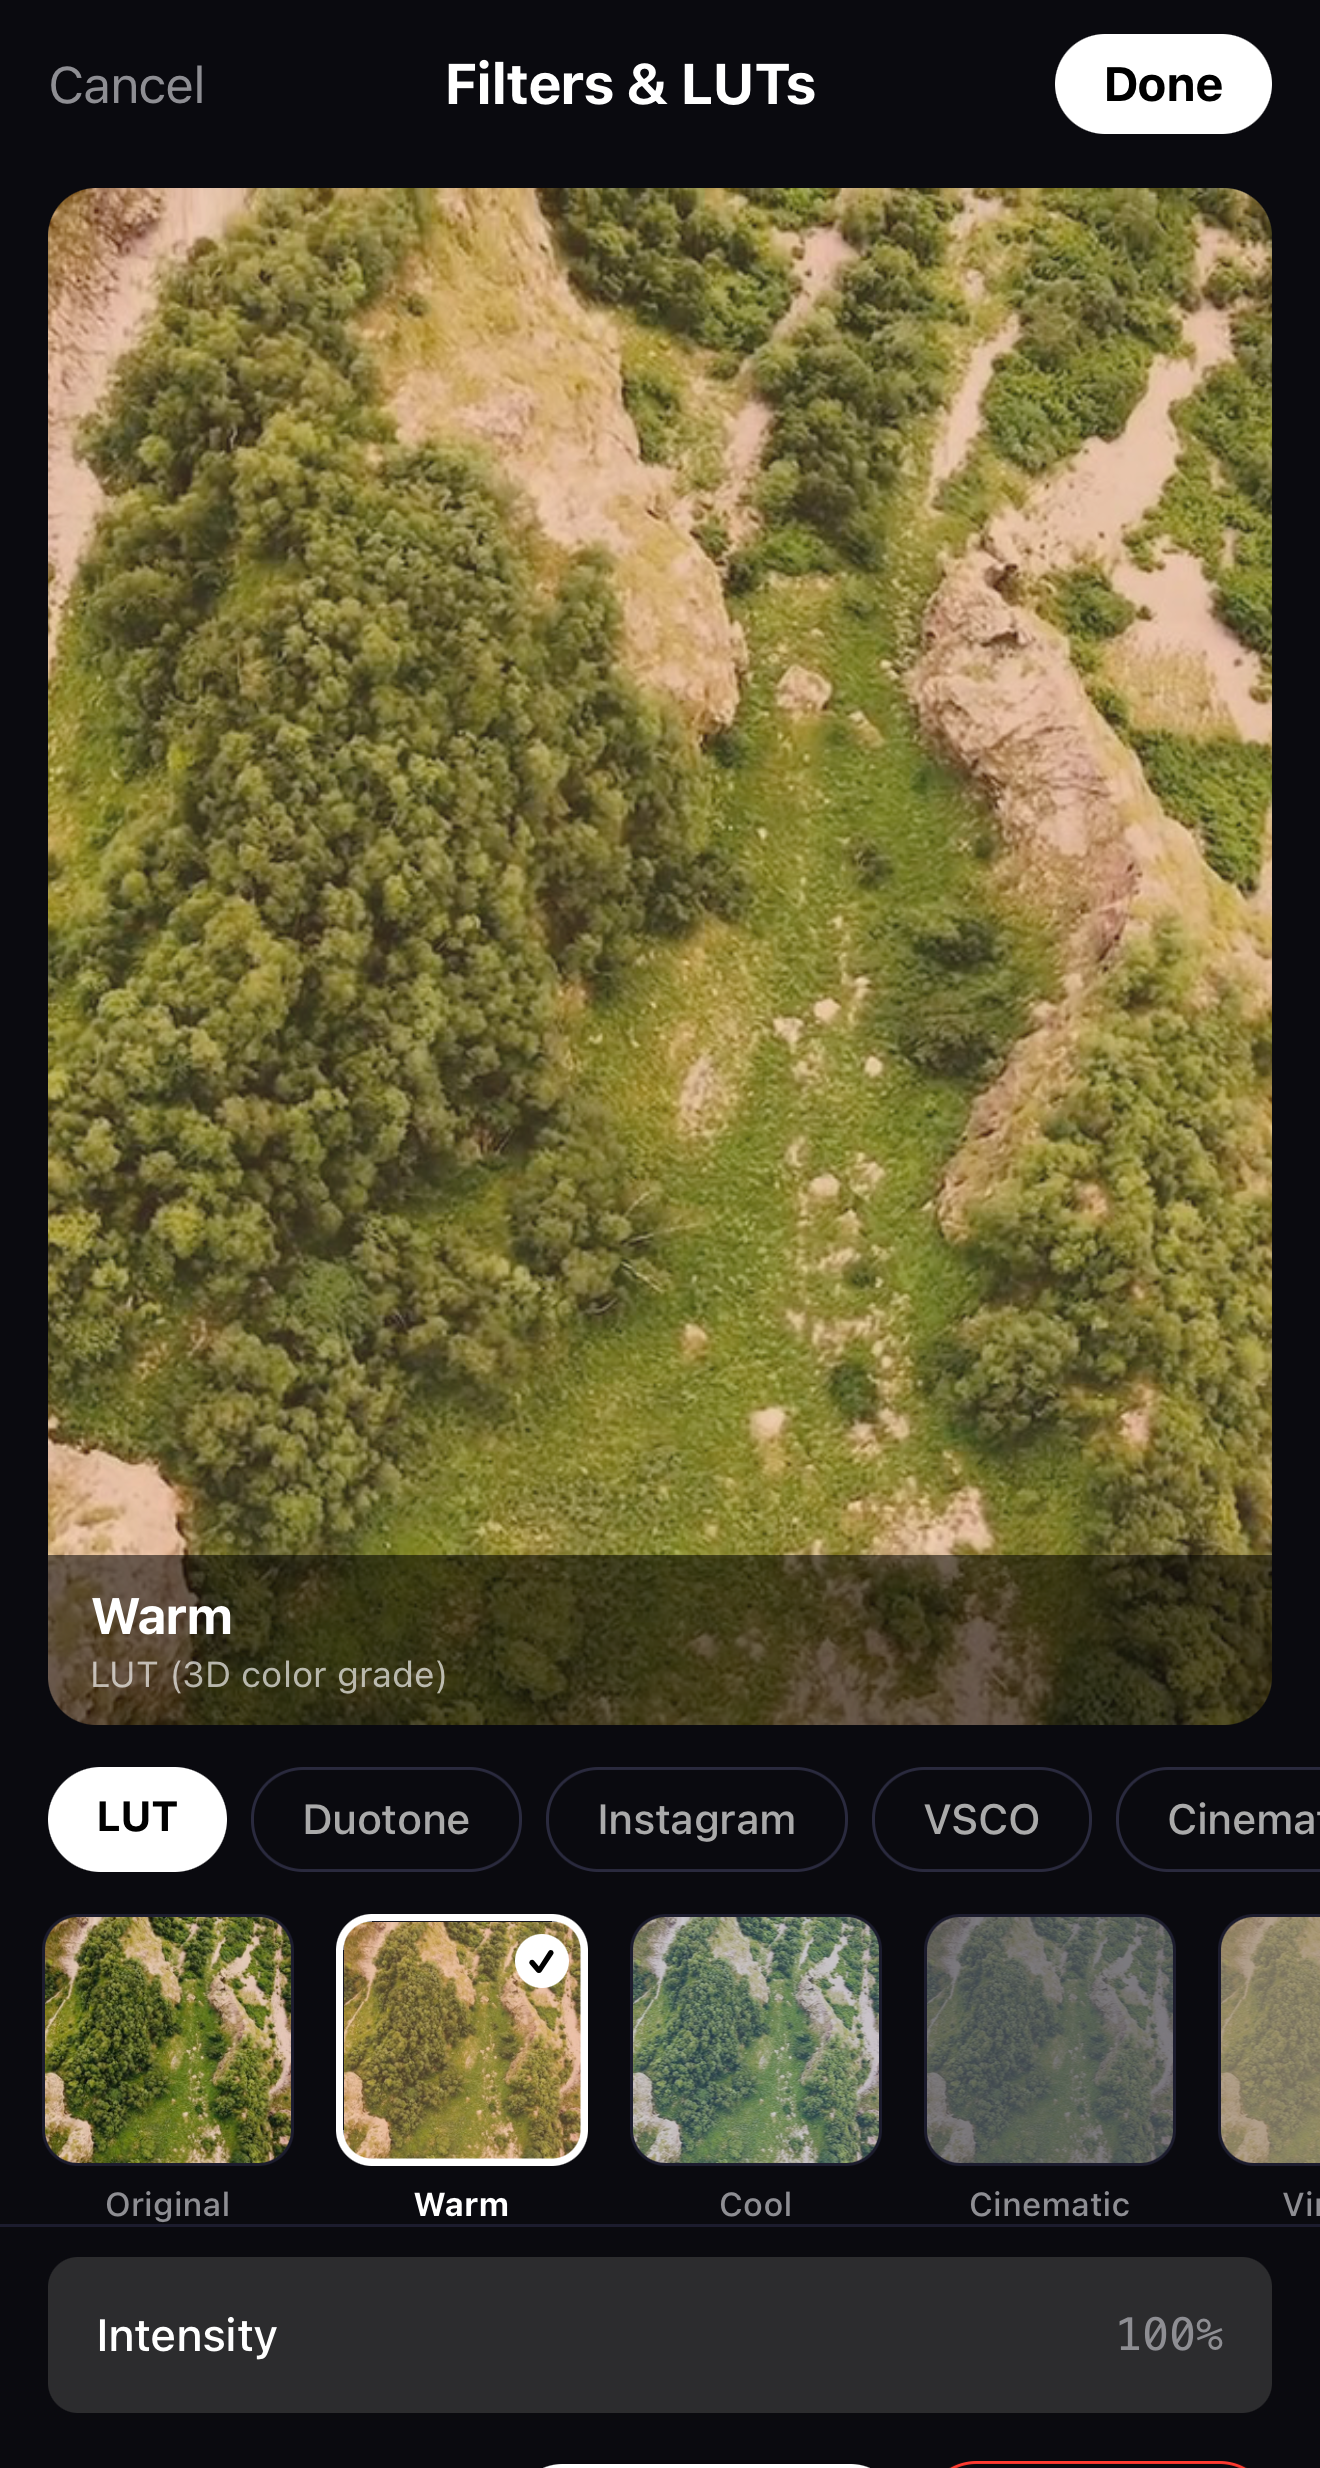
Open the Filters & LUTs panel
Switch to the LUT tab.
Pick a look
Each LUT previews live on your footage.
Dial the intensity
Pull it back to ~60–80% so it reads as a grade, not a gimmick — exactly like with filters.
 LUT tab
Warm — previewing live on your footage
Dial the intensity
LUT tab
Warm — previewing live on your footage
Dial the intensity
Step 2 — Import your own .cube
Bought a LUT pack, or matched a look in a desktop grading app? Tap + Import .cube right in the LUT tab and pick your file. ExpoCut parses it and applies it as a look you can intensity-adjust like any other — so studio-grade color comes straight to your phone.
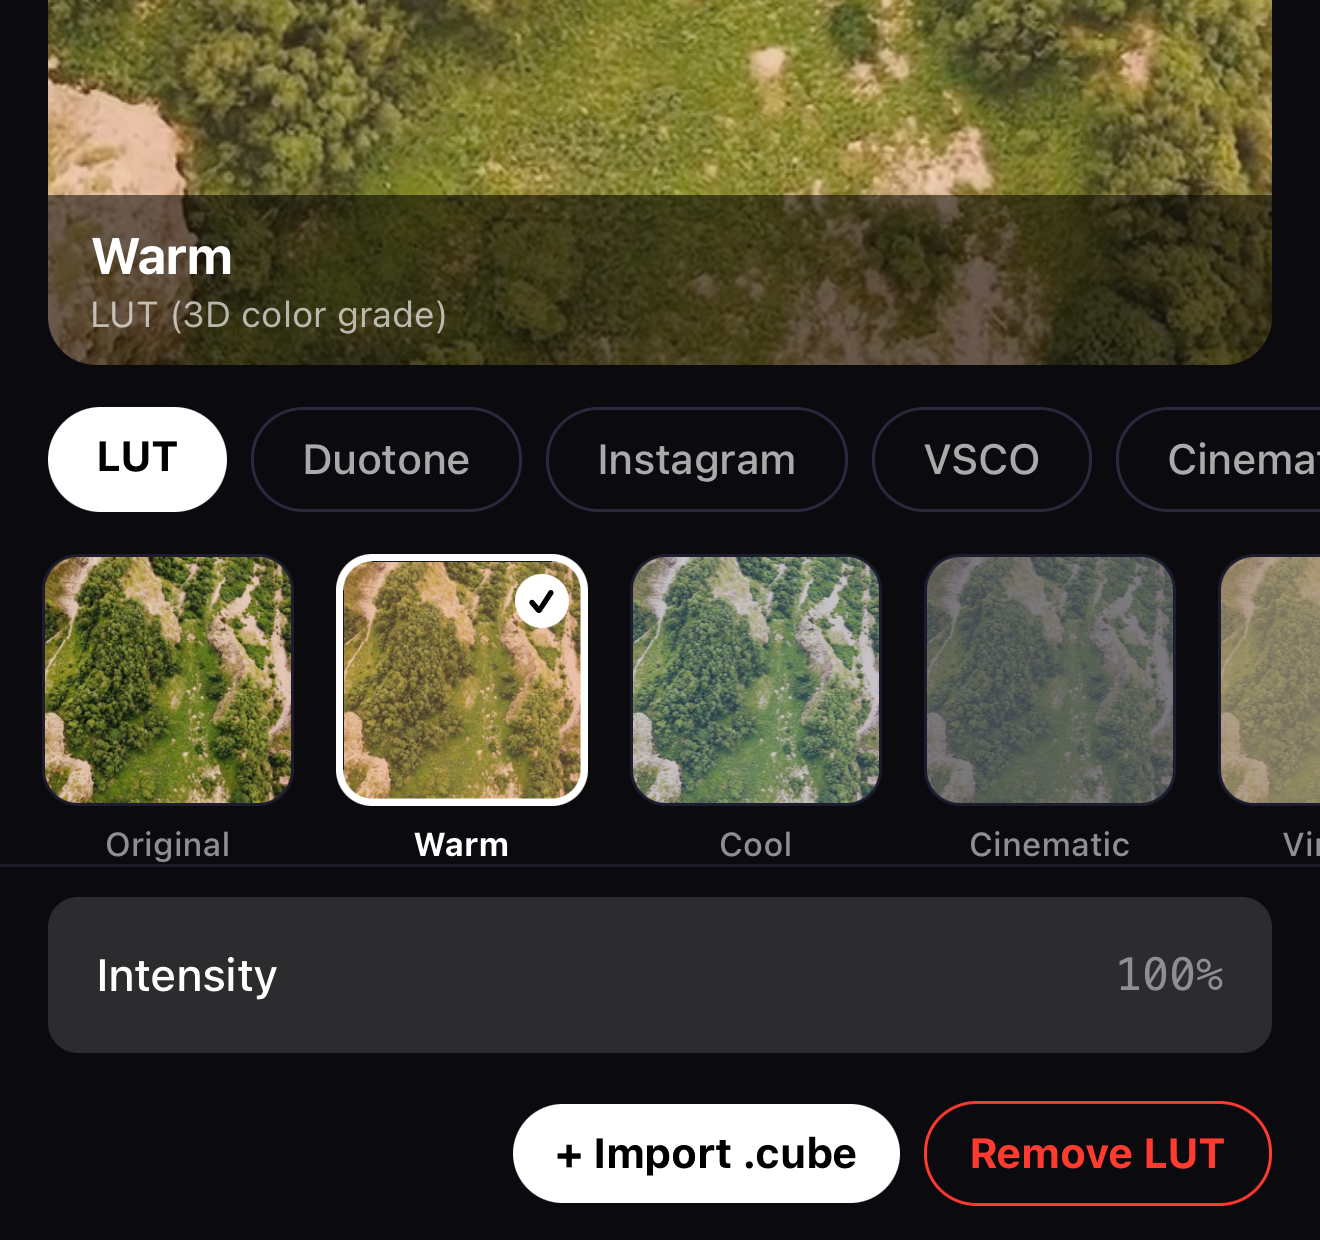 + Import .cube — bring your own look
Dial intensity to ~60–80%
+ Import .cube — bring your own look
Dial intensity to ~60–80%
Grade, then LUT — or LUT, then grade? A LUT looks best on reasonably balanced footage. Do a quick exposure/white-balance correction first, then apply the LUT, so the look lands the way the LUT’s author intended.
Step 3 — Keep it consistent
The whole point of a LUT is consistency. Use the same LUT on every clip in a project (or apply it on an adjustment layer so it grades the whole timeline at once). Mixing LUTs per clip is the fastest way to break a cohesive look.
Where to go next
- The one-tap version: filters & looks.
- Manual control: color grading on your phone.
- Grade everything at once: every effect explained (adjustment layers).
Apply a LUT, correct first, dial the intensity, keep it consistent — the professional path to color that looks intentional across your whole video.
Frequently asked questions
What is a LUT?
A LUT (lookup table) is a precise color recipe that remaps every color in your footage to a target look — a film stock, a cinematic teal-orange, a vintage fade. It's how pros apply the exact same grade consistently across many clips with one tap.
How do I import a .cube LUT?
Open the Filters & LUTs panel, go to the LUT tab, and import your .cube file. ExpoCut parses it and applies it as a look you can dial back with the intensity slider. Use this to load looks you bought or matched in a desktop grading app.
What's the difference between a filter and a LUT?
A filter is a curated preset; a LUT is a precise color mapping, often exported from a professional grading tool. LUTs give you exact, repeatable looks and let you bring in studio-matched grades — but you apply both the same way and both have an intensity control.
Pro color in one tap
Built-in cinematic LUTs plus your own .cube imports — the precise, repeatable looks that lock a film grade across your whole project.
Get ExpoCut Browse all guides