How to Add 3D Objects to a Video on Your Phone
A floating 3D shape is the fastest way to make a title card or product shot feel produced — and it used to need a desktop and a render queue. ExpoCut’s 3D Object layer does it on the phone: pick a shape or import a model, colour it, set it spinning, and it lives on the timeline like any other layer.
Quick answer
In ExpoCut, tap 3D in the bottom bar (or + ▸ 3D Object). The Presets tab shows a live preview above 13 shapes — Cube, Sphere, Knot, Icosa, Torus, Cone, Dodeca, Octa, Cylinder, Plane, Capsule, Ring, Teapot — a colour row, an Animation row (Spin, Float, Pulse, Bounce, Orbit, Wave, Shake) and a Material row (Standard, Wire, Flat, Glossy, Metal). The Import tab loads your own .glb, .gltf or .obj from Files or a URL. Tap Done — the object lands as a 4-second 3D layer you drag, resize and keyframe; tap Edit on its toolbar to change shape, colour or motion later.
- 3D is a bottom-bar entry; the picker previews the object live before you add it.
- 13 preset shapes × 11 colours × 5 materials × 7 animations — enough for badges, bumpers and product accents.
- Import accepts .glb / .gltf / .obj from Files or a direct URL; a model that fails to load falls back to the selected preset.
- A 3D object is a normal layer: move it, scale it, keyframe it, give it a transition, put it under a title.
- Keep one object per scene and match its colour to the frame — a teal torus over a teal backdrop looks designed, a rainbow knot looks like a demo.
The trick with 3D in a phone edit is restraint: one clean shape, one colour that belongs to the frame, one slow motion. ExpoCut’s 3D Object layer makes that a one-minute job — and, if you have a real model, imports it.
Where it lives
3D sits at the left end of the bottom bar’s second page (swipe the bar past Shape and Brush), and on the big + Add Layer sheet as 3D Object.
Step 1 — Pick a shape (Presets)
Tap 3D
The picker opens on Presets with a live, rotating preview at the top.
Choose a shape and a colour
Thirteen shapes; tap one and the preview updates. Then tap a colour swatch.
Choose an animation and a material
Animation: Spin, Float, Pulse, Bounce, Orbit, Wave, Shake. Material: Standard, Wire, Flat, Glossy, Metal. Tap Done.
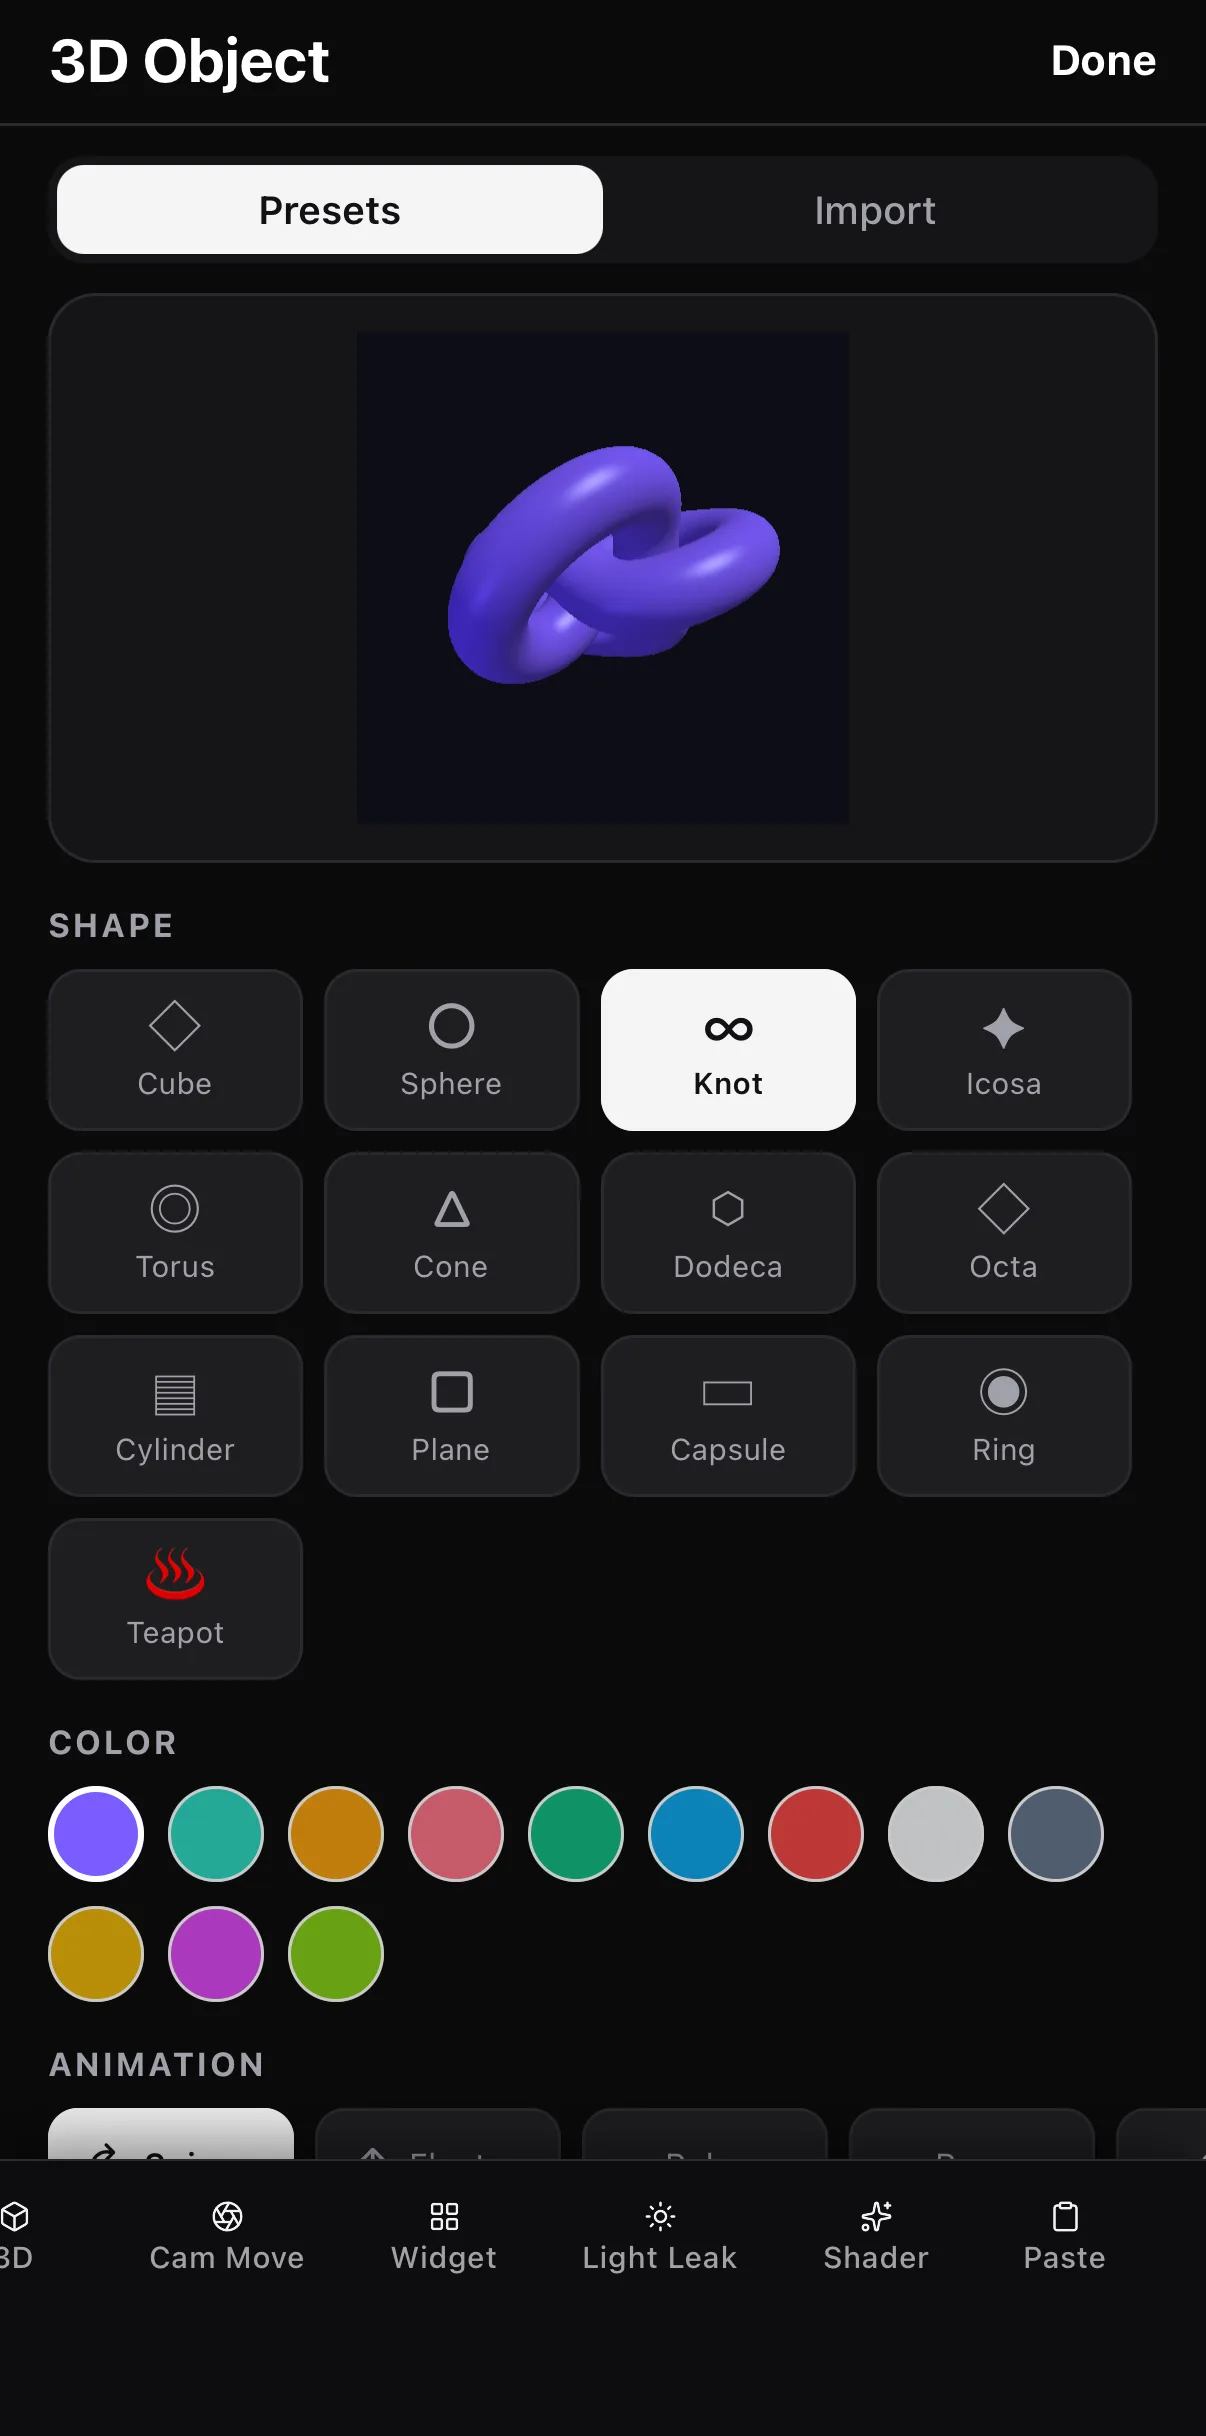 Presets · Import
Live 3D preview
13 shapes
Colour
Animation — Spin · Float · Pulse · Bounce…
Presets · Import
Live 3D preview
13 shapes
Colour
Animation — Spin · Float · Pulse · Bounce…
Step 2 — Or import your own model
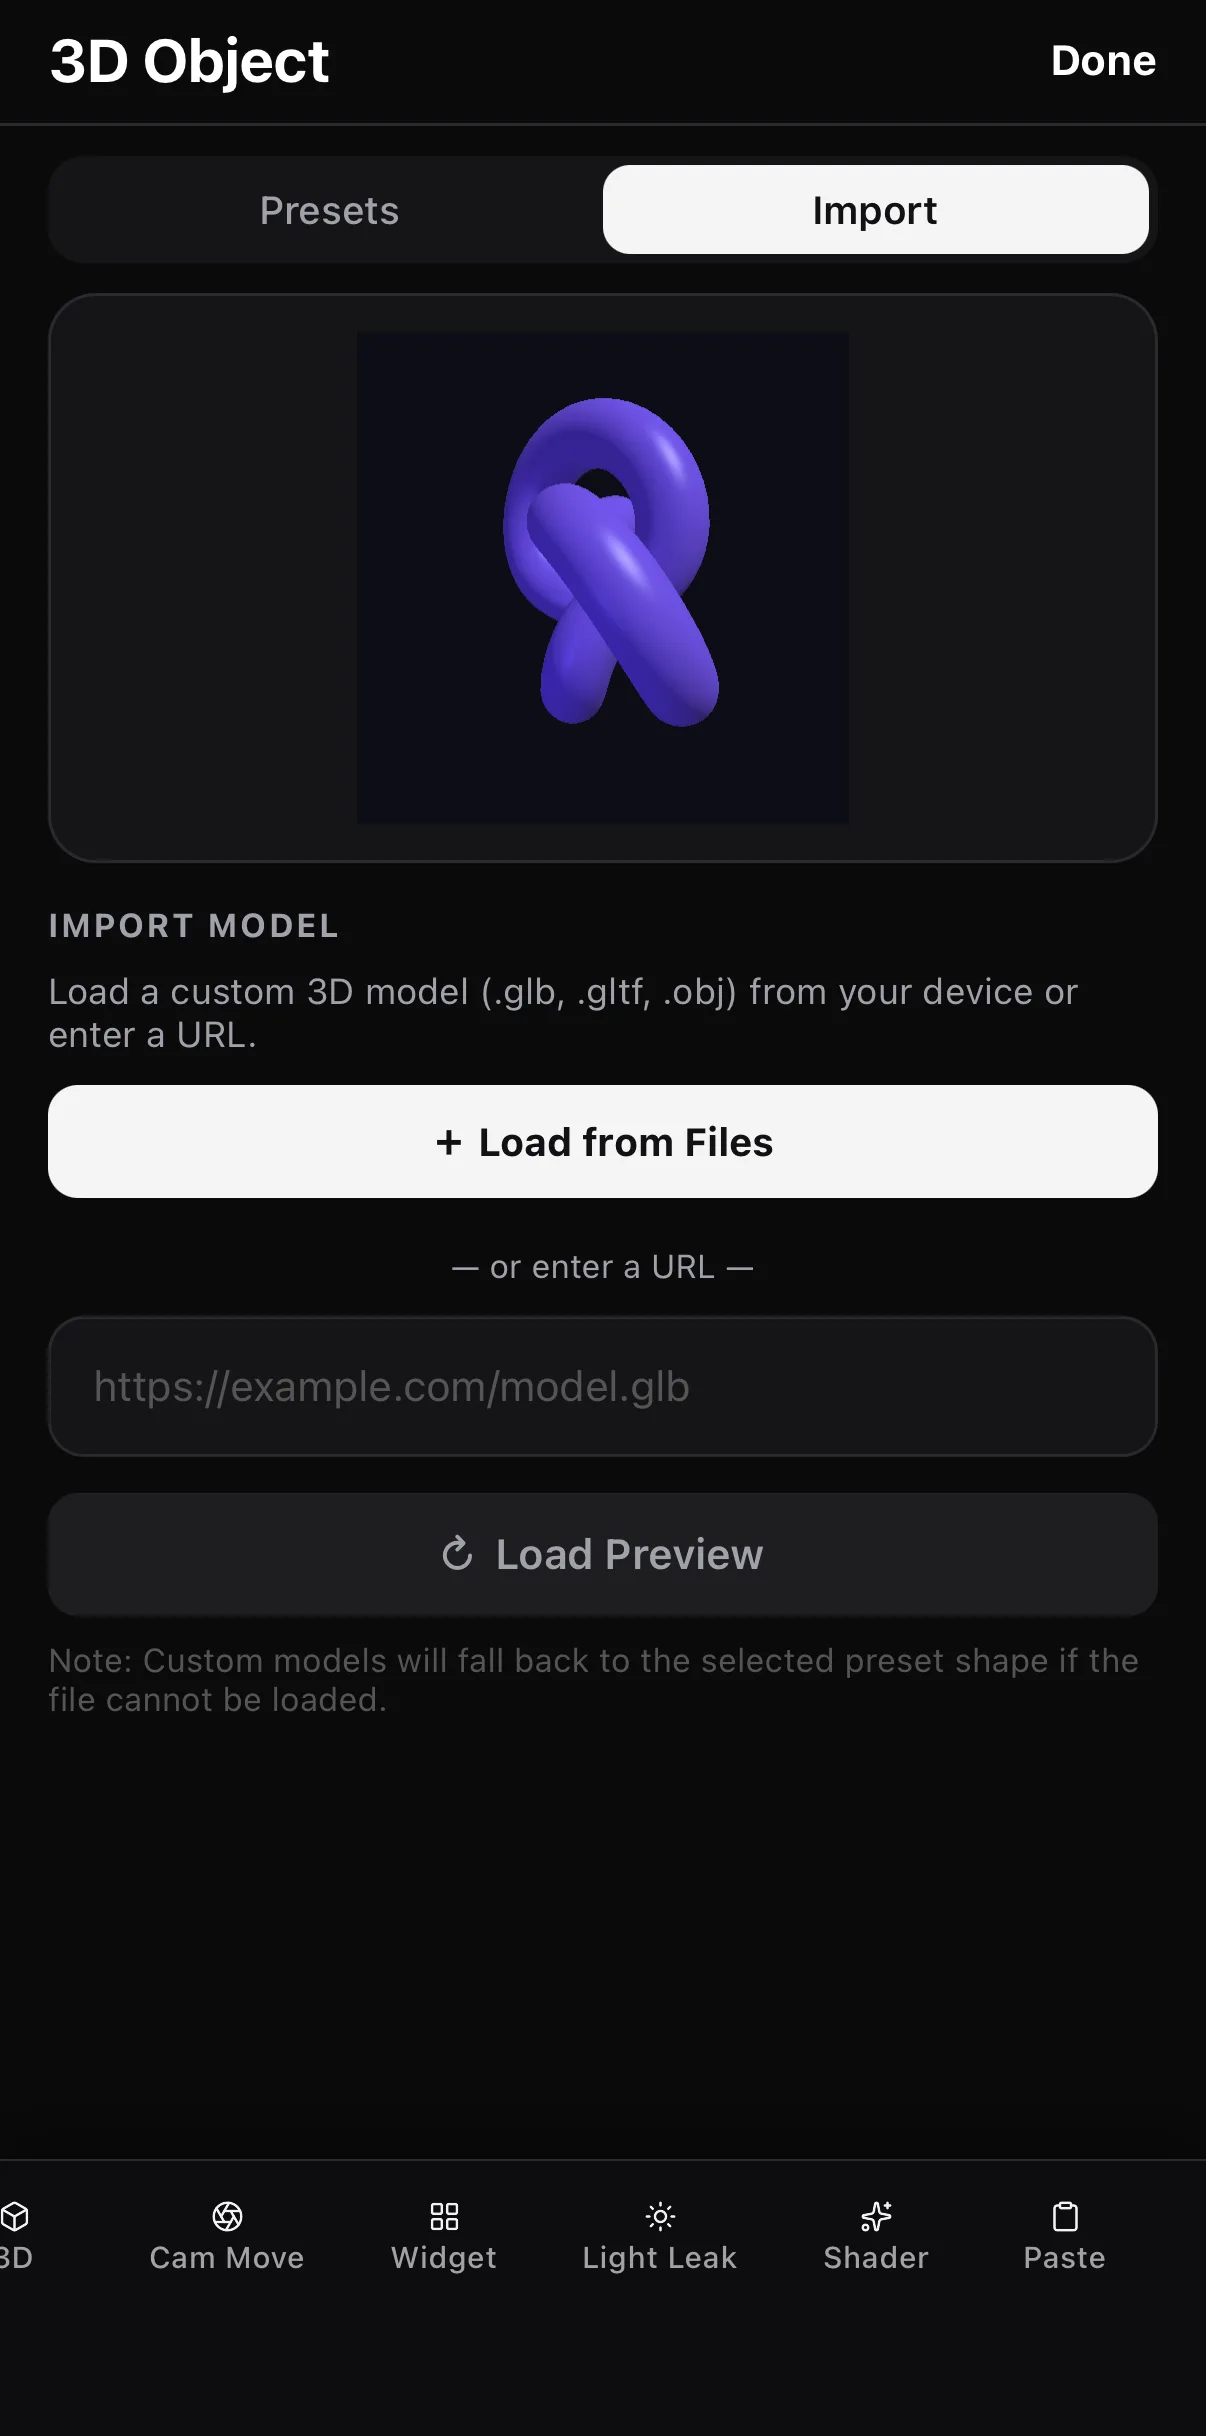 + Load from Files (.glb / .gltf / .obj)
…or a model URL
+ Load from Files (.glb / .gltf / .obj)
…or a model URL
A logo exported as .glb from Blender, a product from a manufacturer’s asset pack, a low-poly character — anything with a mesh loads; the colour and material rows then re-tint it.
Step 3 — Place it
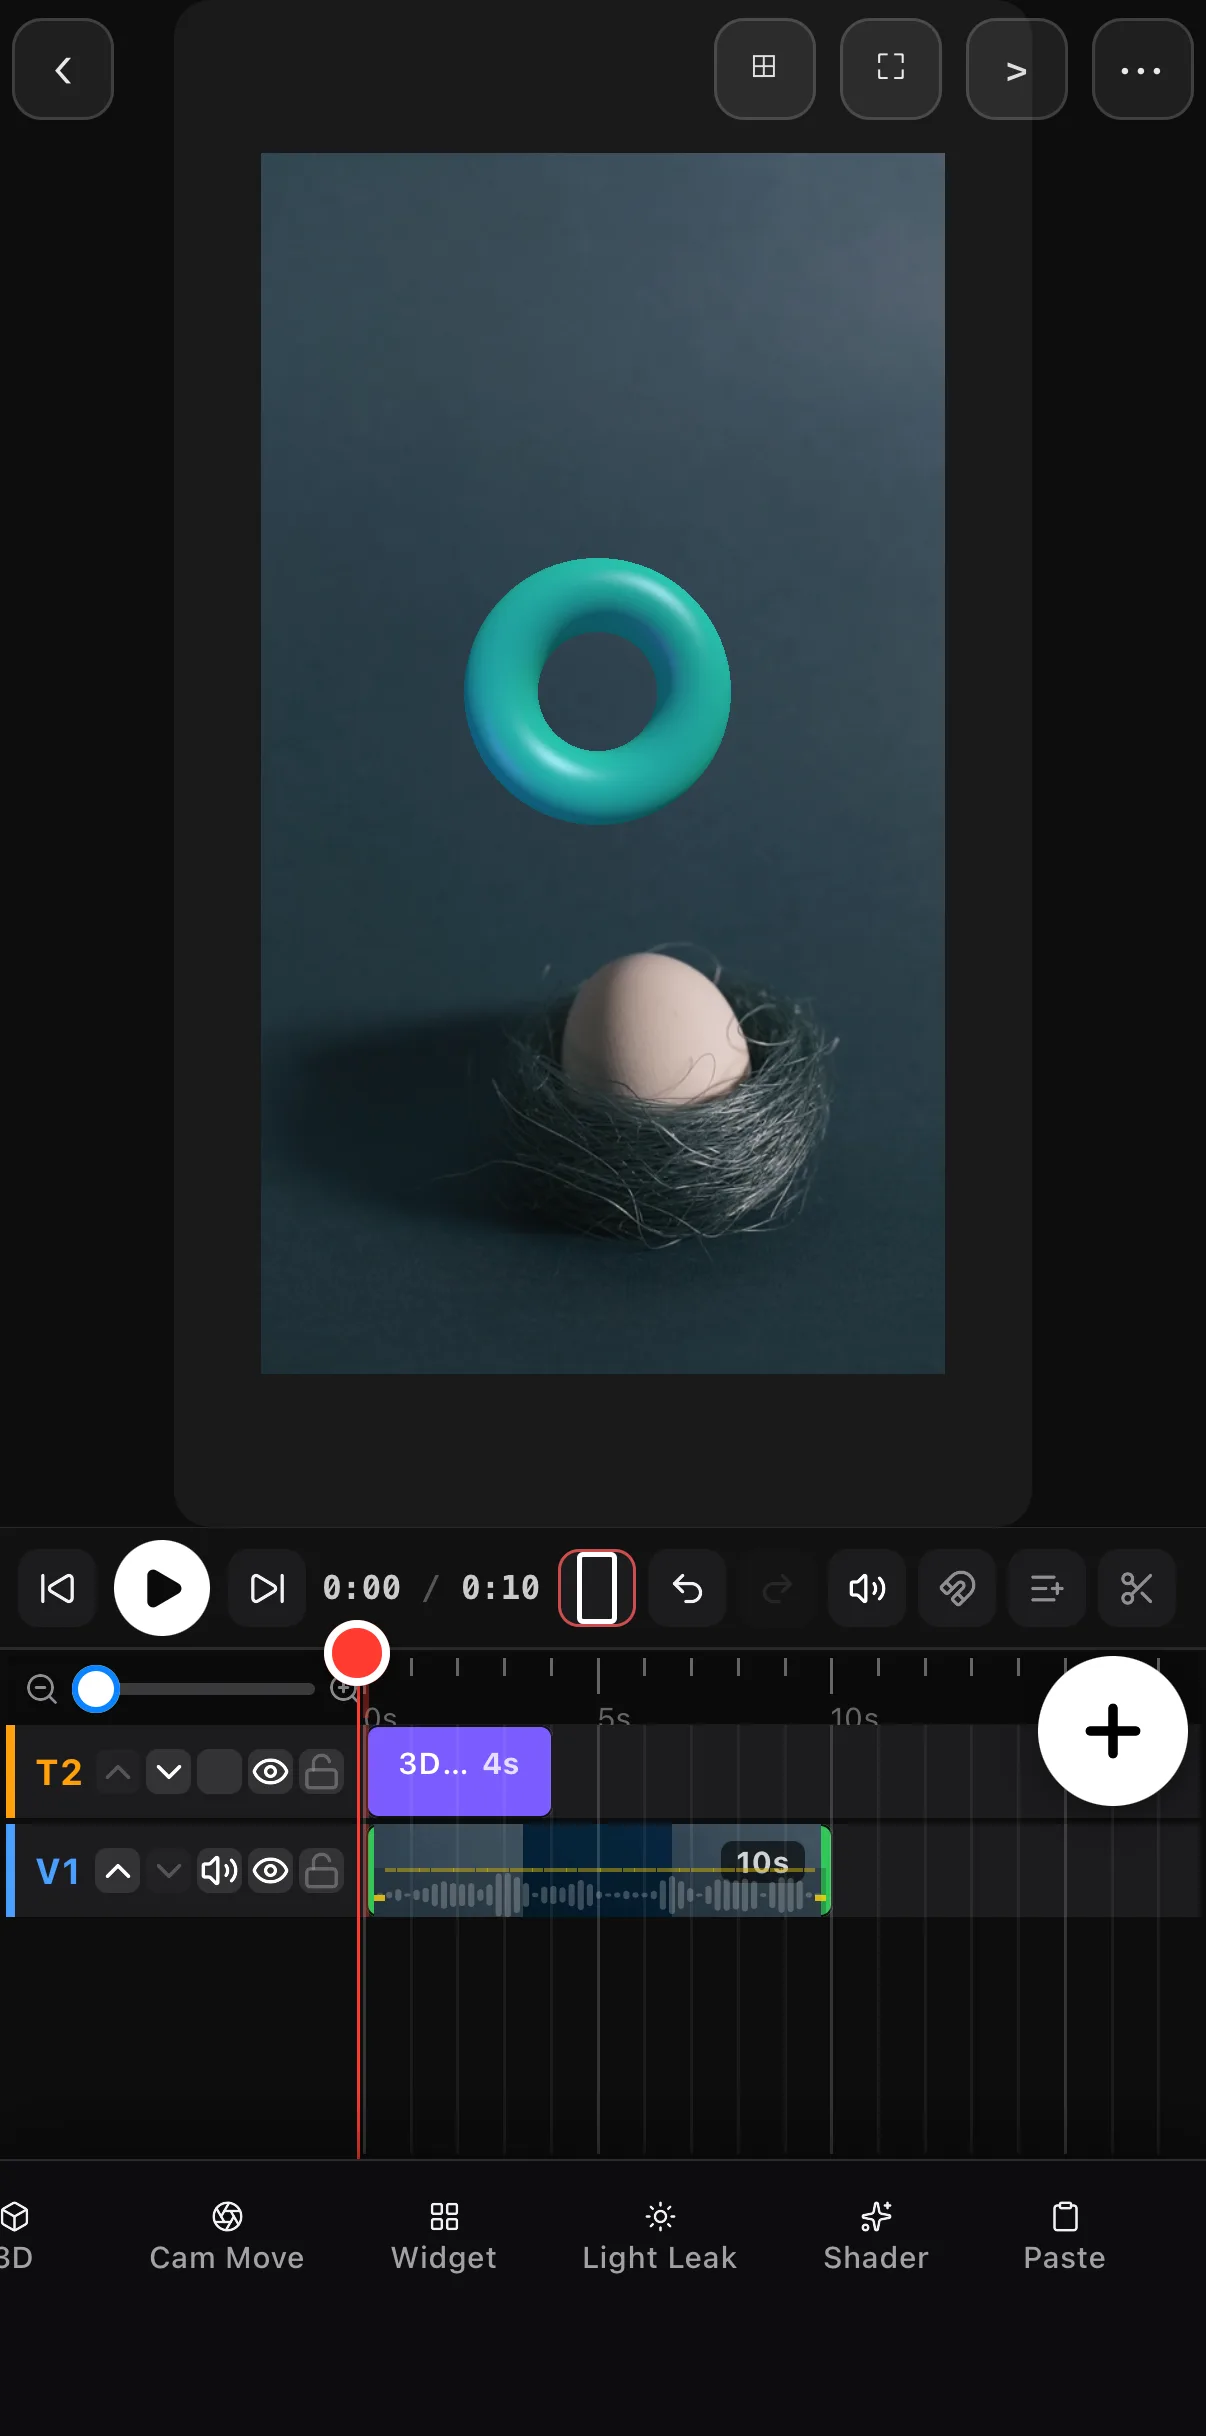 Teal torus — a 3D layer over the clip
3D layer on T2 — 4 s
Teal torus — a 3D layer over the clip
3D layer on T2 — 4 s
- Match the palette. Pick the swatch closest to a colour already in the frame; Metal and Glossy pick up the scene’s brightness.
- Slow motions. Float and Orbit read as premium; Shake and Bounce are for comedy beats.
- Wire for tech. The Wire material over dark footage is an instant “tech explainer” look; pair it with a monospace title.
- Layer it. A title on top, the object behind, a shader behind that — three layers, one bumper.
Where to go next
- Make the object move on a path: keyframes & motion paths.
- A backdrop worth reflecting: shaders & generative backgrounds.
- Camera moves that sell depth: camera moves & parallax.
One shape, one colour, one slow spin — 3D that looks intentional, made on a phone.
Frequently asked questions
How do I put a 3D object in a video on my phone?
Tap 3D in ExpoCut's bottom bar, pick a shape from the Presets tab, choose a colour, material and animation, and tap Done. The object lands on the canvas as a 3D layer — drag it into place, resize it with the corner grip, and trim its clip on the timeline.
Can I import my own 3D model?
Yes. The picker's Import tab takes a .glb, .gltf or .obj from Files (+ Load from Files) or from a direct URL (paste the link and tap Load Preview). It gets the same colour, animation and material controls as a preset; if the file can't be loaded ExpoCut keeps the preset shape you had selected.
Does the 3D object export properly?
Yes — the layer is rendered into the exported video on-device like every other layer, with its animation, colour and material. Preview equals export.
Related guides
Put something solid in the frame
Thirteen shapes, five materials, seven animations, or your own .glb — 3D objects on any video, rendered on your phone.
Get ExpoCut Browse all guides