How to Use Templates & Reels (Make a Video in Minutes)
The fastest edit is the one you don’t start from scratch. Templates and Reels give you a finished structure — you just swap in your clips, change the words, and export. Here’s how.
Quick answer
Open the Templates or Reels tab on the home screen, tap a card, watch its live preview (Templates also offer Color Theme swatches), then tap Use this Template / Use this Reel. Templates walk you through their text slots with a live canvas first; then the project opens in the editor’s Wizard mode — a strip of slot cards under the canvas. Tap a card to swap media or text, tap Timeline for the full editor, and export.
- Wizard mode = canvas + play bar + slot cards, filtered by All · Text · Image · Video · Audio.
- The palette button recolours the whole template; a brand kit applies your logo and palette.
- Reel projects reopen in Wizard mode from the Projects tab.
A blank timeline is intimidating; a finished template isn’t. Templates and Reels hand you the structure — the cuts, transitions, titles, and timing — so your job shrinks to “put my stuff in the slots.” It’s how you go from idea to export in minutes.
Templates vs. Reels
- Templates — fully-built starting points across formats (speaker cards, listings, promos). Pick a colour theme, walk through the text slots with a live preview, then land in the editor’s Wizard mode.
- Reels — finished short-form edits, tuned for social. Preview, tap Use this Reel, and you’re straight into Wizard mode swapping media. Great when you want the same cut in a few different brands.
Both live on the home screen, one tab each, next to your Projects.
Step 1 — Pick one and preview it
Open Templates or Reels on the home screen
Filter by shape — Reels, Square, Wide, Feed — or by category, and tap a card. Each card shows its length and how many slots it has.
Watch the live preview
The preview screen plays the whole template on a real canvas, with a scrub bar so you can step through the motion. Templates also show a row of Color Theme swatches — tap one and the preview recolours instantly.
Use it
Tap Use this Template (or Use this Reel). Templates walk you through their text slots one at a time first — type over the suggestion, Skip, or Use defaults to keep the sample copy and jump ahead.
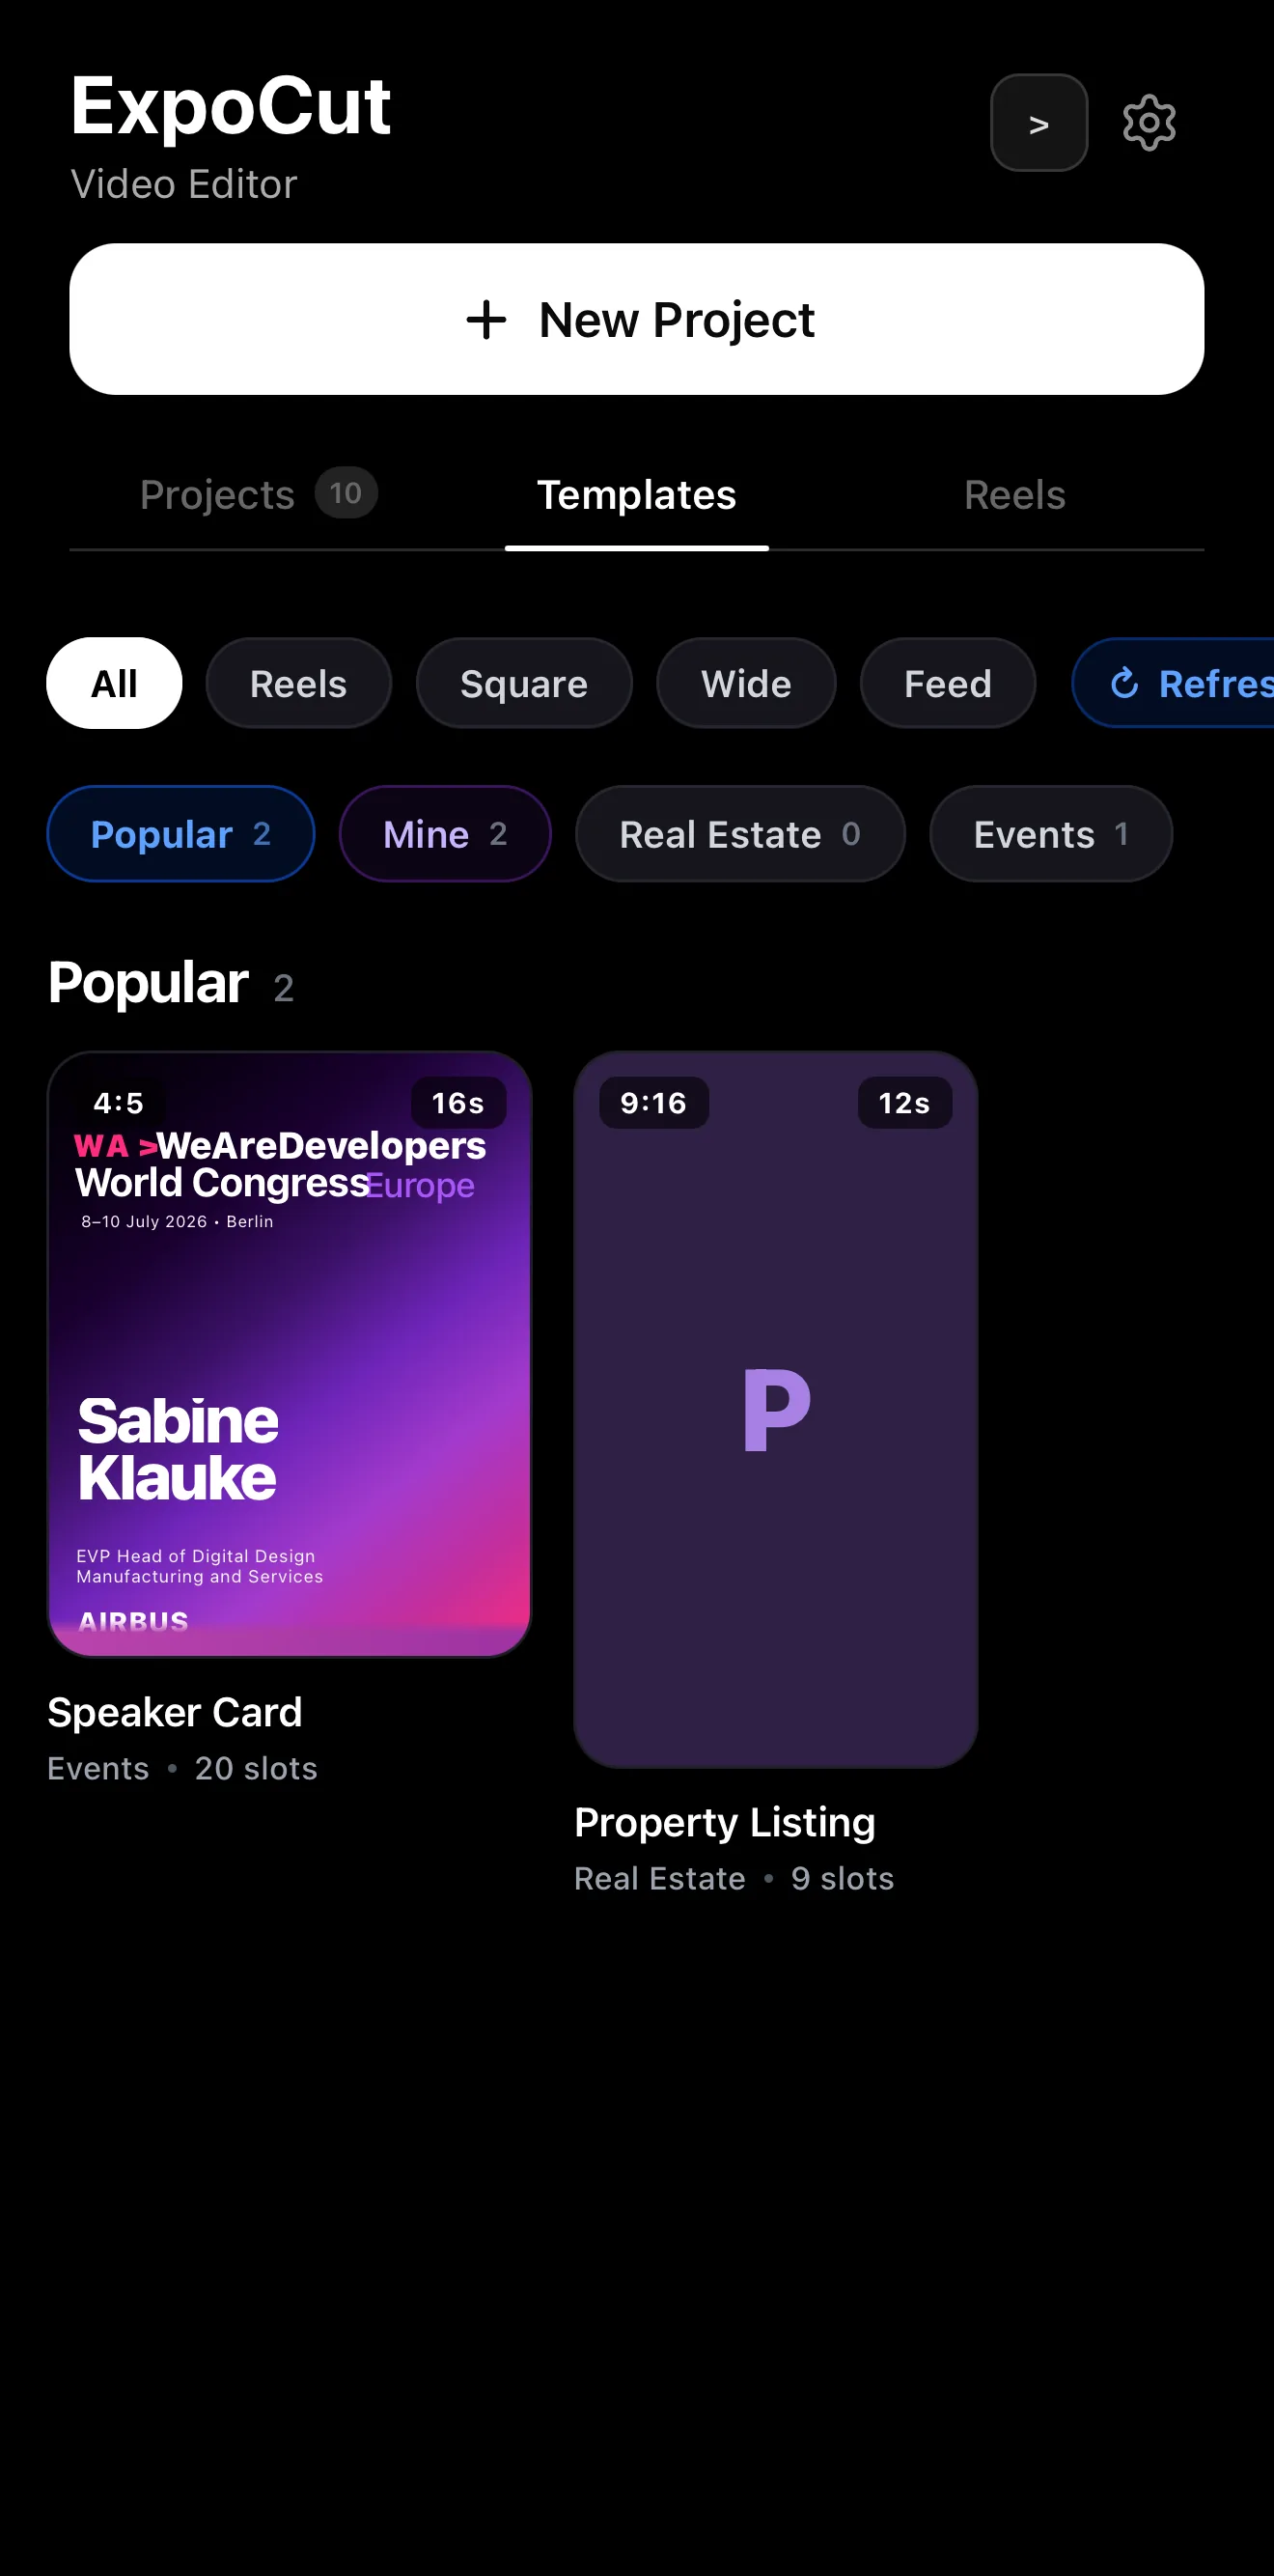 Categories
Each card = a finished build with N slots
+ Add — import your own
Categories
Each card = a finished build with N slots
+ Add — import your own
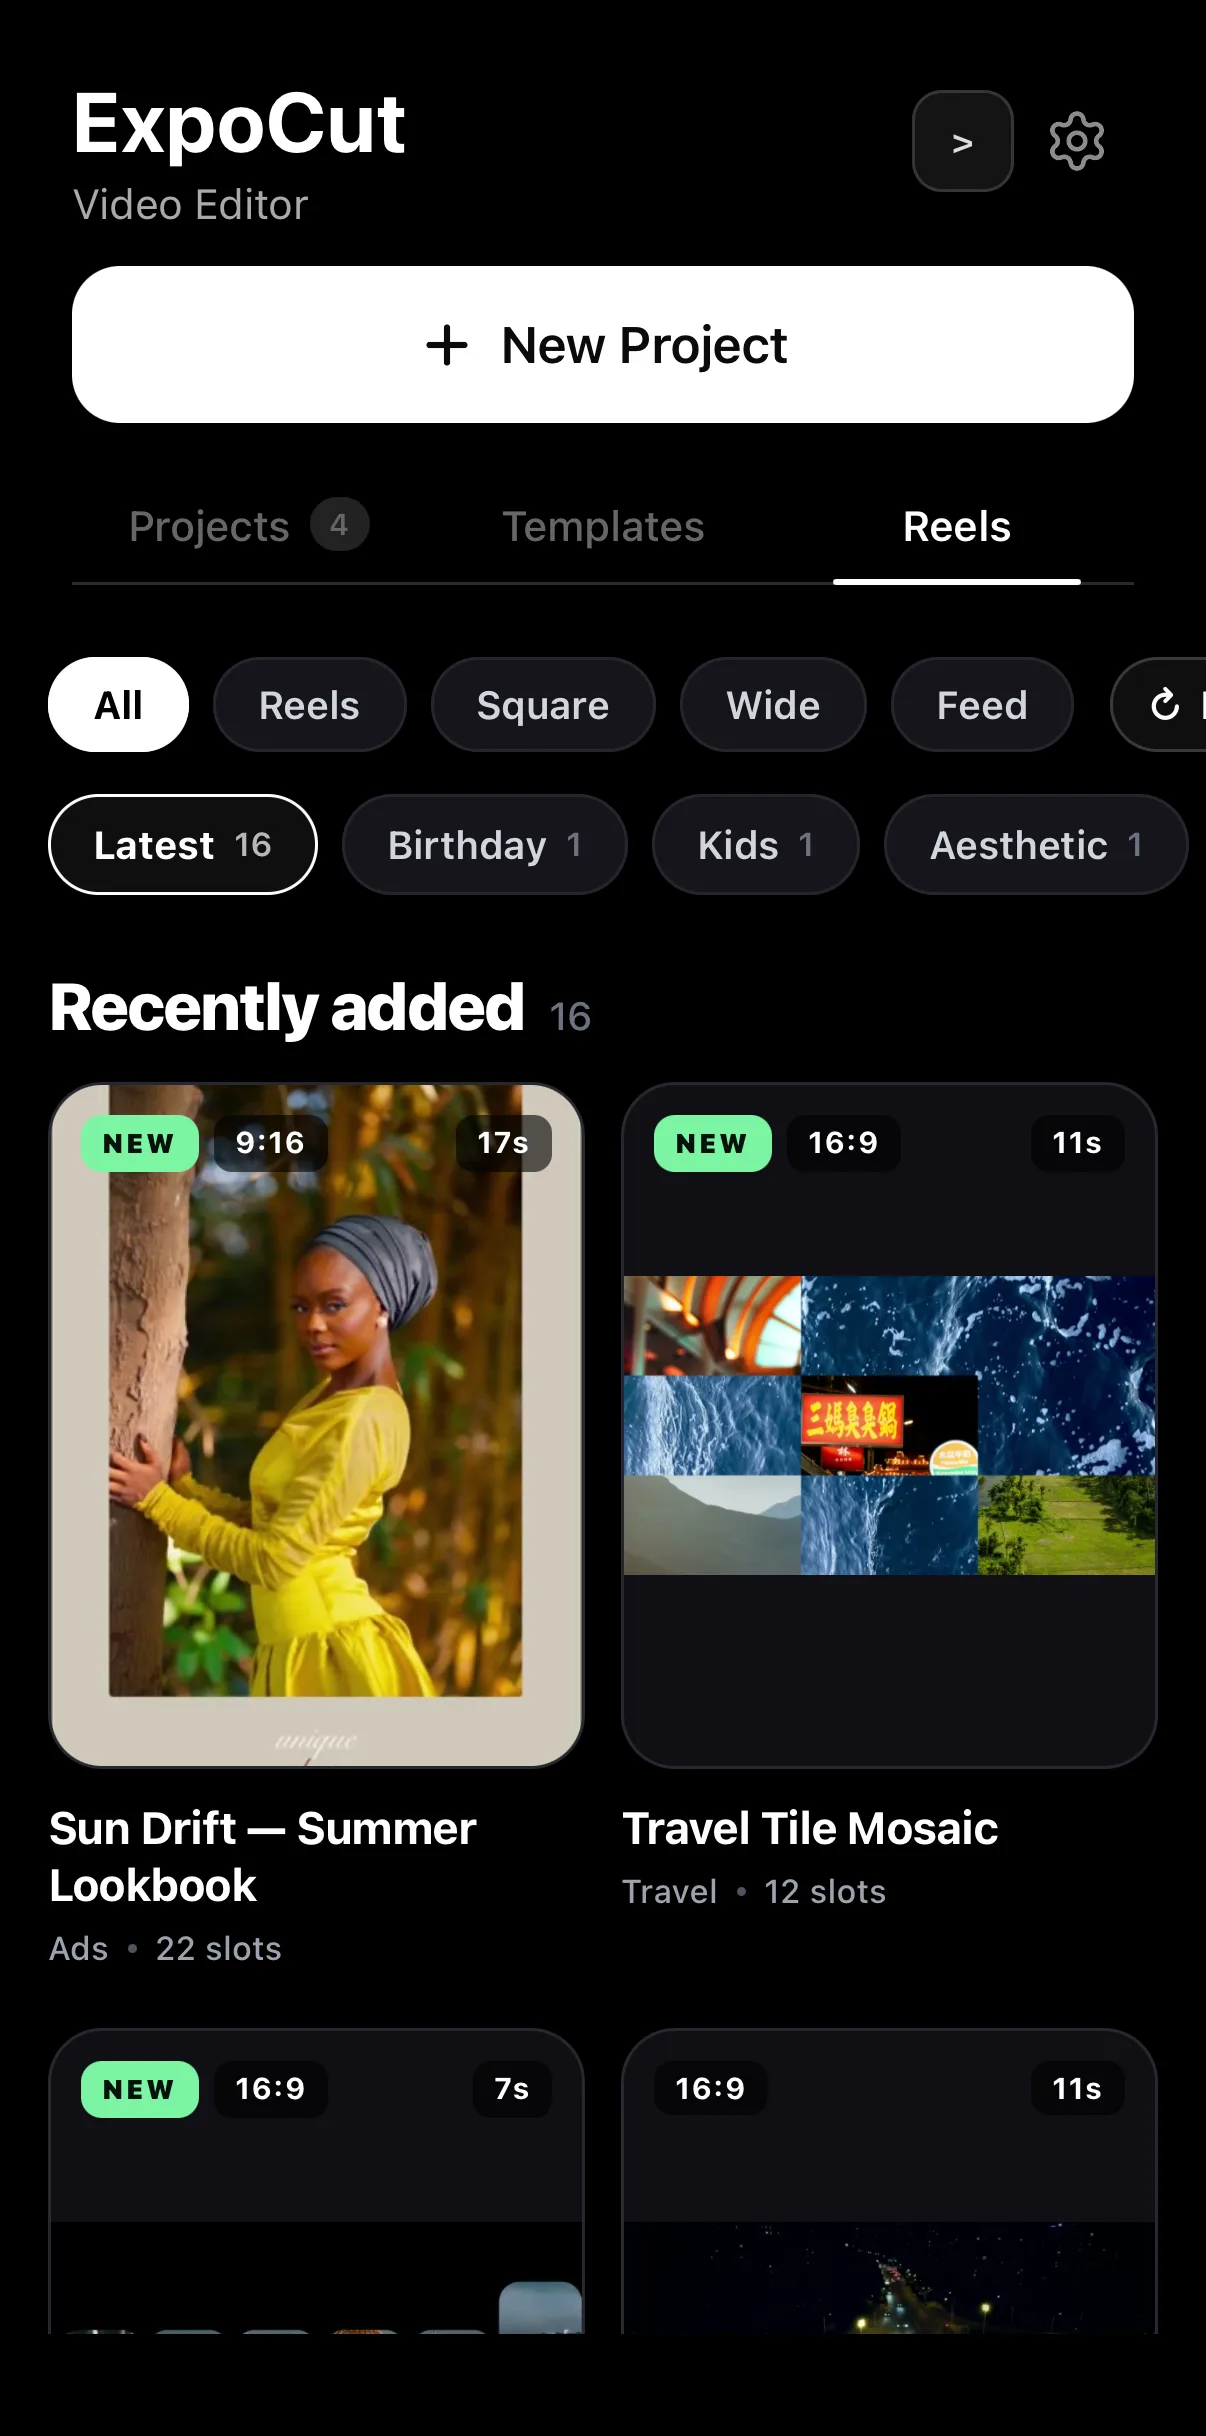 Filter by shape
…or by category
9:16 · 17 s · 22 slots
Filter by shape
…or by category
9:16 · 17 s · 22 slots
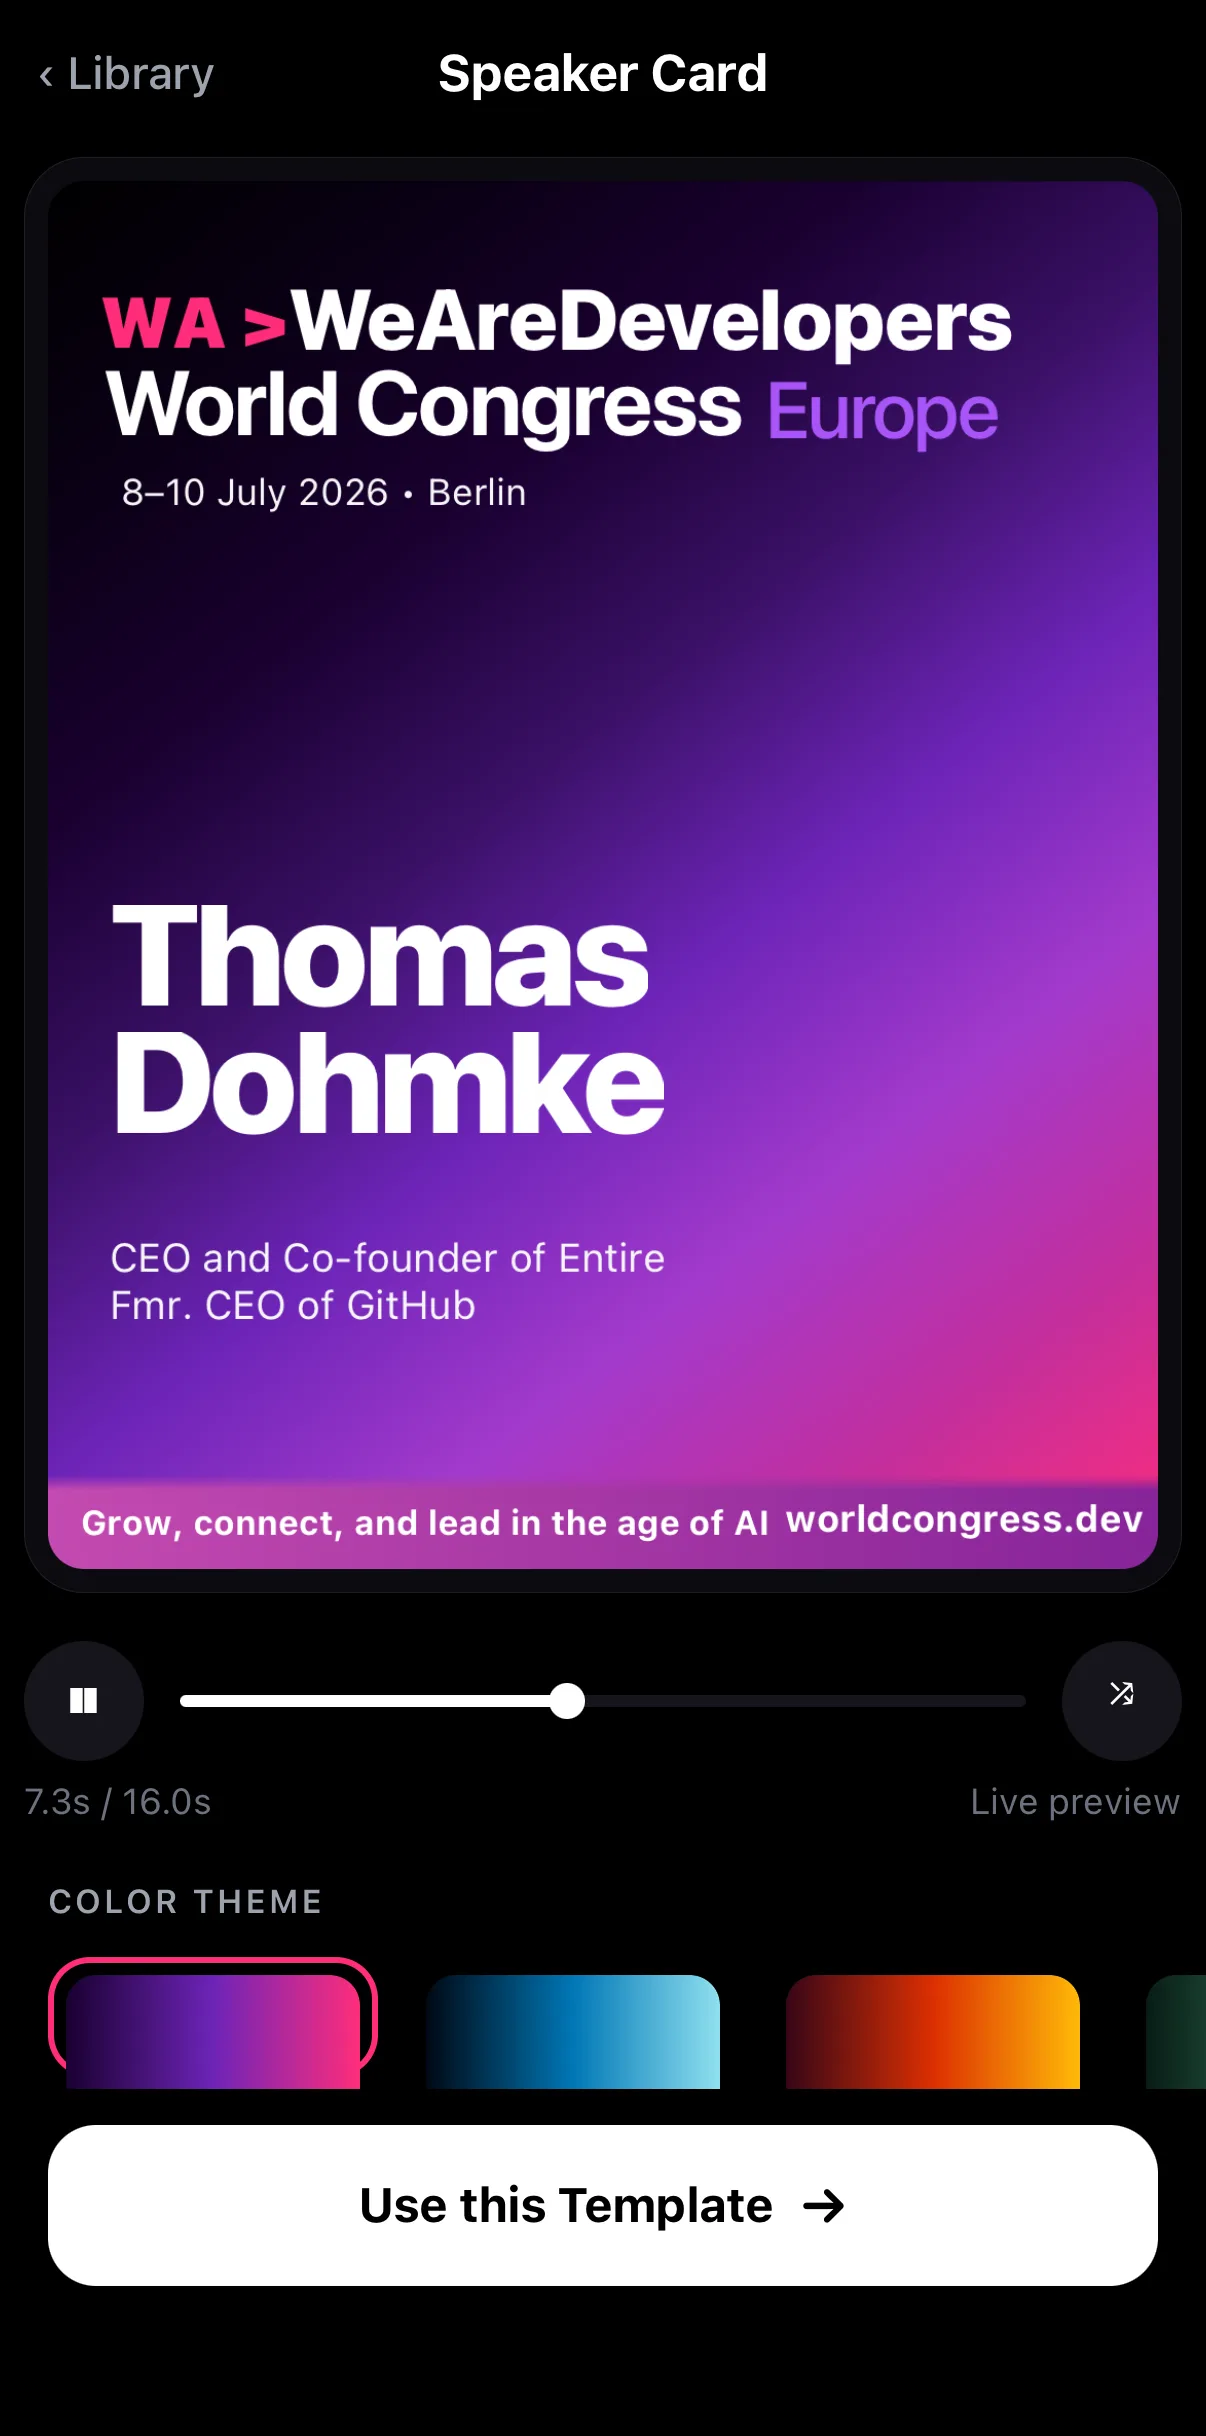 Scrub the live preview
Color Theme
Use this Template
Scrub the live preview
Color Theme
Use this Template
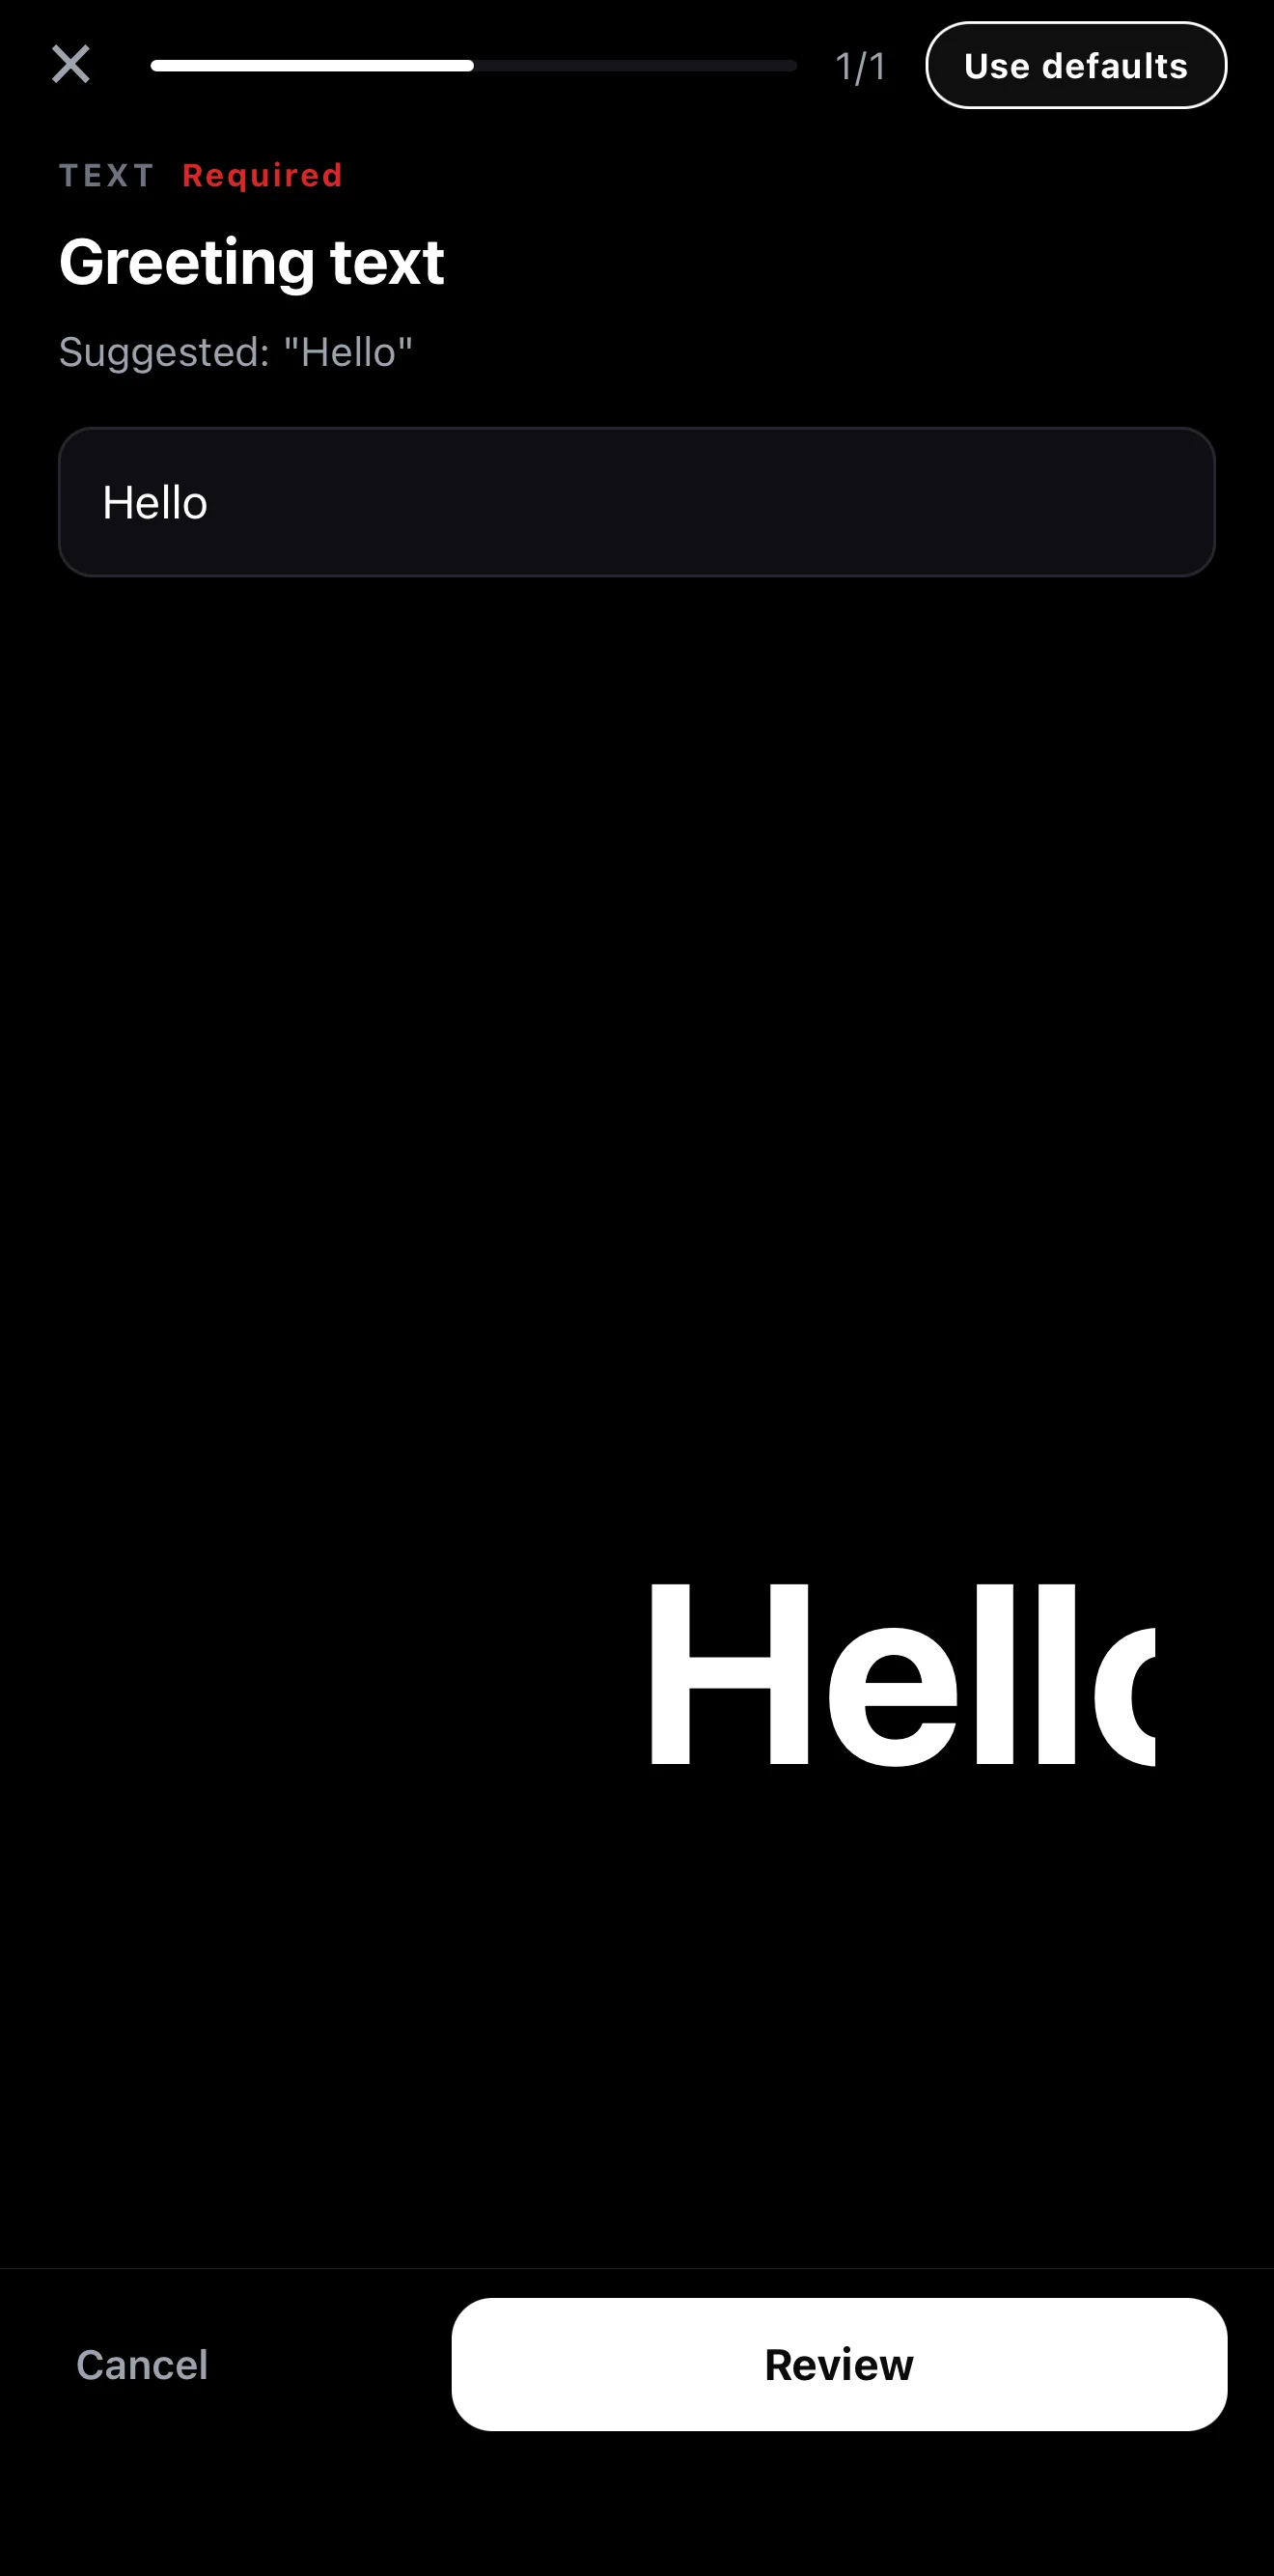 Type over the suggestion
Live preview updates as you type
Use defaults
Type over the suggestion
Live preview updates as you type
Use defaults
Step 2 — Fill the slots in Wizard mode
The template opens in the editor’s Wizard mode: the canvas on top with a play/scrub bar, and a strip of slot cards underneath — every text line, photo, clip and music bed the template uses, in timeline order. Filter the strip with the All · Text · Image · Video · Audio chips.
Tap a slot card to change it
A text card opens a one-field sheet — type and Save. A media card opens the same picker you use everywhere else — Gallery, Stock or Download — and your clip drops into the slot at the right size and timing.
Recolour it
The palette button in the top bar swaps the colour theme. Your brand kit does the same with your own logo and palette.
Go deeper when you need to
Tap Timeline in the top bar to open the same project on the full timeline — every layer is there to trim, re-time or restyle. Wizard brings you back.
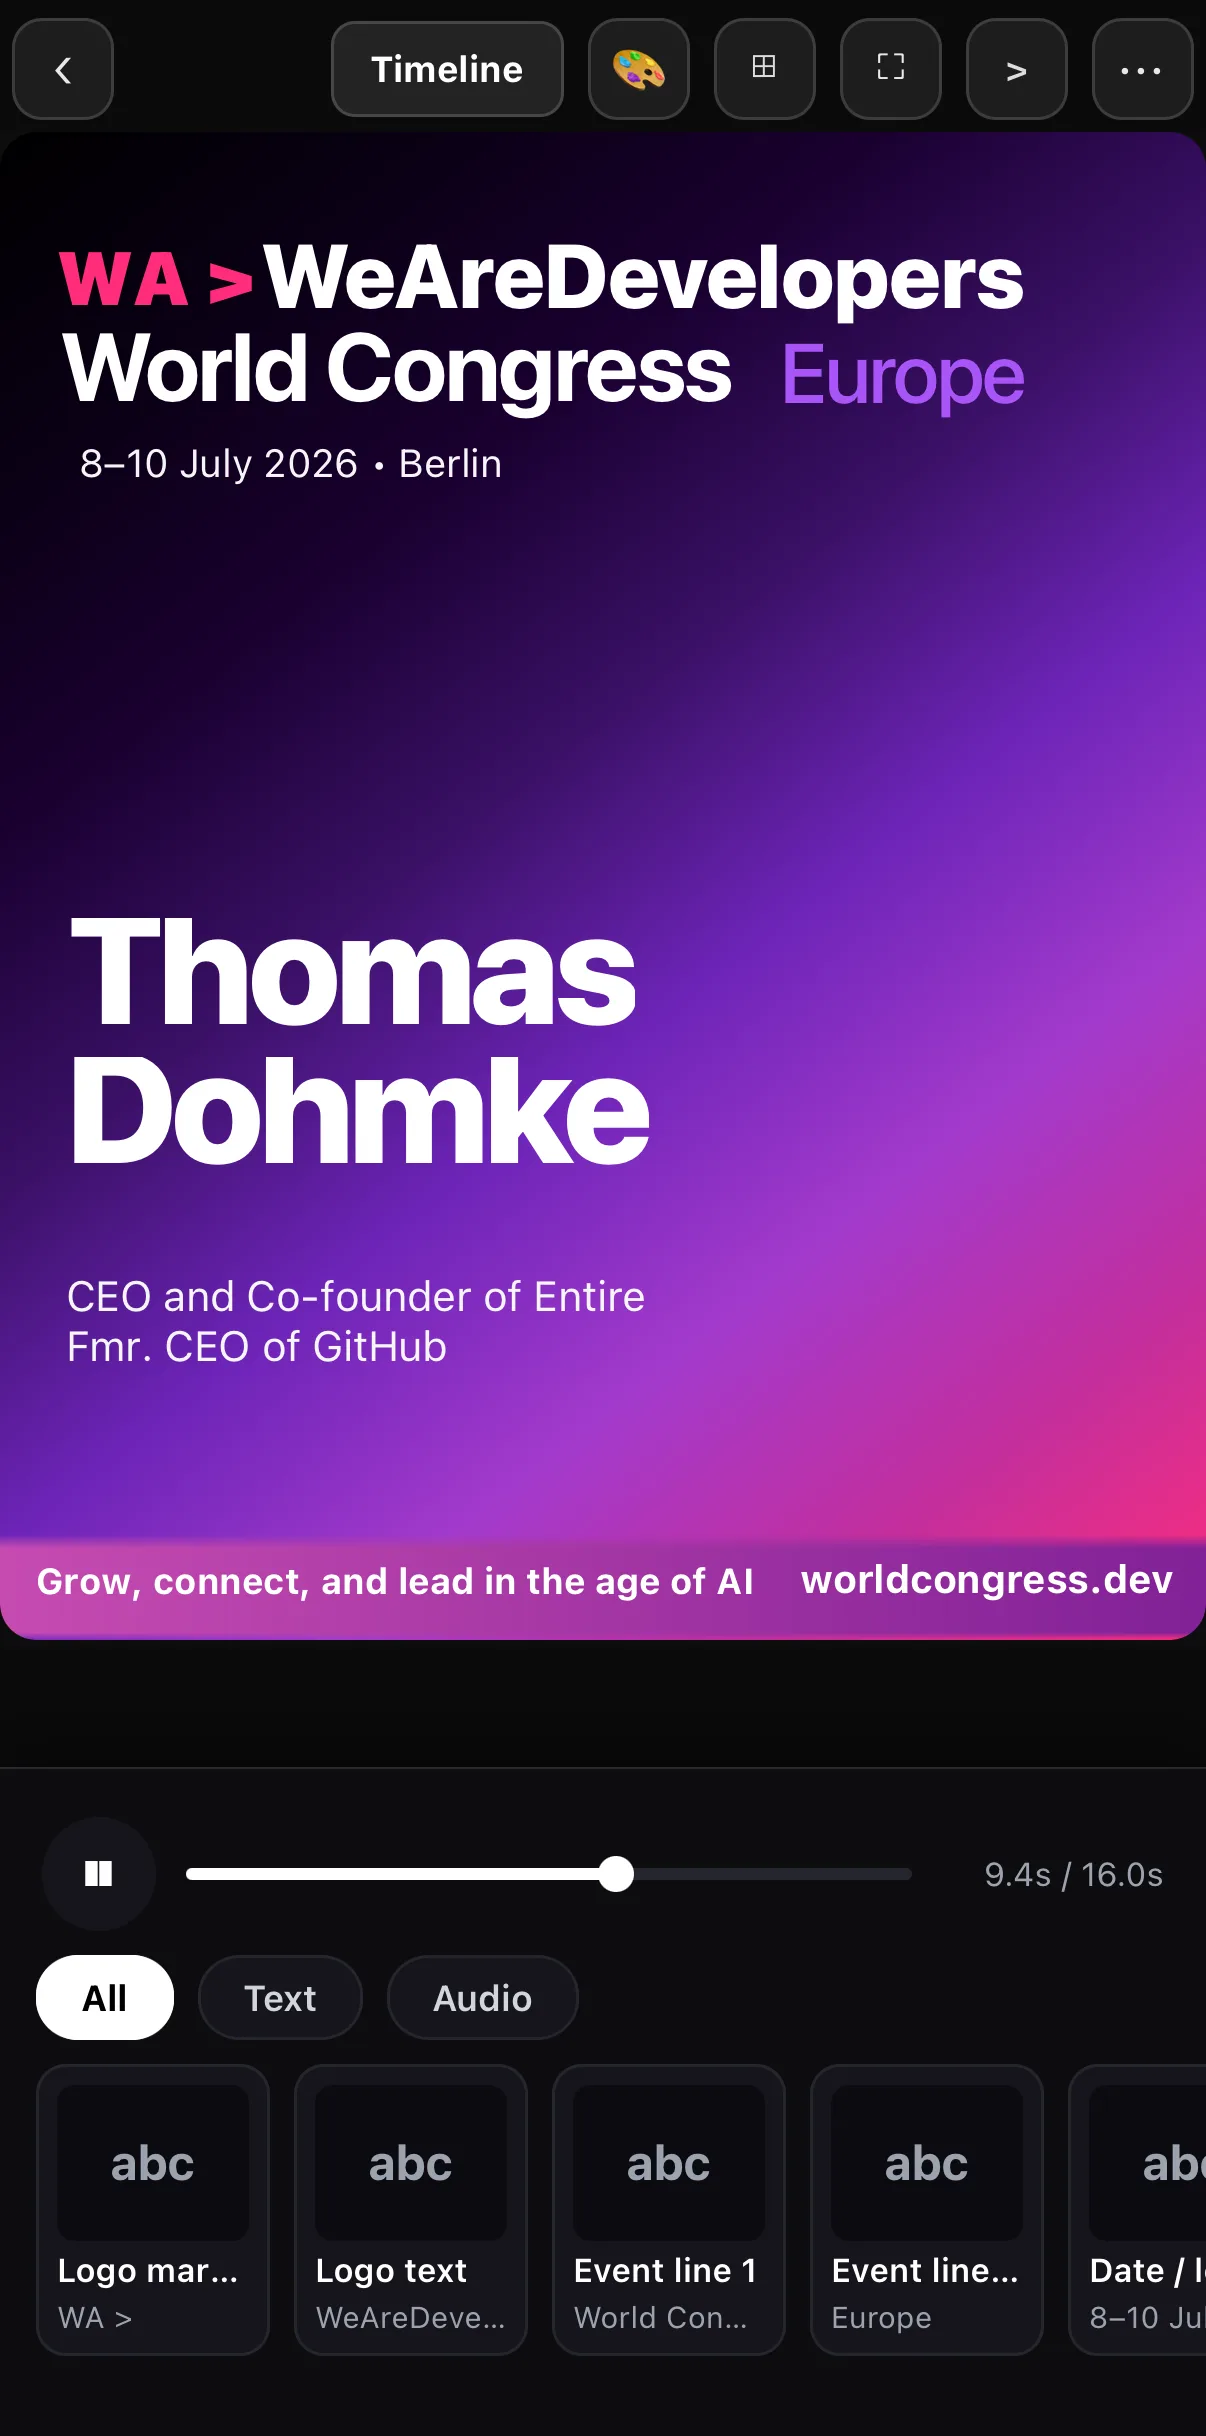 Timeline / Wizard toggle
Colour theme
Filter the slots
Tap a card to change it
Timeline / Wizard toggle
Colour theme
Filter the slots
Tap a card to change it
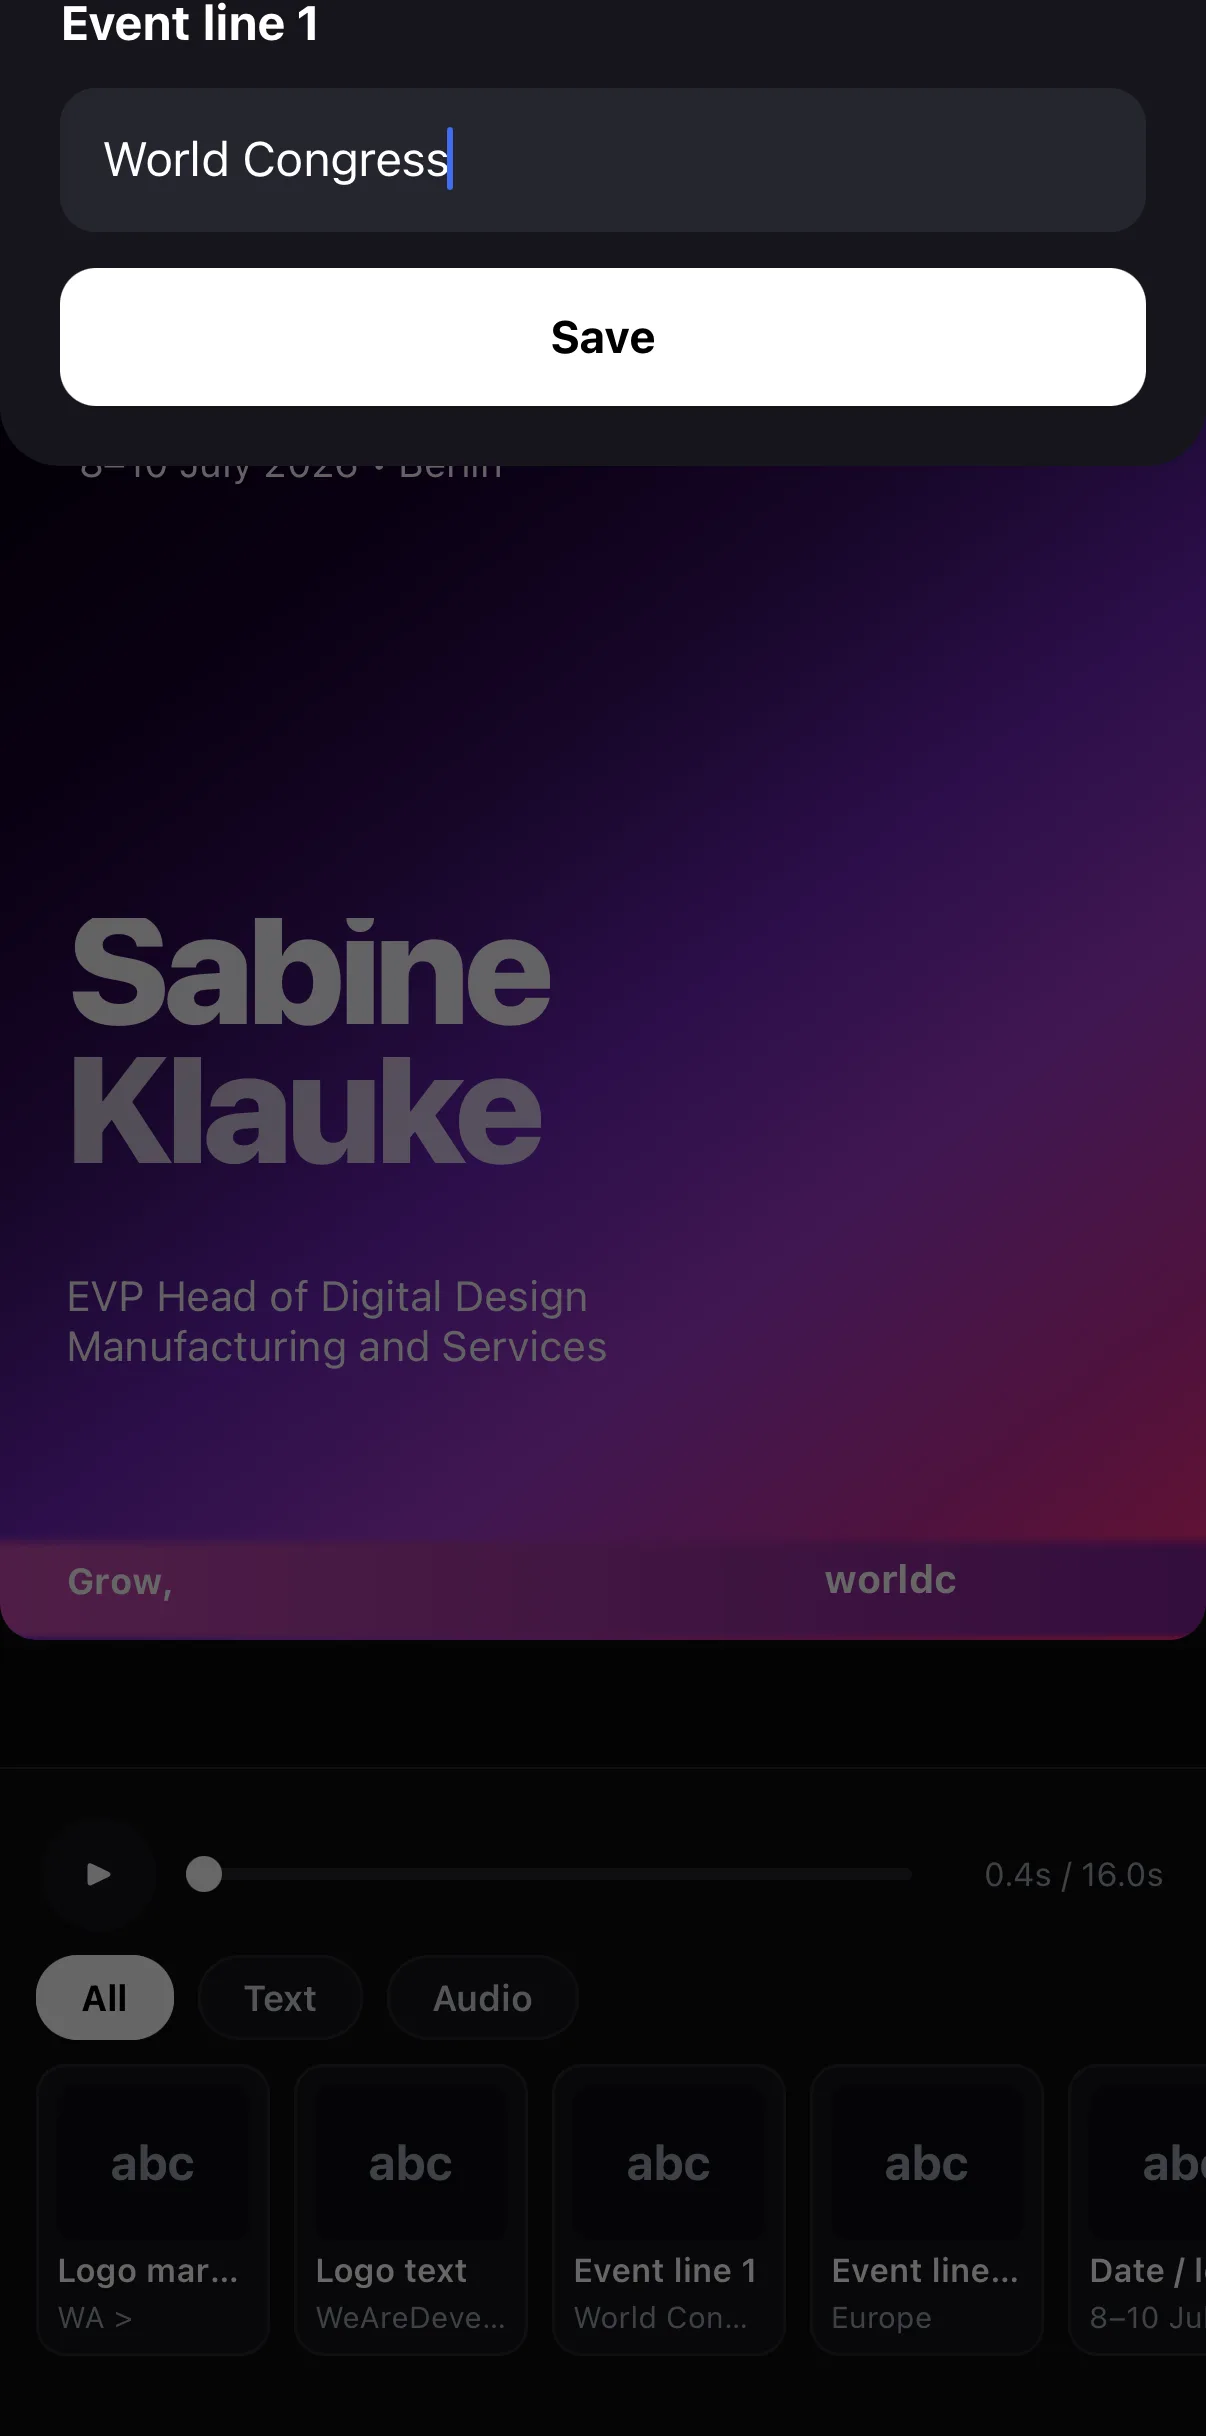 Type the new line
Save
Type the new line
Save
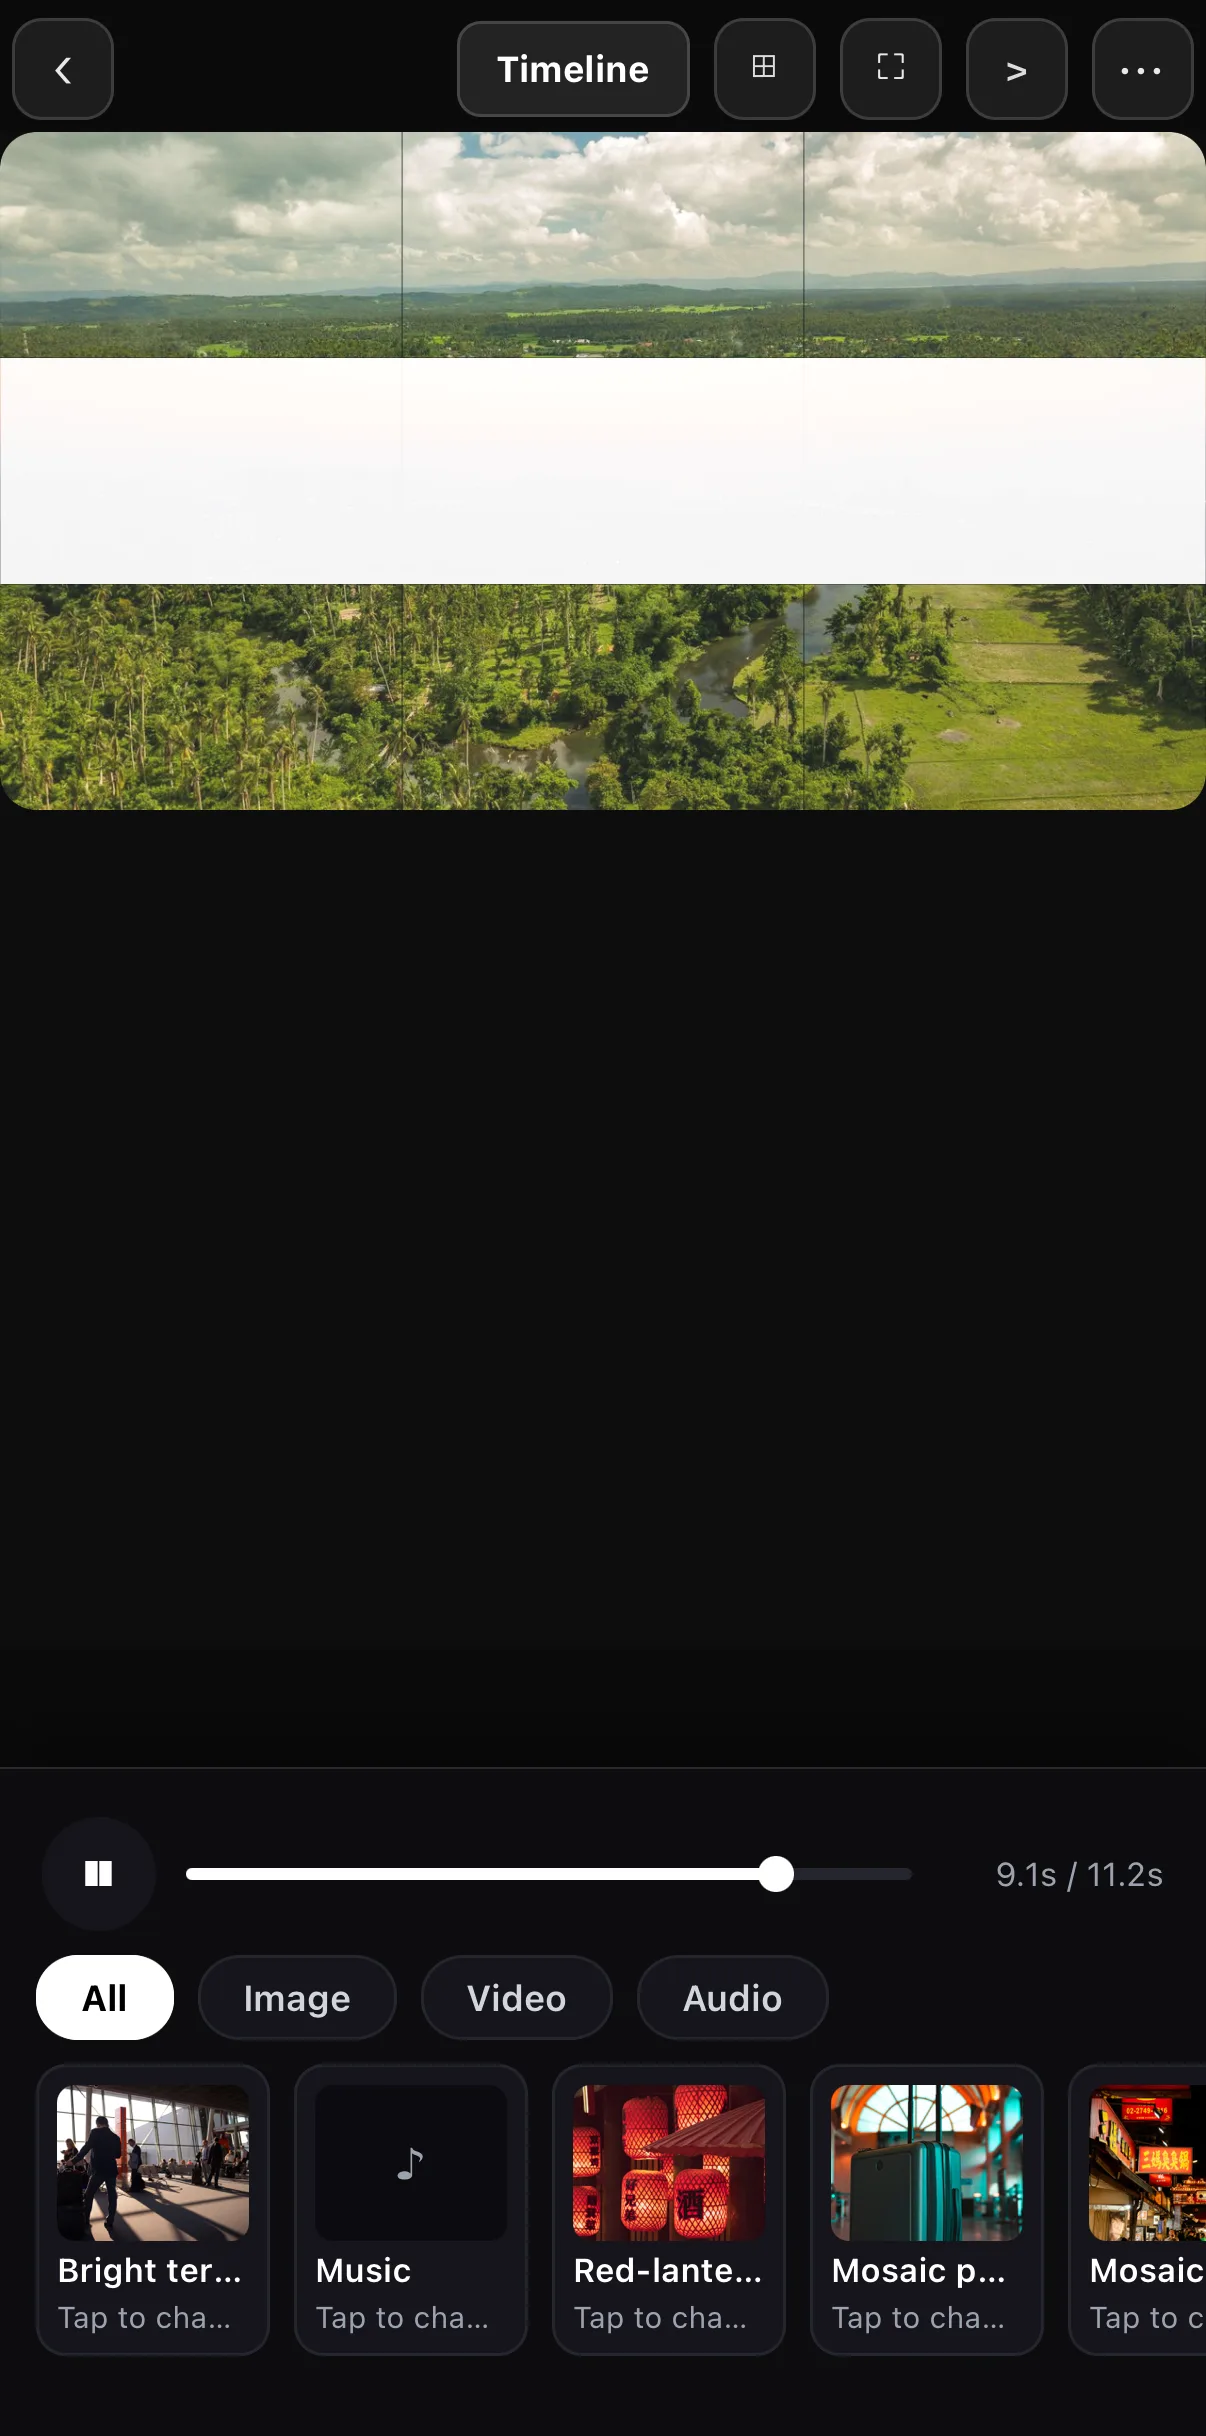 All · Image · Video · Audio
Media slots — Tap to change
All · Image · Video · Audio
Media slots — Tap to change
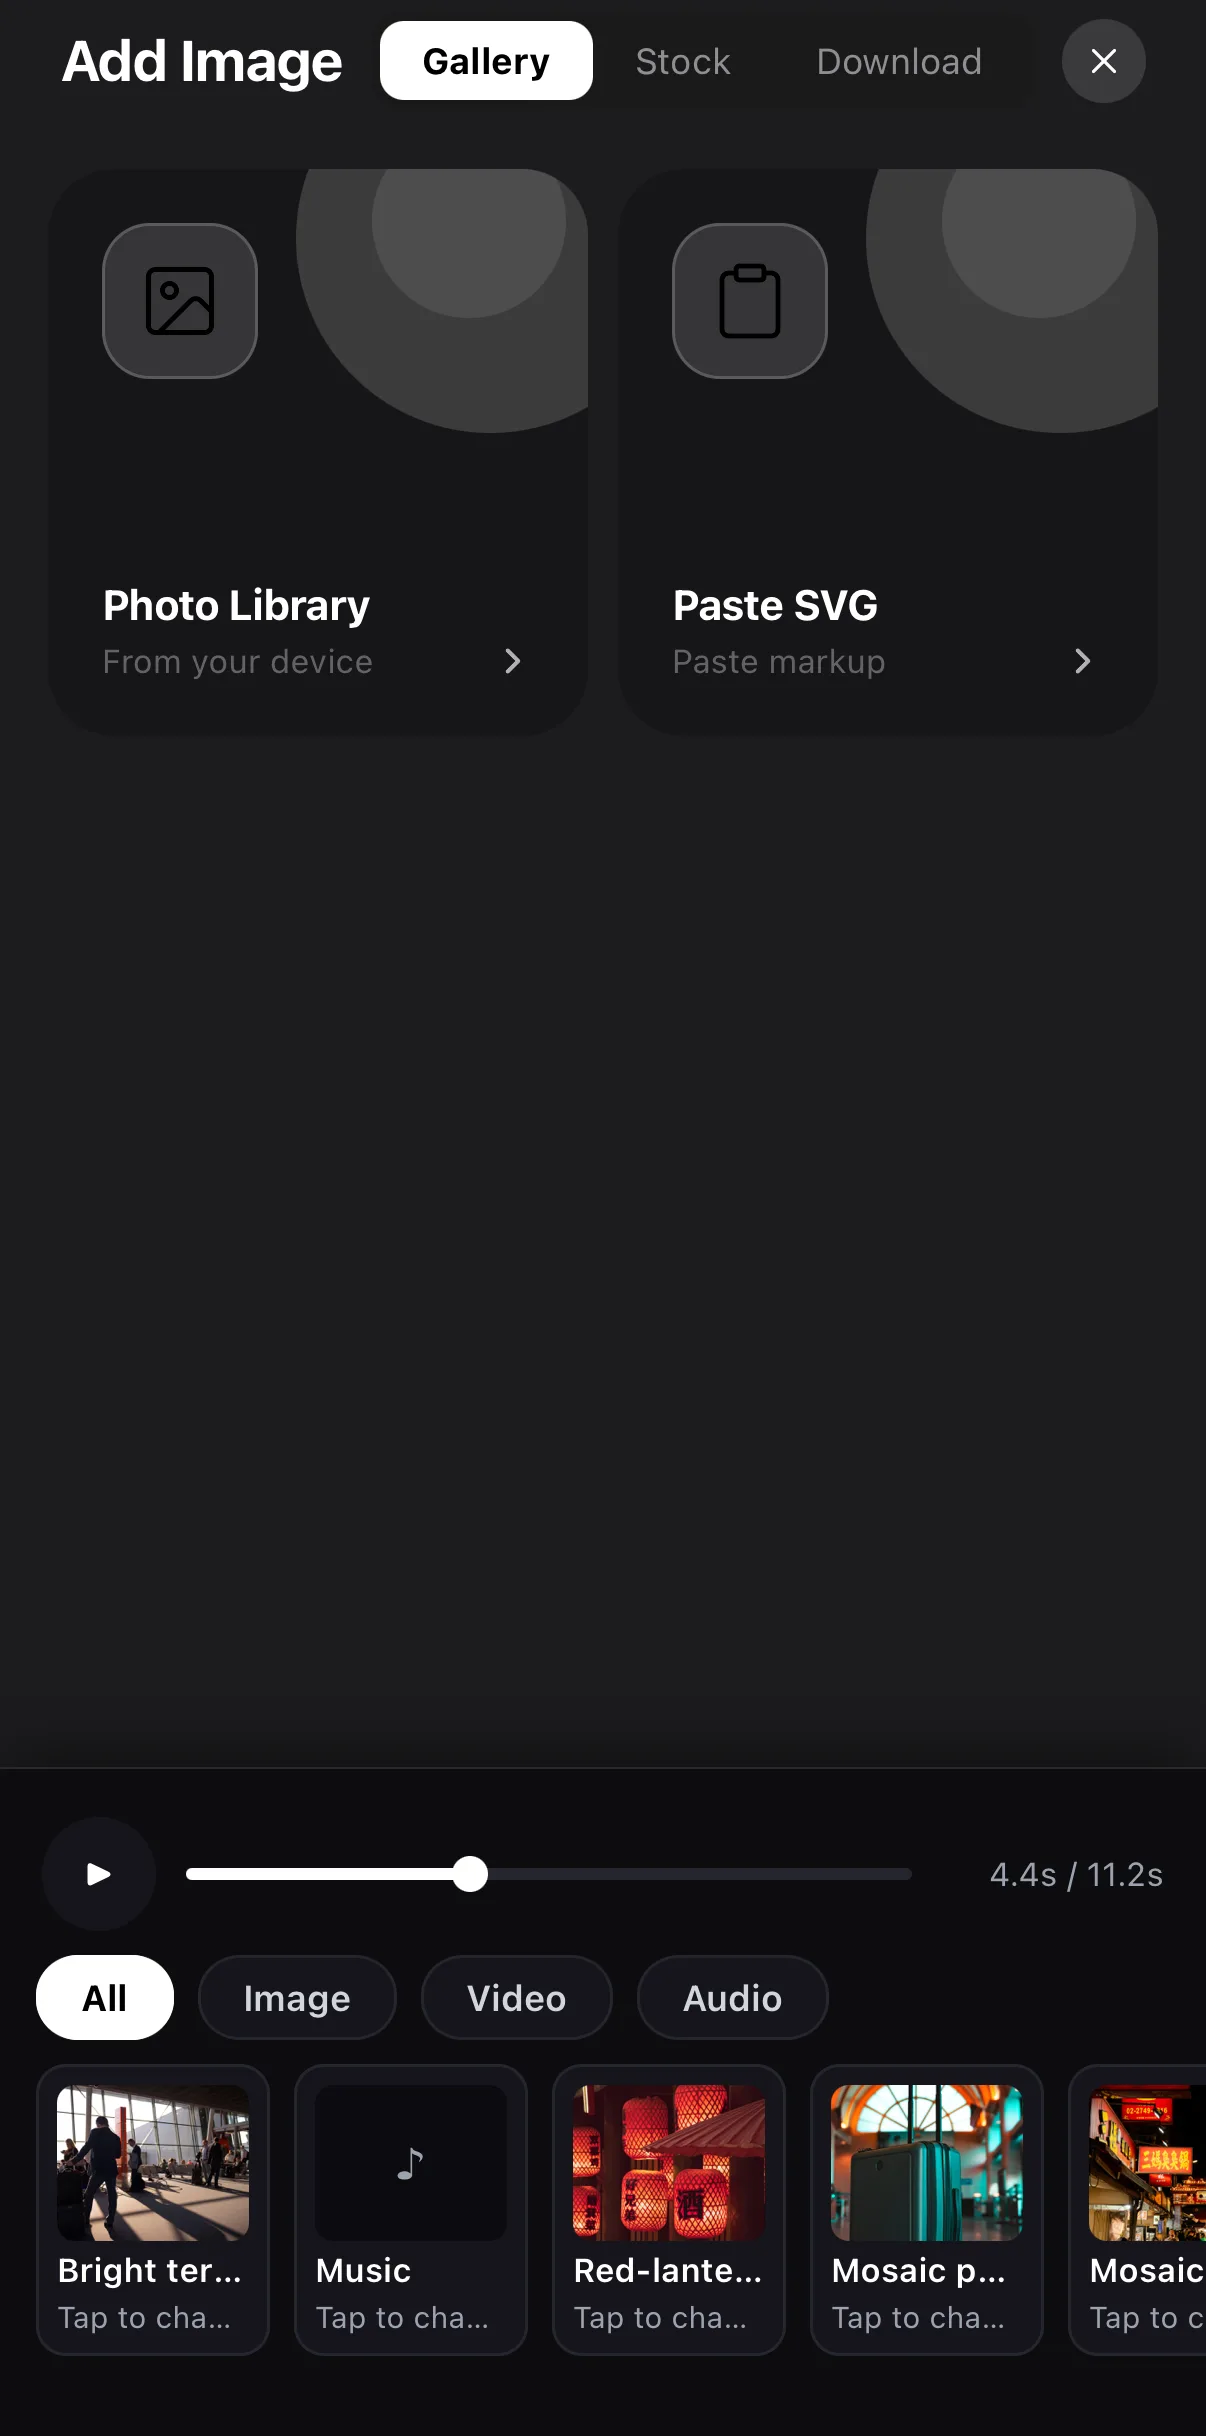 Gallery · Stock · Download
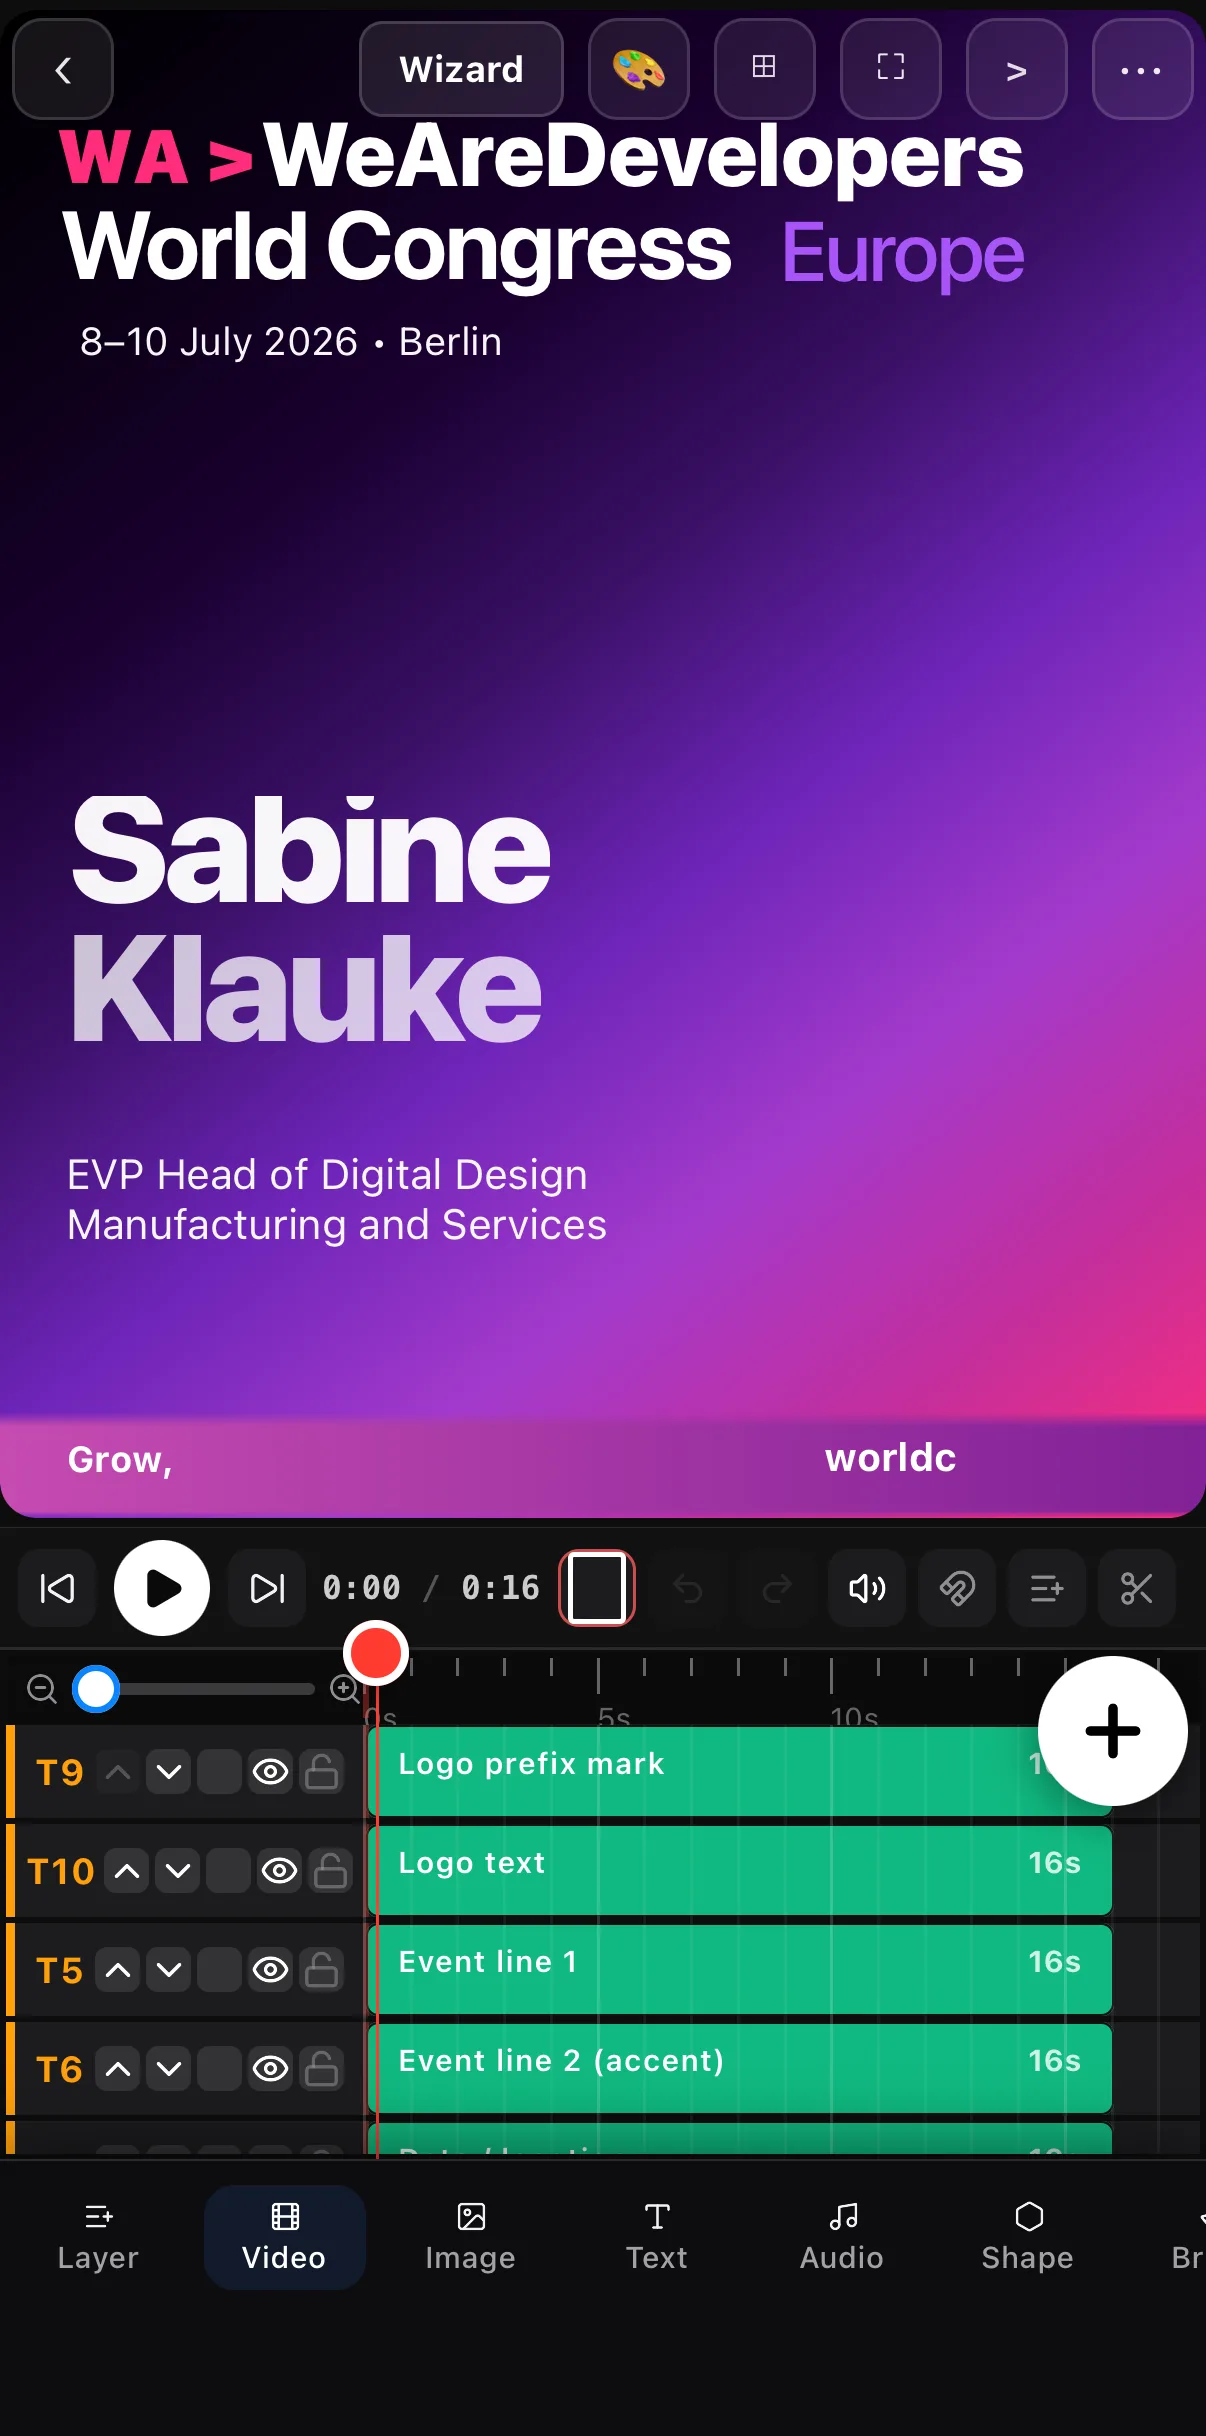 Back to Wizard
Every layer, on the timeline
Back to Wizard
Every layer, on the timeline
Match the clip to the slot. Templates are timed for specific shot lengths. When a slot wants 3 seconds, the Trim Clip sheet that opens for every video lets you keep exactly the 3 seconds that matter, so the rhythm still lands.
Step 3 — Export
When it looks right, export at the template’s aspect ratio (9:16 for Reels, 16:9 for Wide). Because preview equals export, what you see is what ships. Reel projects reopen in Wizard mode from your Projects tab, so a weekly series is a one-minute job.
When to use a template (and when not to)
Templates win for consistency and speed — series intros, product spotlights, recurring formats. Build from scratch when the idea is genuinely one-off and the structure is the creative point.
Where to go next
- Save your own: save & reuse a template.
- Brand every video the same: brand kit & logo and the .ectpl format.
- Bring one in from After Effects or CapCut: import templates.
- Ship it right: best export settings.
Pick a template, drop in your clips, change the words, export — the finished-first workflow that turns “I should post” into “posted.”
Frequently asked questions
How do I use a video template?
On the home screen open Templates (or Reels), pick one and watch its live preview, then tap Use this Template. It opens in the editor's Wizard mode — a strip of slot cards under the canvas. Tap a card to swap in your footage or change the words, then export. The timing, transitions and animations are already done for you.
What's the difference between a Template and a Reel?
Both give you a ready-made structure you fill with your own content, and both open in Wizard mode. Templates walk you through their text slots one at a time first (with a live preview) and offer colour themes; Reels are short social edits that jump straight to the wizard so you can swap media. Either way, the cuts, transitions, and timing are already built.
Can I change the colors of a template?
Yes — pick a Color Theme on the template's preview screen, tap the palette button in Wizard mode to recolour later, or apply your brand kit to stamp your logo and colours across the whole thing at once. You can still edit any individual layer in Timeline mode.
Related guides
Start finished, not blank
Bundled Templates and Reels — fill the slots, change the words, recolor to your brand, export. A good-looking video in minutes.
Get ExpoCut Browse all guides