How to Make an App Promo Video with Device Mockups
An app demo looks ten times more professional inside a crisp device frame. ExpoCut wraps your screen recording in a phone mockup and animates it in — promo-ready, no design tool required.
A raw screen recording says “demo.” The same recording inside a clean phone frame, tilted and animated in, says “product.” ExpoCut gives you device mockups and a ready-made reveal so your app looks launch-ready.
Step 1 — Frame your recording
Record your app at native resolution
Capture the flow you want to show — keep it short and focused on one feature.
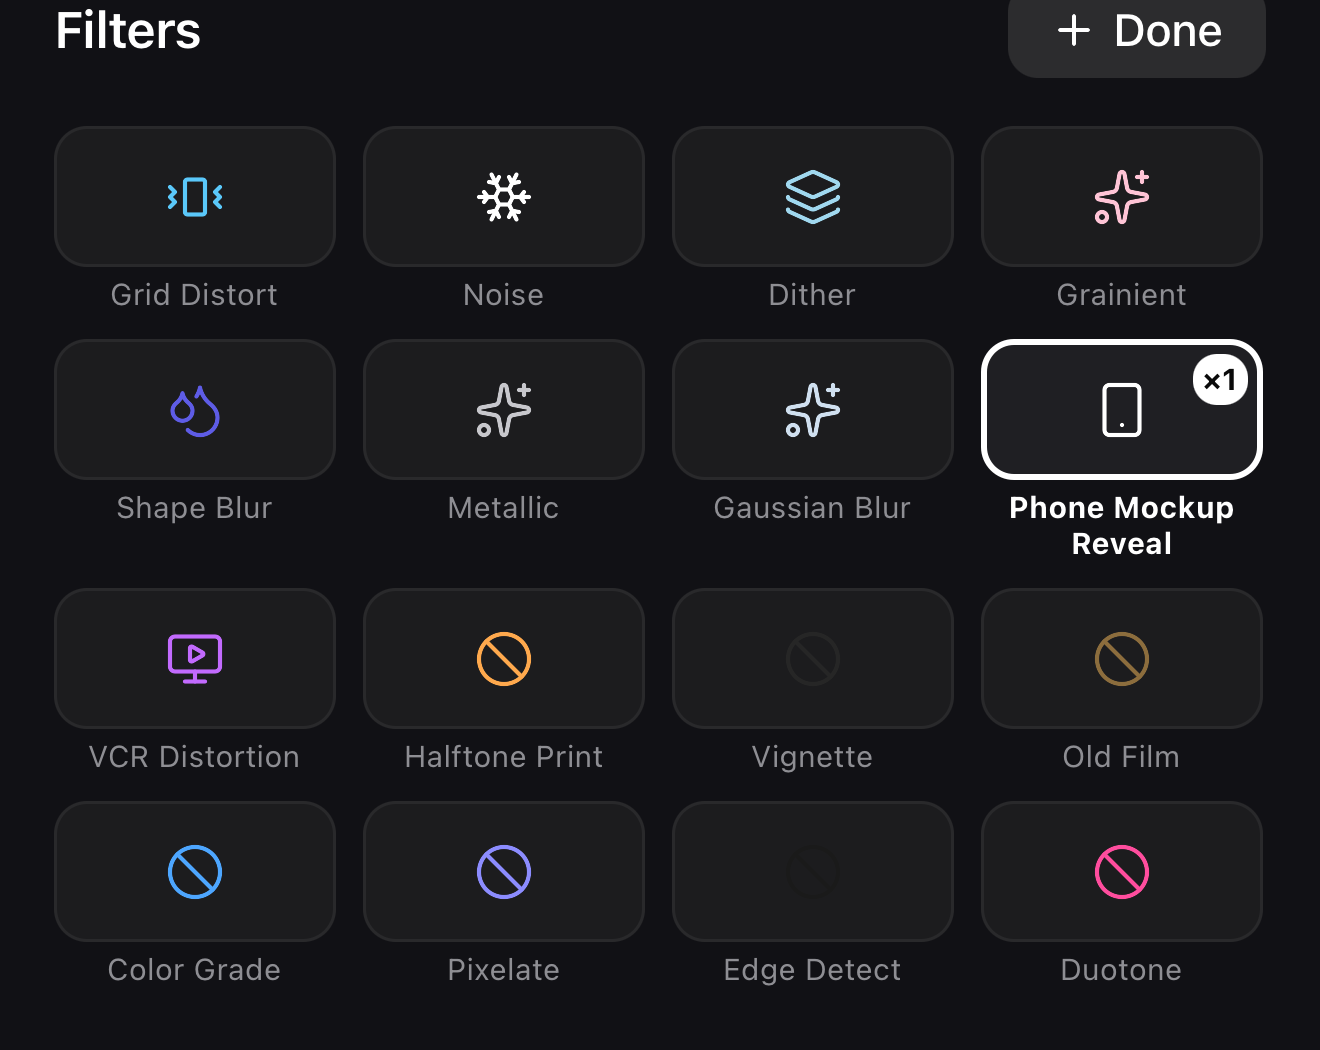
Add the Phone Mockup Reveal
Select the clip, open FX ▸ Filters ▸ Add, and tap Phone Mockup Reveal. It wraps your recording in a phone frame — sized correctly so the UI stays crisp — and paints its own branded backdrop, so the device pops without any extra layers.
Tune the backdrop
The effect’s own backdrop is a two-color gradient you control. Match it to your brand, or swap in a generative background behind the frame for extra motion.
 Phone Mockup Reveal — wraps your recording in a device frame
Heads-up on preview. The mockup is GPU-rendered, so it composites on export and on a real device — in some preview environments the canvas shows the raw clip until you render. Trust the panel: what you set is what ships.
Step 2 — Animate the reveal
A static mockup is fine; a reveal is better. The effect’s name says it: it brings the device in with an entrance so the phone feels like it’s presenting itself. The panel gives you the controls that sell it — Reveal Time for the entrance, Phone Size and Angle for the framing, and two backdrop colors to brand the scene. Or keyframe the layer sliding up and rotating to face the viewer.
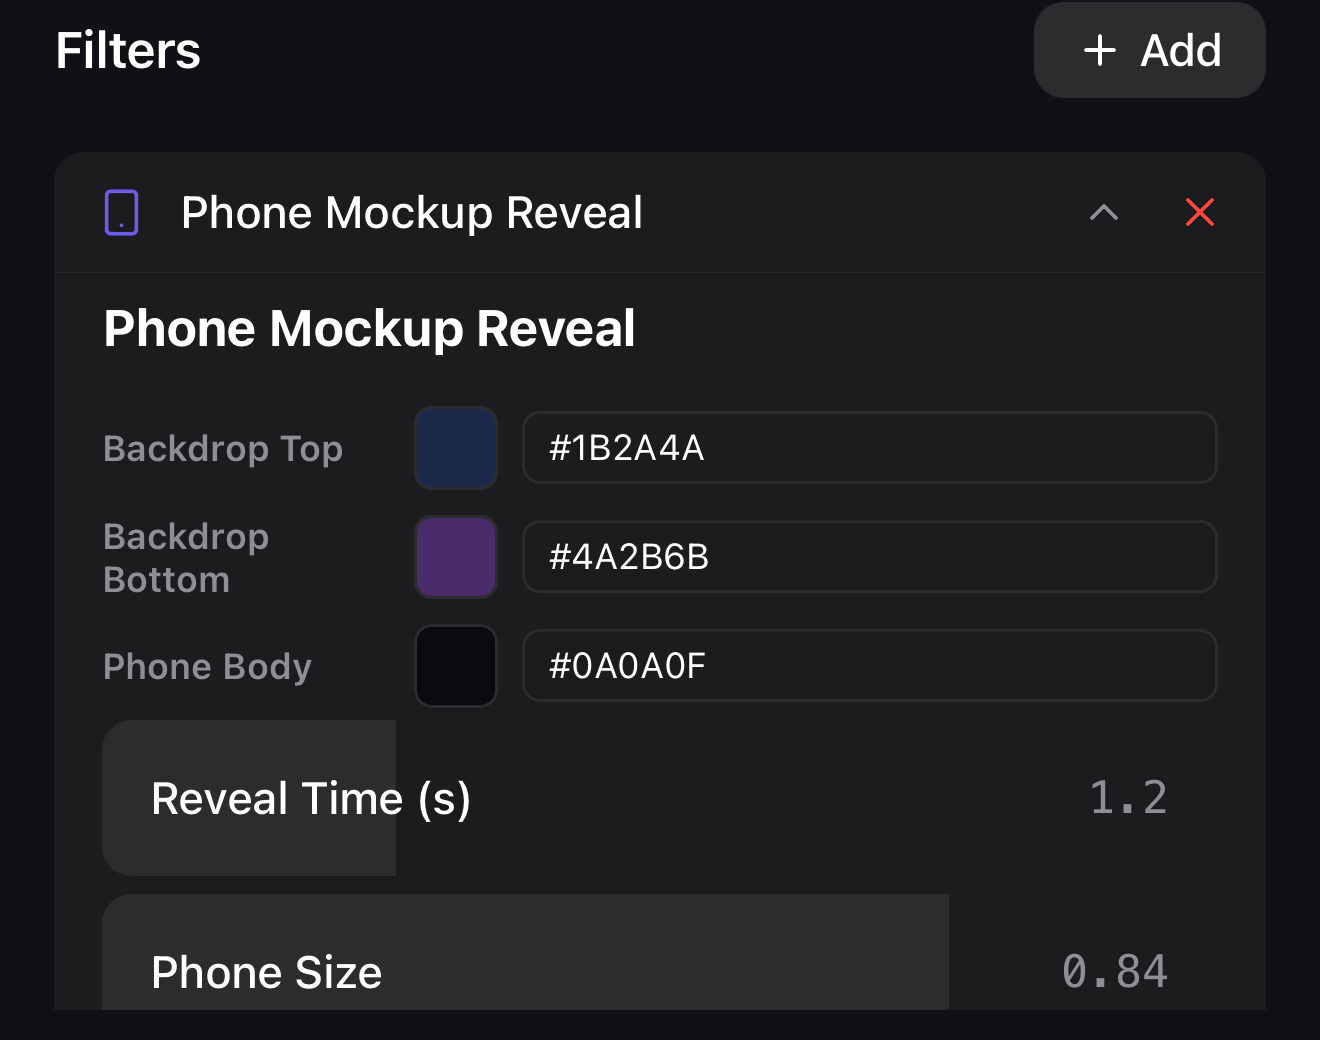 Brand the backdrop & phone body
Reveal Time — how long the device animates in
Brand the backdrop & phone body
Reveal Time — how long the device animates in
Step 3 — Brand and caption it
- Add your logo and app name with a brand kit so every promo matches.
- Put a one-line value prop on screen as a title — “Edit video on your phone,” not “Welcome.”
- Add captions if there’s narration.
Step 4 — Export for the store and social
Export 9:16 for social teasers and a matching size for your App Store preview. Keep it under ~30 seconds — promos win on focus.
Where to go next
- Build the backdrop: generative backgrounds & shaders.
- Animate the device: keyframes & motion paths.
- Title the value prop: text & titles.
Frame it, reveal it, brand it — and your app demo goes from “screen recording” to “store-ready promo” without ever leaving your phone.
Frequently asked questions
How do I put my screen recording in a phone frame?
Add a device mockup around your media — ExpoCut wraps the screen recording in a phone frame at the right size. Then add a background, a title, and an entrance animation and you've got an app-promo shot.
What's the fastest way to make an app-promo video?
Add your recording, then apply the Phone Mockup Reveal effect from FX ▸ Filters. In one step it brings the device frame, the entrance animation, and a branded backdrop — so you mostly swap in your screen recording and a logo.
What size should the screen recording be?
Record at your device's native resolution and let the mockup frame it. A clean, full-quality recording keeps the UI crisp inside the frame.
Make your app look launch-ready
Wrap your screen recording in a polished device frame, animate the reveal, and brand it — App Store-ready promos, made on a phone.
Get ExpoCut Browse all guides